
This post may contain affiliate links. For more information, see our privacy policy.

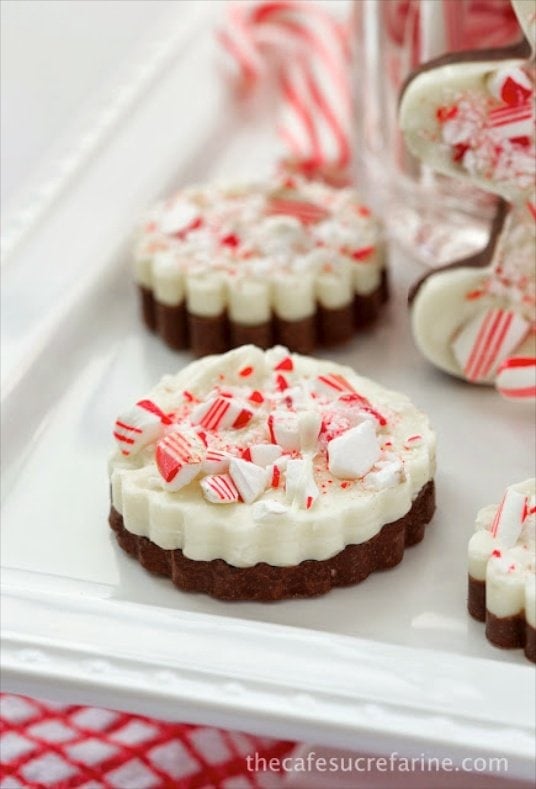
Last year, about this time, I saw these really fun, really gorgeous peppermint bark snowflakes on Pinterest. They were all over the place and I could hardly stand it. Check them out - I bet you'll flip over them too!
I looked into how they were made and discovered that I needed a silicon snowflake mold. Instead of running all over town looking for one of these unusual molds, I checked online. Done! I ordered it and couldn't wait for the mailman to make the delivery. But sadly, by the time it arrived, it was too late. It was almost Christmas and the busy holiday season had started accelerating. So I set it aside and decided I'd use it "next year".
Which is now "this year".
I got the snowflake mold out a few weeks ago and started thinking about making the beautiful candy snowflakes and how I would style them for the photos. But the more I thought about it, the more I realized, that YOU were going to be in the same dilemma that I was in last year, you'd check out my beautiful peppermint bark snowflakes, want to make them for your family and friends and then realize you needed to order a silicon snowflake mold. By the time the mold would arrive, it would be too late. Christmas would be upon us and the busy holiday season would be accelerating. I didn't want you to set it aside and decide to use it "next year". So, I started thinking and tinkering in the kitchen.
After a bit of testing, tweaking and (of course, taste-testing) I came up with a simple idea and guess what? You don't have to order anything! Just pull out your cookie cutters or, if you don't have a collection of cookie cutters, stop at any store that carries kitchen items and pick up some fun cookie cutters - that's all you'll need, other than a sheet pan, an oven, some good quality chocolate, peppermint extract and a few candy canes. A microwave will make the job a bit easier, but the stovetop will also work just fine.

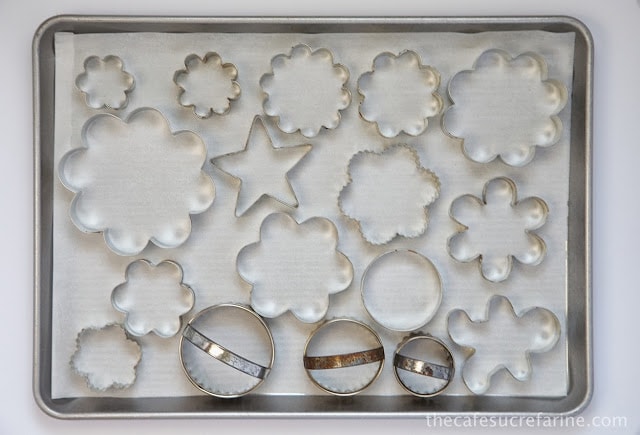
You can make any shapes you like. I happen to have a lot of circular, flower-shaped cutters; but use whatever you have, or find at the market.
Your family/friends/teachers/mailmen/hairdresser /neighbors ............. or whoever you decide to give these delightful candies to, will be thrilled.


- 12 ounces semi sweet chocolate chips*
- 4 ounces milk chocolate*
- 16 ounces white chocolate chips*
- 4 teaspoons vegetable oil divided
- 1 teaspoon peppermint extract divided
- 6 ounces candy canes or peppermint candies
-
Line a sheet pan with parchment paper. Make sure the pan is fairly flat and doesn't have a warped surface. Place cookie cutters on prepared pan, with cutting edges face down (see picture above).
-
Place the candy canes in a large zippered freezer plastic bag. Seal tightly. Use a rolling pin or rubber mallet to crush the candy canes into tiny pieces. Pour crushed candy into a coarse strainer and shake gently to remove some of the "dust". Set aside crushed candy and "dust".
-
Place semisweet chocolate, milk chocolate and 2 teaspoons vegetable oil in a microwave-safe, medium-size bowl. Cook on power level 5 (not full power!) for 1 minute. Remove from microwave and stir. Chips will have just begun to melt. Return to microwave for 30 second intervals (always on half power), stirring in between, until chocolate is completely melted and smooth. This will take about 2 to 3 minutes. Add ½ teaspoon mint extract and candy cane "dust" stir to combine.
-
Place a small scoop of melted chocolate (I used a small ice cream scooper) in the center of several of the cookie cutters. With a wooden skewer or other long, thin implement (a chop stick works perfect), begin stirring in the center of the chocolate, gently pushing it out towards the edges. You may need to add a bit more chocolate. Keep pushing the chocolate till the shape is filled with an even layer of chocolate. I made this layer about ¼ inch thick but feel free to make it thicker or thinner. Repeat procedure until all cutters have this first layer. If chocolate begins to thicken, just return to microwave for 30 seconds on power level 5.
-
Place sheet pan with cutters in refrigerator to harden for 20-30 minutes.
-
Towards the end of the chilling time, repeat melting process in microwave with white chocolate and remaining 2 teaspoons of oil. When chocolate is melted and smooth, add remaining ½ teaspoon of peppermint extract and stir to combine.
-
Repeat step #4 with white chocolate till all dark chocolate is covered and surface is fairly smooth. I made the white chocolate layer about ¼ inch thick.
-
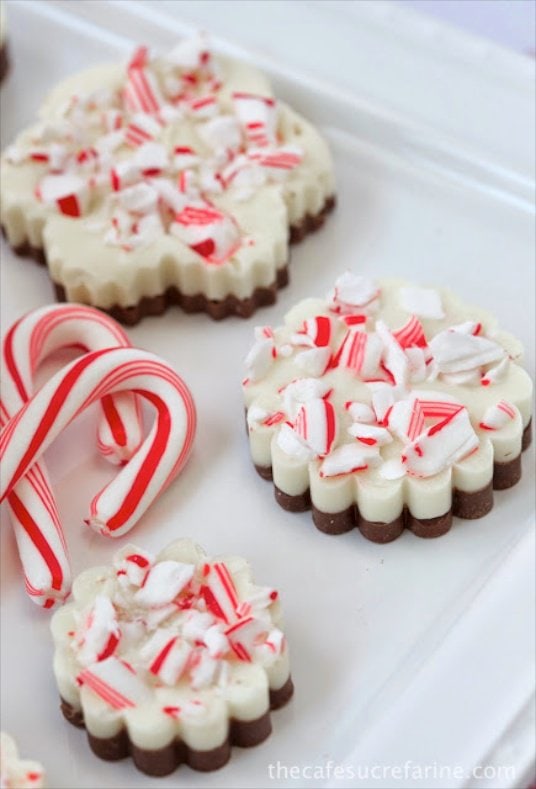
Sprinkle white chocolate surfaces with crushed candy canes. Place in refrigerator for at least 1 hour or until firm and well chilled. To remove cutouts from cutters, hold a cutter by the edges a few inches over a work surface. Push up gently from the bottom till seal is broken, then push down with your thumbs, from the top, till cutout is released onto your work surface. Repeat with other cutters. Store candy in a cool place. It doesn't have to be in the refrigerator.
lena says
this looks very christmas-y and so pretty with the peppermint bark:) i'm gonna chk out Pinterest now!
Tricia @ Saving room for dessert says
I shared this on Facebook and have gotten so many requests to make these - especially if I will share with my FB friends 🙂 They are beautiful Chris!
Lenia says
Oh my God!This is sheer beauty!A wonderful post full of amazing pics!
Kisses,dear!
Lisa {Authentic Suburban Gourmet } says
What a PERFECT cookie for this time of year! Love all of your photos and how festive these cookies are! Nicely done!
Julia | JuliasAlbum.com says
Love these cute little treats! Perfect for the Holidays! I am sure these will be favorite with kids because the shapes are just so adorable!
marissa | Rae Gun Ramblings says
oh my gosh those are gorgeous and sound so yummy! pinning
Pam says
They look fantastic! My kids would be thrilled if I made these.