
This post may contain affiliate links. For more information, see our privacy policy.
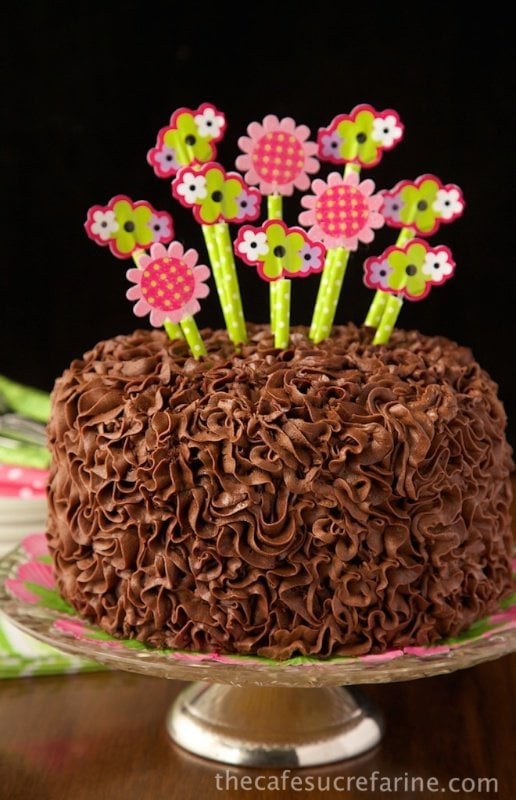
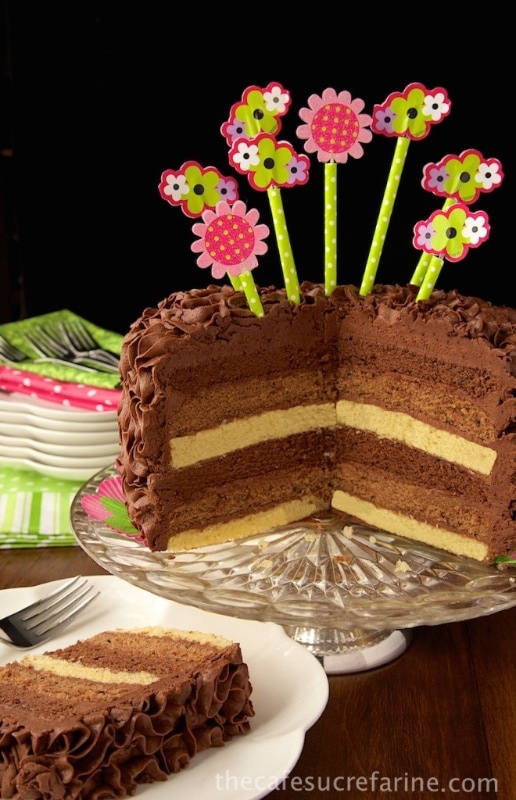
When a celebration cake is in order, and this 6-Layer Ombre Cake with Truffle-Fudge Icing definitely fits the bill!
I needed celebration cake and it had to be fun, festive and quite fabulous. We're not only celebrating The Cafe's move to it's new home (web site), but today is our three-year anniversary! Yes, it was three years ago that we began this crazy adventure called The Café Sucré Farine; an unusual name, French in origin, with a fun story behind it. This 6-Layer Ombre Cake with Truffle-Fudge Icing was the perfect way to celebrate!
I had a dream for many years of opening up a small cooking school. I've been crazy about all areas of food preparation for as long as I can remember and had been reading food blogs for several years. I thought it might be a good way to stick my toe into the culinary world.
My dear husband, Scott, with a background in photography, offered to capture the images ........... easy peasy, right? Little did we know that blogging would be an endeavor that would be unbelievably challenging, extremely exhausting and super fun, all at the same time.
In the beginning, I didn't know a url from a html from SEO, but I bought the book Blogging for Dummies and "so it began". We learned quickly that there was a whole new language to learn, lots of technology to harness and so much more. Though Scott was quite skilled in photography, taking pictures of food was a "horse of a different color".
Three years later, we're still learning the language, harnessing the technology, acquiring new photography, culinary and social networking skills as we go, and so much more. There have been tears (lots of them), prayers (even more) and laughs (many) as we've traversed through these past three years.
And the cooking school? It's funny, but I realized about a year and a half in, that my true joy and passion is being in the kitchen, tinkering, testing and creating and then sharing the results with you, hopefully making your meals more fun, interesting and delicious!
Oh and speaking of you, YOU have been one of my very favorite parts of blogging. I've enjoyed getting to know people from all around the world and love hearing from you in comments, emails; even meeting a number of you in person! Without you, it wouldn't be worth the time, energy and commitment. Get this: I'm still in my jammies at 1:30 in the afternoon, after a morning of cooking, creating, styling and photo shooting!
So you see, it's a day to celebrate; our new home/web site (Thanks Shay & Julie!), a three-year Café anniversary and YOU! This 6-Layer Ombre Cake with Truffle-Fudge Icing is perfect; though it would brighten up even the most dreary uncelebratory day. I used one of my favorite cake recipes and changed it up a bit. I wanted something unique and fun.
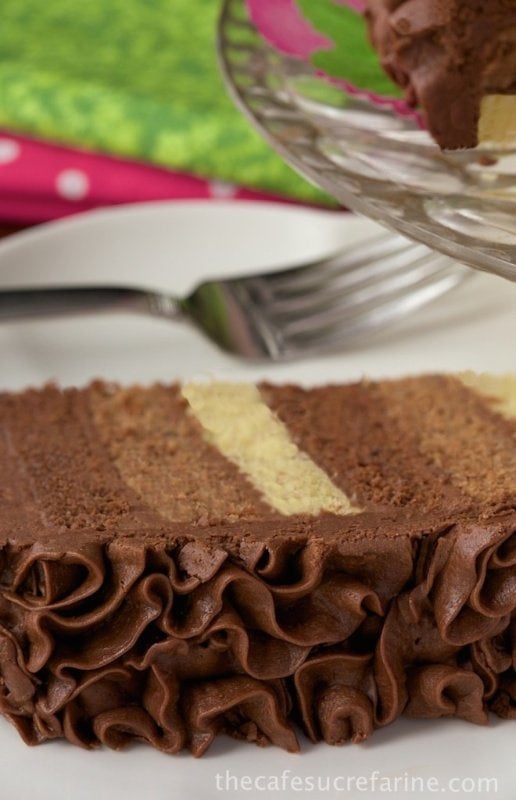
After a bit of experimenting, I came up with this ombré cake. If you're not familiar with ombré, it just means layers of color. I chose the simple, natural color of the yellow cake for one of my layers, then added a bit of cocoa for another color and then a deep chocolate hue was achieved by adding more cocoa.
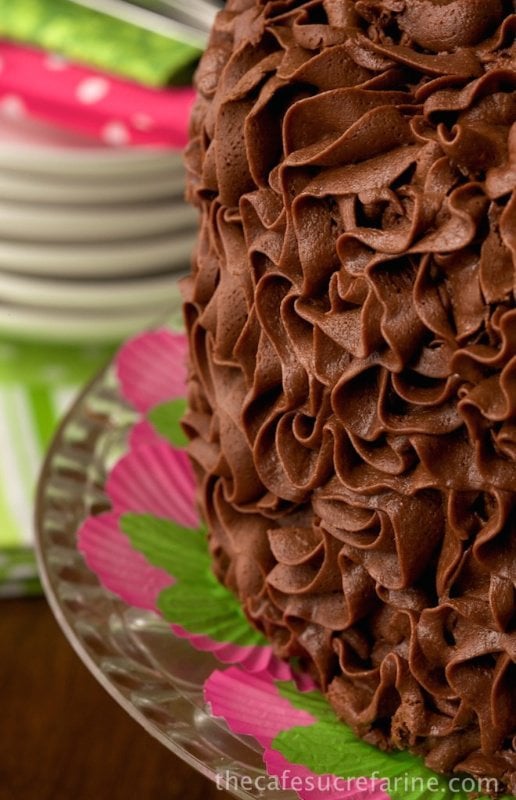
I used my favorite technique for icing. Some of my friends think I'm spoofing, (because I cook so much) but I'm horrible at frosting a cake. Give me a bowl of icing and a knife and I usually come up with a pitiful looking mess. This pretty ribbon-like technique is, to me, like magic; you just start swirling and twirling in a random fashion and next thing you know, you've got a whimsically lovely cake sitting in front of you.
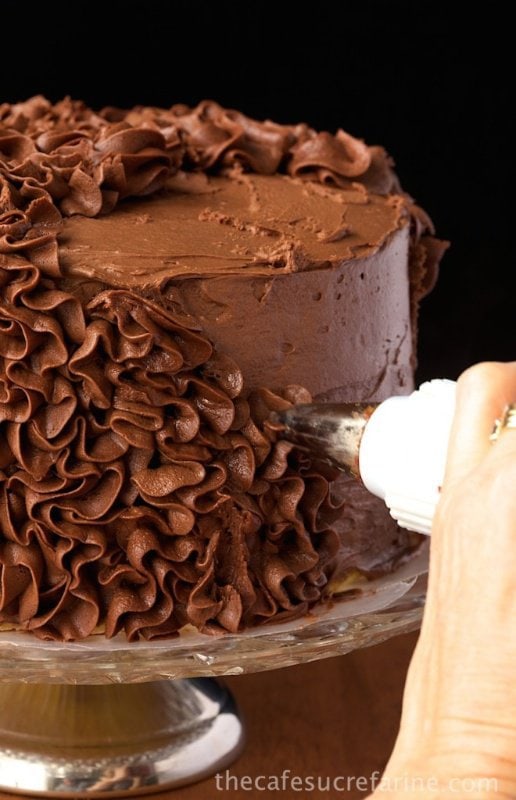

Try it! I promise I won't tell anyone your secret, that it's really quite an elementary piping technique. You do need a pastry bag and a large decorating tip, either a 1M or a 2D (both made by Wilton). To prevent a huge mess, I like to use a simple technique I learned from my friend Claire in this post. Check out how she makes it so easy to use a pastry bag. I love learning tricks like this one.
I need to run and get a shower before my husband disowns me, so I"ll sign off for now. I hope you like our new site. I know you'll love this fabulous 6-Layer Ombre Cake with Truffle-Fudge Icing! Yum!

- 3 cups all-purpose flour
- 3 teaspoons baking powder
- ½ teaspoon salt
- 1 ½ cups butter at room temperature
- 2 ½ cups sugar
- 6 large eggs at room temperature
- ¾ cup buttermilk (plus 3 tablespoons needed for cocoa layer)
- 2 teaspoons vanilla extract
- For the layers:
- 6 tablespoons cocoa powder
- 2 tablespoons buttermilk
- 2 tablespoons cocoa powder
- 1 tablespoon buttermilk
- Truffle Fudge Icing recipe below
-
Preheat oven to 350˚F. Spray 3-8-inch or 2-9-inch pans with baking spray* and line with parchment paper. Spray parchment paper lightly and spread to coat with a paper towel. Set aside.
-
Combine flour, baking powder and salt in a medium bowl and stir to combine. Set aside. Set out four medium-size bowls. You will use these later after batter is made.
-
Combine butter and sugar in the bowl of a heavy-duty stand mixer. Beat until light and fluffy, about 2 minutes.
-
Add eggs, one at a time, beating well after each addition.
-
Add flour mixture alternatively with the ¾ cup buttermilk, starting and ending with the flour. Stop the mixer and scrape the bowl several times in between. Add vanilla and mix well.
-
Divide batter as evenly as possible between 3 bowls, about 2 ½ cups in each bowl. Add 6 tablespoons of sifted cocoa powder and 2 tablespoons buttermilk to one bowl. Add 2 tablespoons of cocoa powder and 1 tablespoon buttermilk to second bowl. Third bowl will not have any extra ingredients added.
-
Place half of the plain batter in two of the prepared pans. Place half of one of the cocoa batters in third prepared pan. Cover the remaining batter lightly and set aside in a cool place. (The counter is fine if it's not super warm in your kitchen. If it's a really warm day, place the batter in the refrigerator.)
-
Bake first three cakes at 350 for 14-16 minutes or until surface springs back when lightly touched and/or a toothpick inserted in the center comes out clean or with just a few crumbs. Cool on cooling rack for 5 minutes, then turn cakes out onto rack to finish cooling. Wash and dry cake pans and repeat pan preparation and baking instructions for remaining three layers.
-
Transfer 2 cups of the icing to a medium size bowl. Add 2 tablespoons of milk and stir well to combine. This will be the crumb coat for the cake which will help your icing to adhere well. It also prevents any bare cake from peeking through the icing.
-
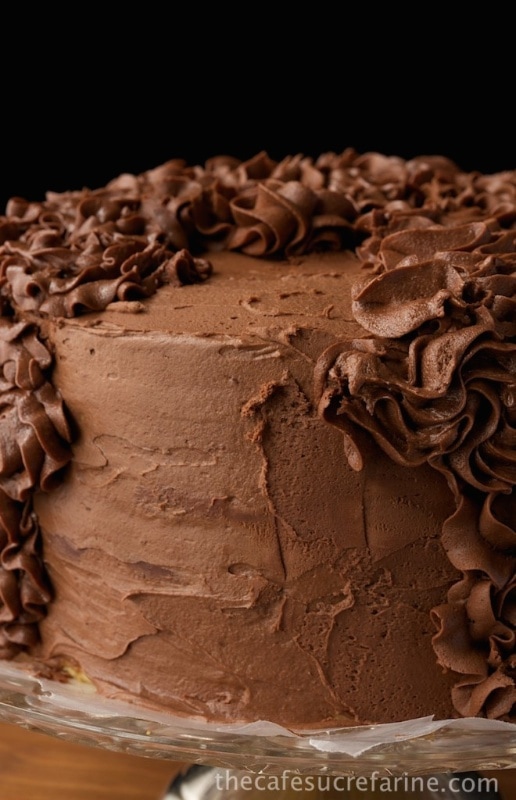
To assemble cake, place a small dab of icing in the center of a platter or cake stand. (This will help secure your cake. Set a yellow cake layer on the platter and top with ⅓ cup of the thinned icing. Spread to edges. Add a light cocoa-colored layer next and repeat with icing then the dark cocoa cake layer and another ⅓ cups of icing. Repeat sequence to result in 6-layer cake. Spread the remaining icing over the entire cake in a very thin layer. It's fine if there are crumbs in the icing. Set cake in the refrigerator for 15 minutes to set the crumb coat.
-
For the icing technique, place about ⅓ of the remaining icing in a pastry bag fitted with a 1M tip. (you could also use a 2D tip). (Don't try to put more than ⅓ of the icing in the bag at a time or it will get too warm from the heat of your hands and will not swirl nicely.) With tip perpendicular to the cake begin swirling the icing in a random pattern (see how-to pictures). I usually start at a bottom edge and work my way to the top, then over the top edge, twirly and swirling as I go. Then I begin again at the bottom right next to where I started the last time, and work my way up. Continue working around the cake till you come back to where you started. If you missed any spots you can go back and add a little swirl here and there. Allow icing to set for 20-30 minutes before slicing. This recipe makes a large cake, but it freezes well.

- 12 ounces semi sweet chocolate chips
- 4 ounces baking chocolate
- 12 ounces butter room temperature
- 4 ounces cream cheese softened
- 1 2- pound bag powdered sugar about 71/2 cups
- 10 tablespoons milk plus more for thinning
- 2 teaspoons vanilla
-
Combine chocolate chips and baking chocolate in a medium size microwave-safe bowl. Microwave on high for 1 minute. Stir and return to microwave for 30 second intervals, stirring in between, until chocolate is melted and smooth. This will take about 2-2 ½ minutes. Set aside to cool.
-
In the bowl of an electric mixer, combine butter and cream cheese. Beat for 1 minute until smooth. Add cooled chocolate mixture and beat until incorporated.
-
With mixer on low speed, add powdered sugar and ½ cup milk. Beat until smooth, adding more milk, as needed to achieve smooth, fluffy consistency. Beat on medium-high speed for 4 minutes. If spreading icing with a knife, you'll want a fairly loose consistency. Piping requires a somewhat stiffer consistency. You made need to add a bit more milk or powdered sugar to get it just right. If you're doing the swirly piping, try a small amount in your pastry bag to see if it is "right". It should flow easily out of the bag but create distinct swirly patterns when you pipe. You don't want it to be so loose that the pattern "wilts" or so stiff that you have to use a lot of pressure.
Leave a Reply