
This post may contain affiliate links. For more information, see our privacy policy.
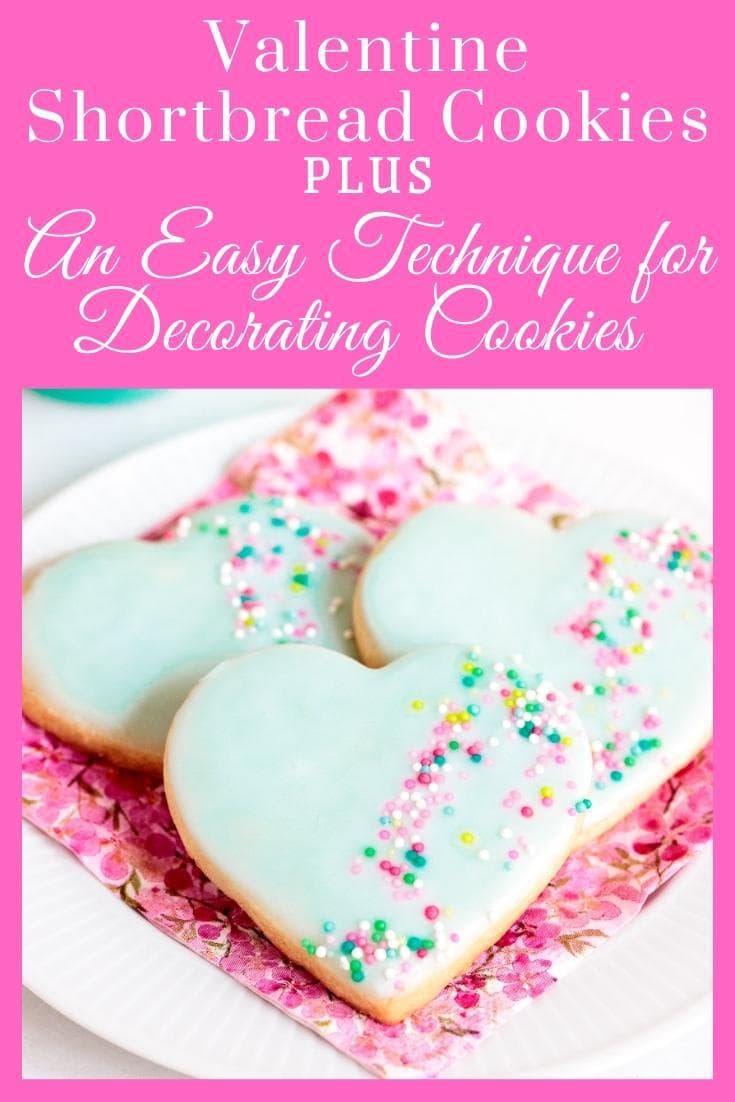
The beauty of these Shortbread Valentine Cookies is not skin deep! They not only look really pretty, but they are also sweet, buttery and melt-in-your-mouth delicious! Check out the easy tutorial below!
Have you ever had a beautiful cookie from a fine bake shop that tastes like cardboard? I have and it's a major disappointment, especially when each cookie costs a ridiculous price. Not with these Shortbread Valentine Cookies! They're pretty to look at and each little (or big) bite is super delicious. On top of all that, the Dip, Drip and Flip icing technique is an easy and fun activity for adults and kids alike.

What is the Dip, Drip and Flip technique?
If you've been hanging around The Café for a while, you're probably already familiar with this Dip, Drip and Flip decorating technique. I've used it over and over for different holiday cookies, each time with a little different twist.
You might remember these Red, White and Blue Glazed Shortbread Cookies, these Easy Decorated Christmas Shortbread Cookies, or perhaps these Snowy Night in the Mountains Shortbread Cookies. I've also done them in honor of Spring, Thanksgiving and several other Valentine versions.
I've never been a great cookie decorator, but I feel like I can really fool people using this simple technique. Lots of Café readers feel the same way as I've gotten tons of comments and emails from fellow Dip, Drip and Flip lovers.

How does the Dip, Drip and Flip decorating technique work?
How does it work? Since "A picture is worth a thousand words.", I thought I'd include some pictures in addition to explaining the easy cookie decorating technique. Ready? Here we go!
The first step is to mix up a two-ingredient icing. Simply combine powdered sugar and half and half or cream. You can add a flavor extract like vanilla, almond, lemon, peppermint, maple, or any flavor you can dream up. Keep in mind that the cookies are also delicious without any additions. For these Shortbread Valentine Cookies, I added just a touch of turquoise gel food color. Again. you can use any color you prefer. Making it personal is part of the fun of this technique!
Secondly, set up a little work area. I've found that having a wet and dry cloth (for wiping your fingers in between cookies), a small amount of extra cream, some toothpicks, a spoon, a small plate, and your baked cookies nearby make the workflow go smoothly. For these Shortbread Valentine Cookies, I also include a little bowl of sprinkles.

The technique itself is simple and the name, Dip, Drip and Flip explains it perfectly! Take a cookie, dip it in the icing, let the excess drip back in the bowl, then flip it over and you're ready to add a little splash of pretty sprinkles. By the way. if you like a little thicker layer of frosting on your cookies, do the dip part twice (it also deepens the color that you're using, especially when dealing with pastels). Check it out:

A word about the Dip, Drip and Flip icing itself. You want a thick but pourable icing. You can add a little extra powdered sugar or half and half to achieve this consistency.

Want to see the whole thing in action? Here's a short little video demonstrating this easy technique:
How to roll cookies with an even thickness?
I'm letting you in on a lot of my secrets today. Rolling evenly consistent cookies has never been my forte. UNTIL I discovered this wonderful adjustable rolling pin. It takes all the guesswork and expertise out of the equation. You simply add the disc that's the correct size for the thickness of your cookies and that's it. Just roll away then cutout perfect cookies!

The rolling pin comes with four removable discs (1/16, ⅙, ¼, and ⅜-inch) so you can roll just about any thickness you desire.

A gift everyone loves!
Are you ready to get all Valentine-y? You probably have everything you need to make these Dip, Drip and Flip Shortbread Valentine Cookies. And they make the BEST gifts for friends, family, neighbors, co-workers, etc. To make your gifts especially festive and pretty, we're sharing a free printable PDF for the labels pictured below.

Just leave us a little note in the comment section below this post. We'll email you the labels and the info you need to print them up yourself. We'll also share links for some fun packaging ideas.

You could even make a little party out of it. Bake these Shortbread Valentine Cookies ahead then provide plain white icing, an assortment of food coloring and some pretty sprinkles. Let everyone make their own little artworks! Just a little heads-up - once they taste the tender, buttery cookies, you probably won't have many left for yourself!

Café Tips for making these Shortbread Valentine Cookies
- Bake the cookies until just slightly golden around the edges.
- Rub your fingers around the edge of the un-iced cookie to remove any crumbs or uneven places before dipping, dripping and flipping.
- Wipe any icing off of your fingers with a wet cloth then dry with a dry cloth before adding sprinkles.
- Rinse out your wet cloth whenever it gets too sticky.
- Keep a small amount of half and half nearby. If the icing seems to thicken, add just a few more drops and stir well.
- After flipping the cookie over, be sure to wave the cookie back and forth with the icing facing up for a few seconds to evening distribute the icing.
- You won't use all of the icing, but you need enough to be able to dip the cookies. Discard the remaining icing or use to ice some other cookies or cake.
- Here is a little troubleshooting guide for making these Shortbread Valentine Cookies:
- If the dough seems too sticky when you're rolling it out, add some extra flour to your work surface and knead the dough a few times to incorporate a bit more flour. Each brand of butter has a little different water content so sometimes you might need that little extra flour.
- If the cookie shows through the icing and you'd like it to be more opaque add a little extra powdered sugar to the icing and stir well. You can also dip the cookie, let it drip for a few seconds then dip it again for a little thicker coating. I call this double-dipping.
- The top of the icing may form a little skin after awhile. You can avoid this by simply stirring the icing in between every couple of cookies.
- If you dip your cookie in the icing and it comes out with just frosting on the edges, your icing is probably too thick. Simply add a few drops of half and half and stir well.
- If the icing is dripping over the edges after you flip the cookie, either your icing is too thin or you’re flipping too soon. Add a little powdered sugar to the icing in your bowl then stir well. Give the icing a few more seconds to drip before flipping.
- If you need to take a break during the decorating process, just cover icing with plastic wrap. When ready to start again, add a few drops of half and half and stir well.
- If any crumbs end up in the icing, use a toothpick to pull them out before icing the next cookie.
If you enjoyed this recipe, please come back and leave a star rating and review! It’s so helpful to other readers to hear other’s results and ideas for variations.
The beauty of these Shortbread Valentine Cookies is not simply skin deep! They look really pretty AND are so sweet, buttery and melt-in-your-mouth delicious! Check out the easy tutorial below!

- 8 ounces very soft salted butter (two sticks)
- ½ cup powdered sugar
- 1 teaspoon vanilla extract
- 1 ¾ cups all-purpose flour
- ¼ cup cornstarch
- 2 cups powdered sugar
- 4-5 tablespoons half and half
- ¼-½ teaspoon vanilla or other flavored extract
- gel or liquid food color
- multi-colored nonpareils (little round sprinkles)
-
Line 2 sheet pans with parchment paper. Set aside.
-
Place soft butter in a medium-size mixing bowl. Stir with a wooden spoon or sturdy spatula until nice and smooth. Add powdered sugar and vanilla. Mix together by hand for about 30 seconds until well blended.
-
Add the flour and cornstarch. Stir until dry ingredients are mostly incorporated. The dough will be a little shaggy.
-
Turn the dough out onto a floured work surface and gather into a ball. Knead 5-6 times until fairly smooth and all the small pieces are worked in. If the dough seems sticky, knead it again with a little more flour. Form into a ball again and flatten with your hand to form a flat disk.
-
Turn the disk to coat both sides with flour. Roll out the dough to an approximate ¼-inch thickness (see Café Tips above in the post). Keep work surface, dough and rolling pin lightly dusted with flour.
-
With a heart-shaped cookie cutter, cut out cookies and transfer to them to the prepared pans with a thin, metal spatula. Re-roll scraps as many times as needed to use up the dough.
-
Place cutouts in the refrigerator, uncovered, for at least one hour or up to 24 hours.
-
When ready to bake, preheat oven to 350˚F. Bake for 10-14 minutes, or until just beginning to turn golden at the edges. Repeat with the second pan of cutouts. Cool on a wire rack before icing.
-
Combine powdered sugar, 4 tablespoons half and half and flavored extract in a medium-size bowl. Mix until smooth. The glaze should be fairly thick, but pourable. Add a little more half and half if too thick. Add more powdered sugar if it’s too thin. (See picture above in the post.) Taste the glaze and add more extract, if a more intense flavor is desired.
-
Transfer the glaze to a small shallow bowl (a little larger than your cookies). Add a drop of food color and stir well to combine. Add more food color if needed to achieve the desired color.
-
Hold onto the edges of a cookie and dip the top surface into the glaze, being sure all of the surface touches the glaze. Pull cookie straight up out of the glaze and allow excess glaze to drip into the bowl for about 15-20 seconds. (You can gently shake the cookie back and forth and up and down to get it to drip a little faster.)
-
Then quickly flip the cookie to the right side up and give it a gentle jiggle to allow the glaze to flow evenly over the surface. Sprinkle cookies on one side with colored nonpareils.
-
Repeat with remaining cookies. Place cookies on a cooling rack and allow the glaze to dry for 20-30 minutes.
See Café Tips above in post for more detailed instructions and tips for rolling even cookies.
Recipe Notes: Makes 20-25 cookies, depending on the size of your cookie cutters.
I use salted butter. If you use unsalted, add ½ teaspoon of salt to the dough.
The Café Sucre Farine is a participant in the Amazon Affiliate Program. The Amazon Affiliate Program is designed to provide a means for sites to earn advertising fees by advertising and linking to products on Amazon. The price you pay as a consumer does not change, but if you make a purchase through one of our links, we receive a small commission – and we continue delivering delicious recipes to you
Sara says
These cookies were amazing and so simple. Will add these in the rotation of desserts. They look so impressive. Note: I'm not a fan of food coloring so I boiled some cranberries and blueberries and added the juice to the icing to achieve great colors. Thank you for the recipe.
Lindsay @ The Café Sucre Farine says
Thanks, Sara!
Martha Boswell says
Love these cookies. Please send labels!
Lindsay @ The Café Sucre Farine says
Thanks, Martha! Sending them your way.
Cindy says
These cookies look so delicious! Please send the adorable Valentine labels. Thank you so much!
Lindsay @ The Café Sucre Farine says
Sending them your way, Cindy!
jo lynn hendricks says
These are so good and easy ! They will be my go to recipe from now on!
How can I receive your labels?
Lindsay @ The Café Sucre Farine says
Awesome, Jo Lynn! Just emailed the labels. Enjoy!
B J Grisier says
These are divine! Thank you. I would love to have you send the printable labels my way. I'd really appreciate it and all of the helpful hints you have offered!!
Lindsay @ The Café Sucre Farine says
Thank you, BJ! Just sent the labels.
Sandy says
Made these shortbread cookies and they are perfect. Thank you for all the great recipes and ideas. Please send me the label's and the pink box!
Sandra Lee
Lindsay @ The Café Sucre Farine says
So glad to hear that, Sandy! We will send the labels your way.
Anne-Louise Hill says
Would appreciate if you could send me those cute labels for those most delicious cookies. Can hardly wait to make a batch for my family MD this week!
Thanks again!
Anne-Louise
Anne-Louise Hill says
Love those cute labels!
Would appreciate if you could send me the labels for those most delicious cookies. Can hardly wait to make a batch for my family MD this week!
Thanks again!
Anne-Louise
Lindsay @ The Café Sucre Farine says
Thanks, Anne-Louise! Sending them your way!
Linda says
Could you please send me the label for these cookies? They look delicious 😋
Lindsay @ The Café Sucre Farine says
Sure, Linda!
Sandra says
Can’t wait to make these with my granddaughters next week. I would love the pdf for labels. Thank you so much. Sandra
Lindsay @ The Café Sucre Farine says
Sending them your way, Sandra!
Charlotte Bailey says
I will be making these for our museum Valentine Cookie sale next week, and would so appreciate having the labels. Thank you!
Lindsay @ The Café Sucre Farine says
Sending them your way, Charlotte!
Alicia says
Can't wait to try the recipes! Just ordered the rolling pin, 1 for me and 2 for my granddaughter! May I also receive the label PDF? Thank you.
Lindsay @ The Café Sucre Farine says
That's great, Alice! Sending them your way!
Susan Hojdik says
Can't wait to make some:) Please may I have a PDF of your labels for these. Thank You
Lindsay @ The Café Sucre Farine says
Sure, Susan!
Stacey Clay says
I want to try these! They look so cute . May I please have the PDF?
Thank you!
Lindsay @ The Café Sucre Farine says
Sure, Stacey!
Julie Miller says
Love these. Thank you. May I have the labels?
Lindsay @ The Café Sucre Farine says
Sure, Julie!
Rosemarie says
Great recipe, all turned out well and iced red and white mix for Christmas. X
Lindsay @ The Café Sucre Farine says
Awesome! Thanks for your review, Rosemarie!
Donna says
I made these cookies today and they are delicious. I used fall cookie cutters, pale orange icing and they are so cute.
Lindsay @ The Café Sucre Farine says
Wonderful! Thanks for letting us know, Donna!