
This post may contain affiliate links. For more information, see our privacy policy.
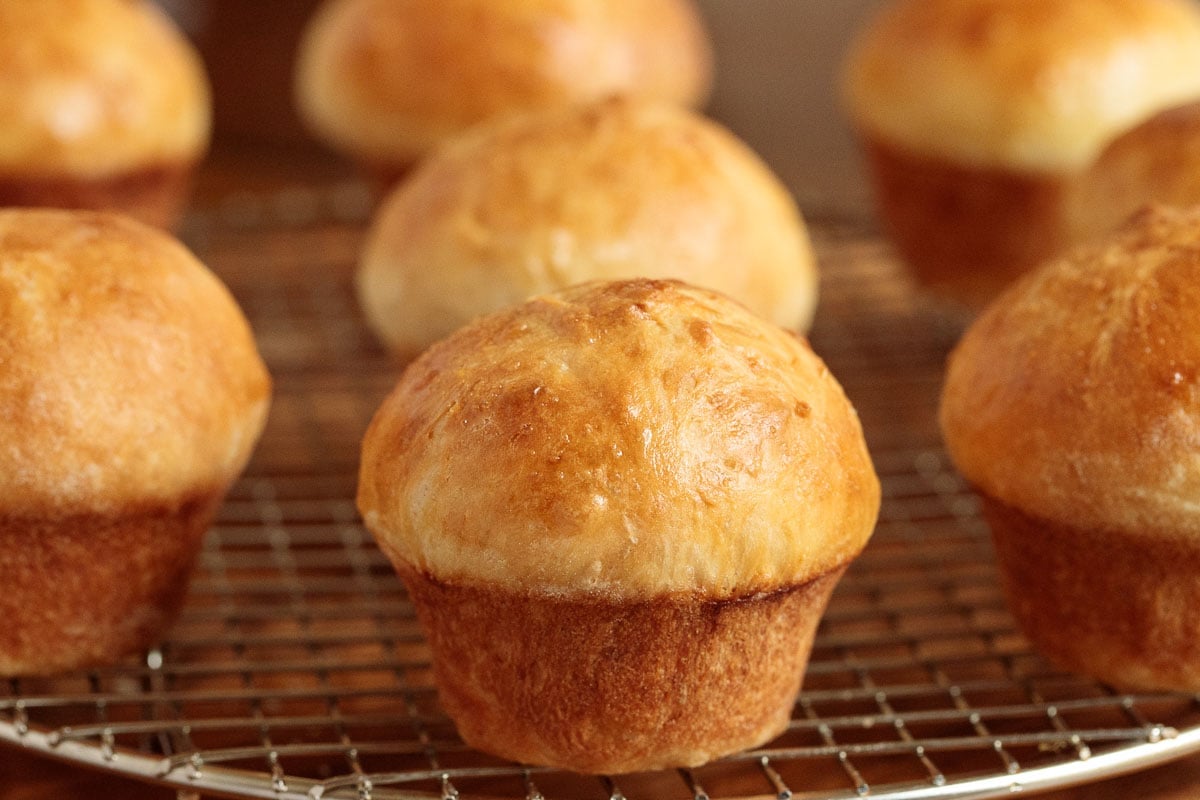
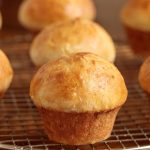
These Ridiculously Easy Brioche Dinner Rolls practically make themselves! There's 15-20 minutes of light labor on your part (no-mixer, no-kneading!) then the yeast and oven work the crazy delicious magic!
I started to call these rolls No-Knead, No-Mixer Brioche Dinner Rolls but, after making them again for the photoshoot, I knew they needed to be called Ridiculously Easy Brioche Dinner Rolls, as they most definitely qualify for this wonderful Café category.
Ridiculously Easy?
Yes, we have a whole category of recipes bearing the descriptive name, Ridiculously Easy. You can read more about our Ridiculously Easy recipes here, but in a nutshell, this exclusive Café collection includes recipes that require little hands-on time, yet make you look like a kitchen rock star! (I used to fool myself, thinking I was creating these recipes for you... but, in reality, I love them too!)
I've made lots of bread and dinner rolls in my life, but these Ridiculously Easy Brioche Dinner Rolls are (for sure) the easiest and (definitely) rank among the most delicious! They're really pretty too and will bring lots of oohs and aahs when family and friends peek into the breadbasket and then take the first buttery bite.

20 minutes of hands-on time!
Making brioche rolls used to be a labor of love for me. It involved a mixer, proofing the yeast, kneading the dough, sometimes layering butter and all kinds of other steps. No more!
The directions for this recipe are so simple: Stir together the dry ingredients (flour, sugar, instant yeast and salt) in a bowl. Combine melted butter, milk, eggs and hot water in another bowl. Make a well in the center of the dry bowl and add the liquid ingredients. Stir, stir, stir till it's all combined then cover and let the yeast do its magic. Go read a book, catch up on the news, write some emails, paint your nails, workout, watch a movie... whatever your "thing" is.
A few hours later, you and the dough will meet up again, but only for about 10 minutes. You'll divide the dough into twelve portions, shape the rolls, then plop them in a muffin tin. Give them a nice cozy cover and it's time for a little more yeast-magic until it's time to preheat the oven.
The best part? The absolutely intoxicating aroma of fresh, buttery bread baking! Scott followed his nose to the kitchen yesterday, while I was baking these Easy Brioche Rolls and said: "It smells like a wonderful French bakery in here!"

How to shape these rolls
The technique I use for shaping these Easy Brioche Dinner Rolls is simple, but also kind of unique. After dividing the dough, I roll one of the portions in flour then place it in one hand and tuck all the sides underneath with the fingers of my other hand. This will form a nice smooth ball.
But instead of using the smooth round ball as the top of my roll, I flip it over and pinch all the tucked edges together. I like to use the pinched, scraggly looking side of the roll as the top. It gives these dinner rolls a nice rustic, homemade look.

What is instant yeast?
I have fallen in love with instant yeast. I've been a yeast baker for many years and although I've learned to work with it, yeast can be a little tricky. Regular yeast generally needs proofing which means activating it in a warm liquid. If the temperature of the liquid is too hot or too cold you can end up with yeast that just doesn't do its job.
Instant yeast, on the other hand, does not need to be proofed. Instant yeast (aka fast-rising, rapid rise or quick rise yeast) has different characteristics than regular active dry yeast. It absorbs water faster so it starts working much sooner. It's also not dried out as much as active dry yeast so it stays more "alive" and begins working "instantly" when combined with dry and wet ingredients. The results? You’ll have much less of a chance for yeast-failure.
Instant yeast can be found next to the regular active dry yeast at most grocery stores. I usually buy it at Aldi as the price is significantly lower than at my local grocery. You can also purchase super cheap instant yeast in bulk online. It can be stored in the freezer and lasts forever. Bread machine yeast can be used interchangeably with instant yeast.
Do I have to use bread flour?
This recipe calls for bread flour. What is bread flour? According to Bon Appétit, "Bread flour has a higher protein content than all-purpose, usually 11-13%. It’s called “bread flour” because bread requires higher amounts of protein to produce lots of gluten. Gluten is the stringy strands that give bread dough its stretch and elasticity, and baked bread its characteristic chew."
All that to say that bread flour is specifically made for making bread. However, I did try these rolls with all-purpose flour. The dough seemed a little looser and I had to use a bit more flour when shaping the rolls but, all in all, they were still delicious and looked great.

I forgot to tell you one thing that you probably need to know about these Easy Brioche Dinner Rolls. They talk. Yep, if you have a batch of them sitting on the counter cooling, they start calling your name. Begging to be enjoyed. And if you have a little butter and some delicious raspberry (you can make this jam from frozen berries!) or strawberry jam stashed away, they don't just call. They yell. It's ridiculous. Don't ask me how I know this, just take my word.

Café Tips for making these Easy Brioche Dinner Rolls
- Don't try to make this recipe with regular active yeast. You need instant yeast. Read the Instant Yeast section above to see why and where to find instant yeast.
- Yeast dough likes a warm, cozy place to hang out. If your house is chilly, there are a few things you can do to create a nice warm yeast-friendly place.
- Turn your oven to 350˚F for 1 minute then turn the oven off. Leave the light on and place your dough in the oven.
- Vigorously boil a cup of water in the microwave for 4-5 minutes. This will create a lot of nice, warm steam. Place dough in the microwave and close the door.
- Set the bowl in the sink in a larger bowl of hot water.
- If you have a load of laundry drying, set the covered bowl on top of the dryer. Make sure you have it on a towel, or it might “wander” off the top of your dryer - that would be really sad!
- Place the bowl on a heating pad.
- Don't be afraid to generously flour your work surface when shaping these dinner rolls. For years, I had trouble making bread and would get so frustrated because the dough would stick to the counter or my hands and everything would be a big mess. I finally learned that I just wasn't using enough flour. Don't overdo the flour but use enough so that the dough isn't sticky.
- For a pretty shiny coating on these rolls, the recipe directs to brush them with an egg wash which is simply beaten egg mixed with a little water. When you brush on the egg wash, use a light touch. You don't want a lot of the egg mixture to run down the sides of the roll or onto the pan. Cover the tops of the rolls with the egg wash, but don't be heavy-handed.
- This dough is thick. I like to use a heavy-duty spatula with a wooden handle to mix it up or a Danish whisk. A Danish whisk is wonderful for mixing up all kinds of batters.
- These rolls can be made ahead and frozen. I usually freeze them on a sheet pan for about an hour. Once they are frozen I throw them in a ziplock bag. That way they don't squish each other in the freezer.
- To serve rolls that have been frozen, allow them to thaw then rewarm in a 325˚F oven for 10-12 minutes.
- You can also make these rolls through step 5 below and freeze them right in the pan. To finish, allow the rolls to thaw and rise then bake as directed.
If you enjoyed this recipe, please come back and leave a star rating and review! It’s so helpful to other readers to hear other’s results and ideas for variations.
Like this recipe? We have a whole collection of Ridiculously Easy recipes we think you'll love. Check them out!
- 3 ½ cups all-purpose or bread flour
- ⅓ cup sugar
- 1 ½ teaspoons kosher salt
- 1 package instant yeast (2¼ teaspoons) see notes above in post regarding yeast
- 4 tablespoons butter
- ½ cup milk
- 1 large egg
- 2 egg yolks from large eggs
- ¾ cup hot tap water
- 1 large egg
- 1 teaspoon water
-
Generously spray a 12-cup muffin tin with cooking spray. Set aside.
-
Combine flour, salt, yeast, and sugar in a medium-large bowl. Stir well to combine. Set aside.
-
Place butter in a medium-size microwave-safe bowl and cook on high power for 40-60 seconds or until melted. Stir in the milk then add the egg and yolks and stir well. Add the hot water and stir to combine.
-
Make a well in the center of the flour mixture. Add the egg/milk and stir, from the bottom up, until all of the flour is incorporated. The dough will be thick. Cover with plastic wrap or a plate and set the bowl in a warm place (see Café Tips above in the post for how to create a warm, cozy rising spot) for 1 ½-2 hours or until dough is doubled in size.
-
Sprinkle ¼ cup of flour onto a work surface. Scrape the dough onto the floured surface. Turn the dough with a dough scraper or spatula until it’s thoroughly coated with flour (You may need a bit more flour). Divide the dough into 12 equal portions, each one about 3 ounces (or 82g). (I like to use a kitchen scale for this but you can just eyeball it.) Roll each ball of dough to coat with flour.
-
Roll each portion of the dough in a little of the flour to coat. Holding a piece of dough in one hand, tuck the edges under, rotating the dough so that all the edges get tucked under and the top has formed a smooth round ball. (If the dough feels sticky while shaping the rolls, just roll it in a little more flour.) Turn the ball of dough over and pinch the tucked edges together (see picture above in the post). Place the dough in one of the prepared muffin cups, pinched side up. Repeat with all of the dough portions.
-
Cover rolls with a clean kitchen towel and allow to rise for 30-45 minutes in a warm area. They should start to puff up but won’t be doubled in size this time. Preheat the oven to 375˚F.
-
Combine the egg and 1 teaspoon of water. Brush rolls all over with egg wash, being careful not to let it drip onto the pan.
-
Place the rolls in the oven and bake for 18-25 minutes or until medium golden brown. Transfer rolls to a cooling rack or serve warm. (When completely cooled rolls can be transferred to an airtight container or can be frozen. Warm in the oven for a few minutes before serving.)
See Café Tips above in post for more detailed instructions and tips.
The Café Sucre Farine is a participant in the Amazon Affiliate Program. The Amazon Affiliate Program is designed to provide a means for sites to earn advertising fees by advertising and linking to products on Amazon. The price you pay as a consumer does not change, but if you make a purchase through one of our links, we receive a small commission – and we continue delivering delicious recipes to you!

Michel Roth says
La pâtisserie nécessitant de la précision, j'aimerais qu'un site Internet au nom européen fournisse des mesures européennes (en grammes). Les températures et les volumes peuvent être convertis à l'aide d'une formule, mais les volumes ne se convertissent pas directement en masse, et la masse est la chose importante.
Chris Scheuer says
Bonjour Michel, si vous regardez au-dessus du mot "Instructions" dans la recette, vous trouverez un bouton de conversion métrique. J'espère que cela pourra aider!
Huan Quek says
Thank you so much for this recipe. Mine were ugly because I am not very good at the shaping, but the texture, aroma and taste are excellent. Living in the tropics, the proofing time was halved, and rising even while I tried to shape! Having baked brioche the traditional way, over hours of stretching and pulling, your recipe is now my Go-to! Thank you so much! Wil be baking these again and many more soon!
Lindsay @ The Café Sucre Farine says
That's great, Huan! Thank you for leaving a review!
Nina Smith says
Your roll recipe is fabulous. I have never made a bread recipe that is so easy. I followed your recipe and my rolls turned out perfect. They were delicious. You most definitely earned a 5 star rating. This recipe will most undoubtedly become my favorite bread recipe. Thanks so much for sharing your recipe. Kudos to you!
Lindsay @ The Café Sucre Farine says
Thank you, Nina! So glad you enjoyed these!
Phyllis says
Can these be hamburger or hot dog buns? They sound yummy!! Also I made your foccacia and it was a big hit. My brother took some home to make sandwiches.
Thanks for all the great recipes.
Lindsay @ The Café Sucre Farine says
So glad to hear that, Phyllis! Check out this recipe that we like to use for buns- https://thecafesucrefarine.com/easy-buttermilk-brioche-buns/
Aly says
If you have not discovered it yet try these rolls with President Butter, it is a French cultured butter and makes classical baked items oh la la! You can find it at Lowes Foods or Publix. Harris Teeter used to carry it but my local one (Mooresville, NC) doesn't any longer. If you ever see it try Lurpak Butter from Denmark. It has been voted the best butter in the world many times. Great ingredients make a difference.
Lindsay @ The Café Sucre Farine says
Thanks for the tip, Aly!
Cindy says
My first try at bread making and these turned out great! Family really liked them, so I made another recipe the following week but used it to make cinnamon rolls. So good!
Thank you for the Ridiculous Easy recipes for us newbies.
Lindsay @ The Café Sucre Farine says
Wonderful! Thank you for letting us know, Cindy!
Dlevy says
Hi Chris. If I bake and freeze them how long should I allow for them to thaw? Thanks.
Chris Scheuer says
Hi Dlevy, I would give them 2-3 hours to thaw.
liza says
Hello can i bake this a day before the gathering?How long can it stay good over the counter/And advised on how it will stay fresh over the counter.thanks
Chris Scheuer says
Hi Liza, I really like to freeze my rolls if I'm not using them that day. You can even slightly underbake them, then pop them in the oven to warm and get a little more golden, right before serving.
Beverley says
Not sure what I did wrong ! These were a colossal failure. Couldn’t get them to rise on second rising, but bakedk them anyway . They were doughy and heavy. Not enough heat for rising?
Chris Scheuer says
Hi Beverly, so sorry you had trouble with these rolls. It's really difficult to say what went wrong without having been right there in the kitchen with you. Sometimes the rise can take longer depending on the temperature in the kitchen but if the dough rose the first time, it should be fine the second time. You might have needed to wait a little longer.
Sharon Apfeldorf says
Is there any way to make theses rolls dairy free" I really want to try them. Thanks
Chris Scheuer says
Hi Sharon, I think you'd be better off going with an artisan roll recipe if you want to go dairy free. The success of this one is quite dependent on the butter and milk.
Linda Maynard says
Can I make these as mini brioche rolls? How long to bake a mini roll?
Chris Scheuer says
Hi Linda, you could definitely make these as mini rolls. The baking time will be less but I can't say exactly without testing the recipe. I would check them after 12-14 minutes.
BRENDA says
These turned out really great! Very easy to make and very tasty, hubby loved them too. Only change I made was I put the "tucked" part on the bottom and I added sesame seeds to tops of half of them. Thanks for another great recipe.
Chris Scheuer says
Awesome! Thanks for letting us know, Brenda!
JoAnn says
There are rolls, and then THERE ARE ROLLS1 These are wonderful. Will be giving as gifts to those who don't bake. Is a label available for the tolls and if so, please send. Thanks for great "Ridiculously Easy Recipes". JoAnn
Chris Scheuer says
Ha! So glad you enjoyed these, JoAnn! They do not have a label at this time.
Robin A Salmon says
Love your recipes! Instead of a muffin pan, can these rolls be made in a cake pan or separately on a sheet pan?
Chris Scheuer says
Hi Robin, yes, you could definitely do either!
Diana says
These really are easy and beautiful and delicious. I used parchment cupcake liners and they came out perfect.
Chris Scheuer says
Thanks, Diana!
Nancy Chambers says
Hello Chris,
This brioche rolls look so dainty and scrumptious!
Is there any way to do them as an overnight dough, similar to your brioche bread?
That would be the only way I could manage it for Thanksgiving, since I'm doing all the cooking for my family.
Thank you,
Nancy C.
Chris Scheuer says
Hi Nancy, you can definitely do these rolls as an overnight dough. I just did that myself last night. The final rise will be a bit longer since the dough will be cold.
Mary C says
Love this recipe. I make it often. Can you share where you get your adorable containers. I especially love the jelly dish featured in this recipe.
Thanks Mary C
Chris Scheuer says
Yay! So happy you've enjoyed it, Mary! The jelly jar came from a little antique shop.