
This post may contain affiliate links. For more information, see our privacy policy.

Recently, we were invited to dinner by my son, Nick and his wife Lindsay. When I walked in the door, I saw two gorgeous looking pizzas sitting on parchment paper on the counter. They were all topped and ready to be baked, the crusts were super thin and crisp-looking (my favorite kind) and I couldn't wait for dinner. After chatting for a bit, Lindsay popped the pizzas into the oven and within 10 minutes, we were eating the most amazing pizza. The crust was shatteringly crisp and the topping fabulously delicious. Oh, and beautiful too! It was a barbecue chicken pizza and though I've made something similar for years, I never thought to add bell peppers. They added a wonderful new layer of flavor and looked so pretty.
When I asked Lindsay about the crusts she said that it was actually my Grilled Pizza Crust recipe, which she had adapted to the oven. I loved it because, often, I'm just not in the mood or the weather's not cooperative for grilling. I've made these several times since then with Lindsay's wonderful technique and they've come out great. I love that these can be made, not only early in the day, long before guests arrive, but they can also be made days in advance and frozen until just before serving. I just remove them from the freezer, allow a bit of time for thawing, then top and bake. So easy, so delicious!
When Chris shared this recipe she gave directions for grilling the crust. While we love grilled pizza, I don't do the grilling. I decided to try doing it all in the oven and it worked great! Now I can make this pizza anytime I want, without having to fire up the grill.
~ Lindsay
- 4 cups all-purpose flour
- 1 ½ cups hot tap water
- 2 tablespoons extra virgin olive oil
- 2 teaspoons sea salt
- ½ teaspoon active dry yeast
-
Place dry ingredients in the bowl of a stand mixer with dough hook attached. Mix for about 30 seconds until well combined. Add hot water and olive oil.
-
Mix with dough hook for about 10 minutes. After several minutes dough will leave the sides of the bowl and form a ball - continue kneading for the remaining time (if dough is wet and doesn't form a ball, add just a bit more flour, a tablespoon at a time, until it does).
-
After kneading with the dough hook for 10 minutes, remove bowl from mixer and turn dough out onto a floured surface. Divide into four equal pieces and turn to coat each with flour. Cover with a clean dish towel and let rest for 10 more minutes. This rest time allows the glutens in the dough to relax which will make rolling much easier.
-
Roll each ball out into approximately a 14-15 inch circle . Dough will be very thin, almost paper thin. Don't worry if circles aren't perfectly shaped - these are rustic pizzas, they look better if they aren't perfect. Repeat rolling the other balls of dough and place each rolled circle onto an individual piece of parchment paper. (I put a piece of parchment paper on top of a large cutting board and then stack them up on top of each other, each one on it's own sheet of parchment paper. There is no rise involved with this thin-crusted pizza so you can just stack them up until ready to bake.)
-
Preheat oven to 450 degrees with pizza stone on the bottom rack. Slide parchment paper with pizza dough onto preheated pizza stone.
-
Bake about 5 minutes until crust is starting to puff and is just starting to turn golden. It should no longer be doughy, but not yet cooked through. Remove crust and parchment from oven. At this point you can either proceed with topping and baking your pizzas or you can cool crusts to room temperature and freeze for using at another time. (I like to freeze them un-wrapped, then once frozen, wrap in plastic wrap or foil.)
-
Finishing the Pizza:
-
Flip the crust over to top the side that was originally on the stone. Top pizza crust with your sauce, toppings and cheese. Return to the pizza stone in the oven and remove the parchment.
-
Bake an additional 5-10 minutes until crust is crisp and cheese is melted. Watch pizza closely to make sure it doesn't burn. The time it takes will depend on your oven and pizza toppings. Remove from the oven and place on a cutting board. Slice and serve!

- 1 pre-made Make-Ahead Thin Crusted Pizza crust see recipe above
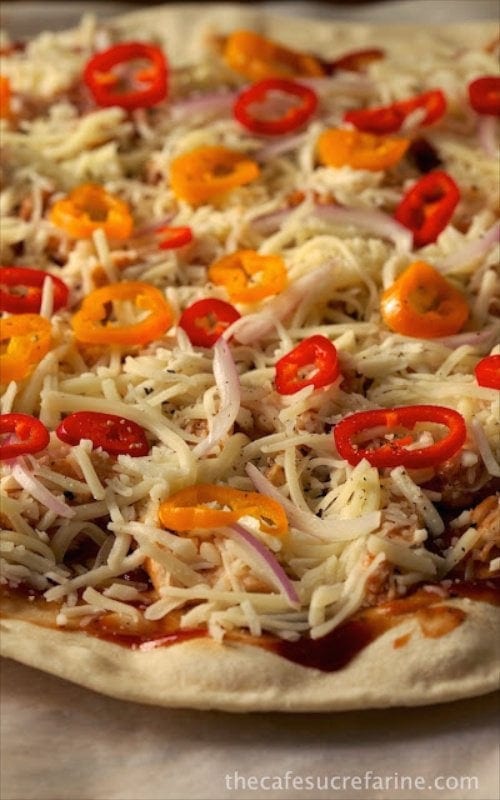
- ¼-1/2 cup of your favorite barbecue sauce
- 1 cup diced or shredded cooked chicken breast leftover or rotisserie works great, coated in barbecue sauce
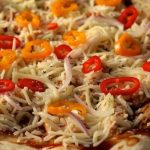
- ½ cup thinly sliced red onion
- ½ cup thinly sliced bell peppers
- 12 ounces shredded cheese- I usually use a combination of whatever I have- mozzarella, italian, or cheddar are all delicious.
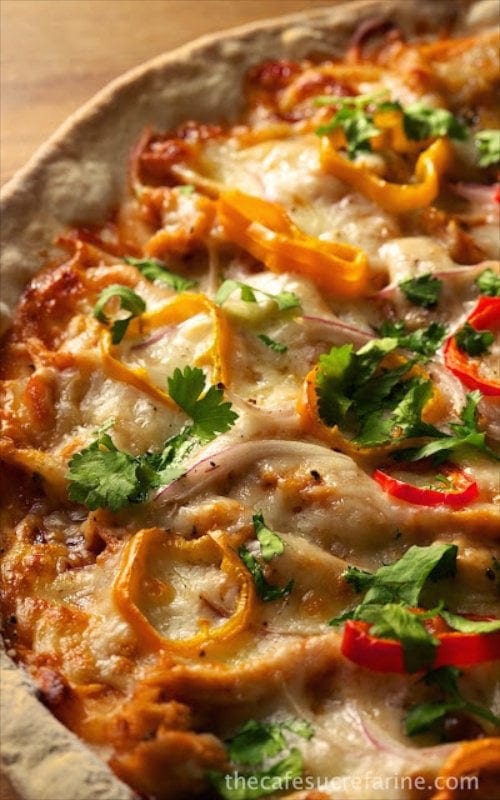
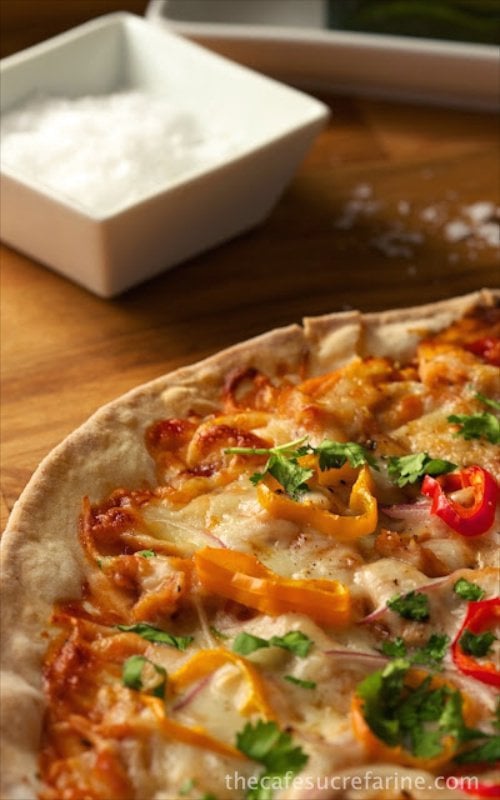
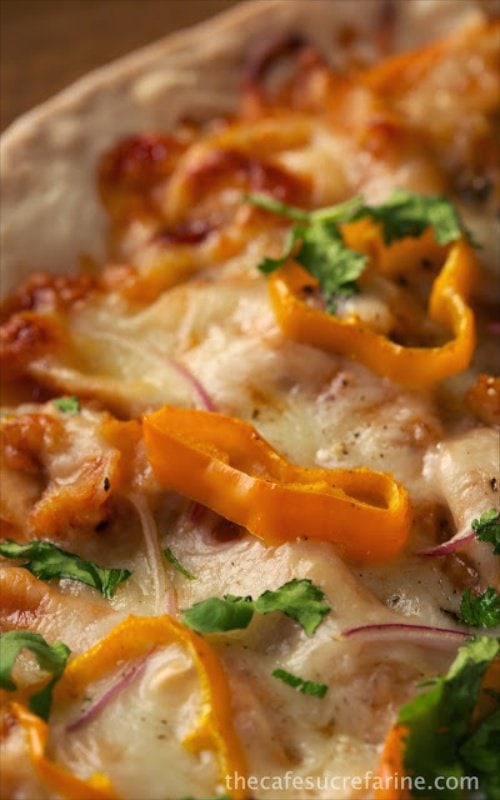
- ¼ cup cilantro chopped
-
Place pizza stone or sheet pan on middle rack of oven. Preheat oven to 450˚F.
-
Top crust evenly with barbecue sauce and spread to evenly to within ½ inch of the edge. Top with chicken, then cheese, followed red onions and peppers.
-
Slide parchment paper with pizza on top onto stone or cookie sheet. Bake for approximately 5-10 minutes until crust is crisp and cheese is melted and bubbly.
-
Remove from oven and let cool slightly, 1-2 minutes. Sprinkle with chopped cilantro. Serve and enjoy!
Leave a Reply