
This post may contain affiliate links. For more information, see our privacy policy.
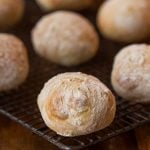
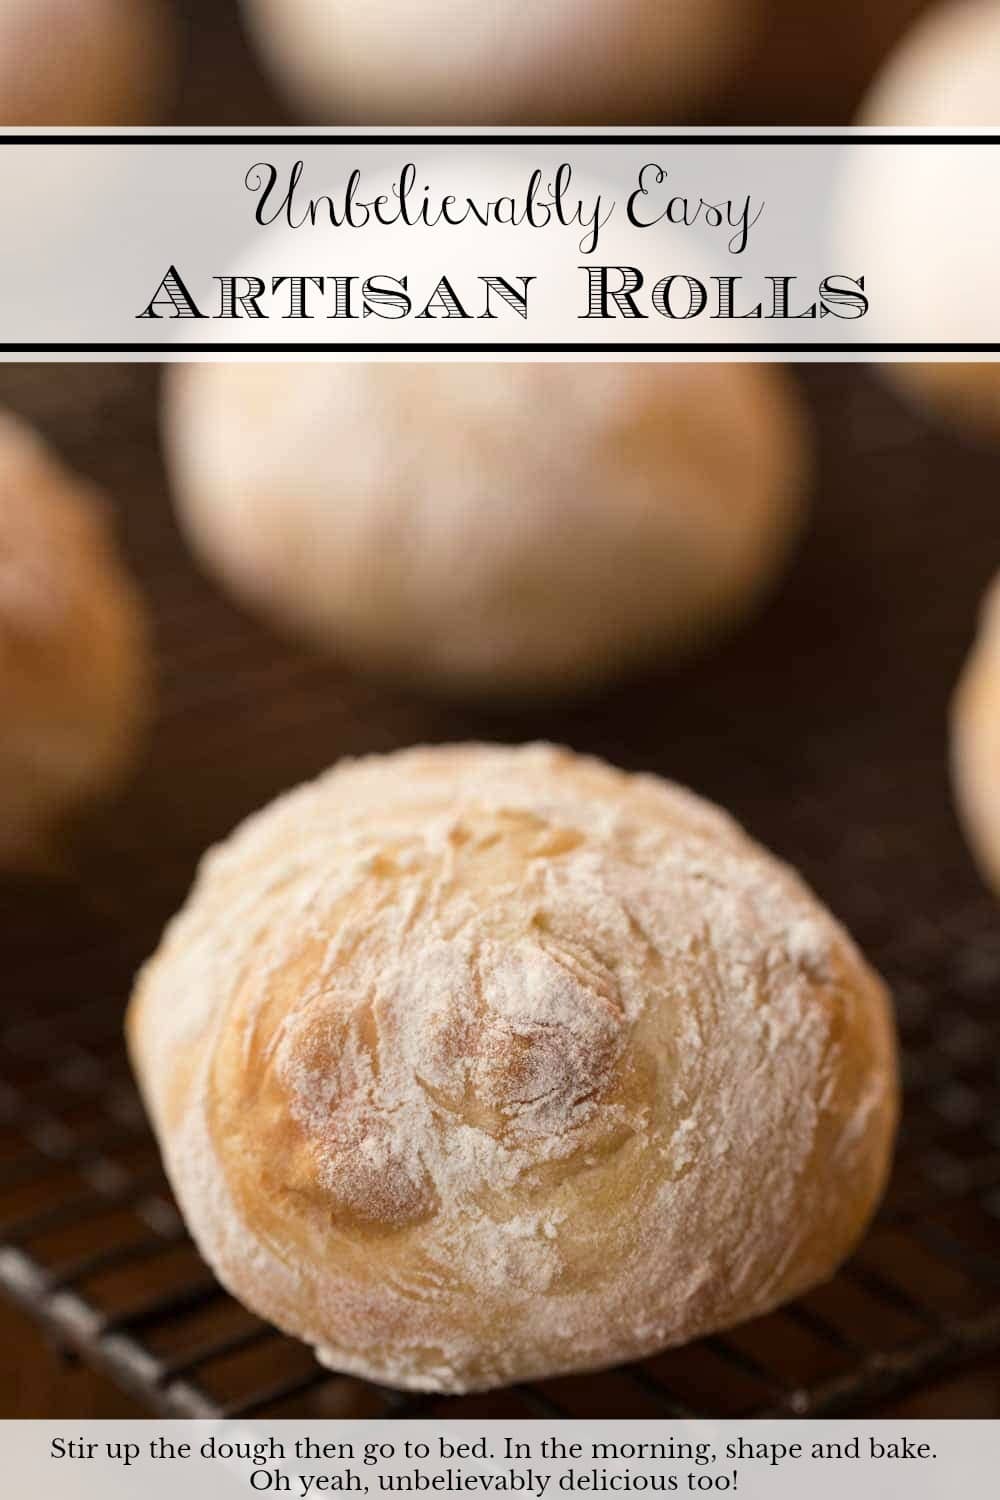
These Easy Artisan Rolls truly are ridiculously easy. Stir up the dough then go to bed. In the morning, shape and bake. Unbelievably delicious too!
When I first published this recipe 5 years ago, I called the rolls Unbelievably Easy Artisan Rolls. And it was true, they are unbelievably easy. But that was before the days of our Ridiculously Easy Recipes. Recently, when making a batch of this delicious bread, I realized that it truly deserve a place in our Ridiculously Easy collection. So, without further ado, let me re-introduce you to these fabulous, Ridiculously Easy Artisan Rolls.

What is Ridiculously Easy?
If you're new to The Café, you might not be familiar with our Ridiculously Easy recipes. They are super popular with our readers and I love them just as much! You can read more about these recipes in this post along with the specific criteria that these recipes have to follow but my nutshell definitely is "recipes that make you look like a kitchen rock star with minimal effort on your part". Like that? I sure do!
Can yeast rolls really be easy?
Let me explain how easy they are and you can decide for yourself. Ready? Combine flour, salt and yeast in a bowl. Grab a sturdy spatula. Add tap water (even cold tap water works!), and stir till combined. Cover, go to bed and have sweet dreams! When you wake in the morning, the yeast will have done its magic.
Sprinkle a work surface with flour and turn the dough a few times, to give it a nice white coat. Divide your dough into 12 pieces and shape the pieces into balls. Place the dough balls on a parchment-lined sheet pan and bake for 20 minutes. That's it! See what I mean? Easy, ridiculously easy!
Oh, one more thing; wipe that drool off your mouth, and please, try to wait till they've cooled just a bit before you start sampling.
I saw these beautiful rolls a few months ago on Pinterest. They originated on a beautiful blog called Alexandra's Kitchen. I did adapt the recipe slightly, but she's the genius who came up with the technique.

It's hard to find really good artisan bread unless you live in a big city where there are lots of bakers. Here in Asheville, NC, there are several high-quality bread shops, but they're few and far between. So what do you do if you're craving delicious, European-style bread? You know, the crusty exterior and chewy, richly-flavored-interior type of bread with those big irregular holes?
In the past all I could personally do was dream about it but now the answer is super simple, I just whip up a batch of these Ridiculously Easy Artisan Rolls.

I started to call them dinner rolls but changed my mind when I thought about how versatile they are. While they do make wonderful dinner rolls, I also love these rolls for sandwiches and as an accompaniment to soups and salads.
Four Ingredients
And, while my recipe today has just four ingredients; flour, yeast, salt and water, you can get really creative with herbs and spices. My favorites are rosemary and sea salt, but I was at Whole Foods for lunch recently and had a crusty dinner roll with Parmesan and fresh ground pepper. That just might be my next version!

Make ahead!
Do you know what might be even better than the simplicity of this Ridiculously Easy Artisan Rolls recipe? The fact that you can make a batch in advance and freeze them for several weeks. Just under-bake the rolls slightly, then pop them in the freezer after cooling. Pull the rolls out of the freezer a few hours in advance and warm them for 8-10 minutes before serving. They'll taste just like freshly baked!
Imagine a basketful of these fragrant rolls being passed around the table at your next dinner party. You'd be sure to see smiles of delight, as each guest peeks under the napkin. Be prepared for lots of compliments, as the warm rolls are savored by one and all. Only you will know that the total hands-on time for these rolls is less than 20 minutes!

Café Tips for Making these Ridiculously Easy Artisan Rolls
- Use plenty of flour on your work surface. This is what will keep the dough from sticking. You will need at least a ¼ cup, maybe more, depending on how wet your dough is. I also like to keep my hands well-floured while shaping the rolls.
- A metal bench scraper (aka a dough scraper) is a wonderful tool to have when making bread, rolls, etc. It will keep your hands from getting sticky as you can use it to move the dough and coat it with flour. Also turning the dough a couple of times on a well-floured surface with a bench scraper, will also keep the dough from sticking to the counter. And lastly, a bench scraper makes cleaning the counter a breeze as you can just scrape up any excess dough and flour.
- Do you have to let the dough rise for 10-12 hours? Nope! I've been in a pinch a number of times and have sped up the rising time by using warm water instead of room temperature water. The rolls still turn out and are delicious BUT the beautiful craggy interiors of these rolls are definitely improved with a long slow rise. There is also more depth of flavor - so if you have the time, by all means, go for the overnight l-o-n-g, s-l-o-w rise.
- This Ridiculously Easy Artisan Rolls recipe is a bit unusual in that you form the rolls by pulling the edges under, then pinch them together to form a smooth ball and place them on the baking pan with the pinched side UP. All other roll recipes that I've ever used direct you to place the rolls on a baking pan, smooth side up. Being a bit of a rebel, I decided to try baking them with the pinched side up and LOVED the beautiful artisan whimsical presentation when the rolls "rolled" out of the oven.
- I love these pre-cut sheets of parchment paper. They save a lot of time in the kitchen, as they're the perfect size for a half sheet pan.
- For regular parchment paper, I really like the Kirkland brand that Costco sells. The problem is, that they only carry it seasonally. I was happy to discover you can purchase it online with free shipping. A roll like this will last a long time and is way more economical than the typical size rolls that you often find.
P.S. If you love delicious, EASY bread recipes, be sure sure to check out our Ridiculously Easy Rosemary Bread. SO good and you won't believe the amazing aroma that will fill your house; AND how easy it is!
These Unbelievably Easy Artisan Rolls are super easy! Stir up the dough, then go enjoy a good sleep. In the morning, shape and bake. Unbelievably delicious too!
- 4 cups bread flour plus extra for shaping
- 2 teaspoons kosher salt
- 1 teaspoon active dry yeast (traditional)
- 2 cups room-temperature tap water
-
In a medium-large bowl, whisk together the bread flour, salt, and yeast. Make a well in the center and add the water. Mix with a sturdy rubber spatula until all flour is incorporated. Don’t worry, the dough will be wet and sticky, that’s how it should be. Cover the bowl with plastic wrap and leave to rise at room temperature for 10 to 12 hours.
-
The following morning (or after 10-12 hours), the dough will have risen, but it may still look shaggy and its surface will be covered with bubbles.
-
Line a sheet pan with parchment paper. Preheat the oven to 425ºF.
-
Spread a generous ¼ cup of flour on a work surface. Dump the dough out onto the floured surface and turn it several times to coat with flour. I like to use a bench scraper for this.
-
Divide the dough into 12-16 equal portions, turning each piece in the flour to coat. (The bench scraper is also great for cutting the dough). Shape each piece into a ball, pulling edges under and pinching together to make a smooth top. Invert balls and place on prepared pan, pinched side up. This will give you craggy, rustic textured rolls. If the dough is sticky as you’re shaping, just roll the piece in more of the flour. Let shaped rolls rise for 20 minutes.
-
The rolls may look a little deflated as they're rising and they won't rise a ton during the 20 minutes but a little magic happens when they hit the hot oven and you'll be shocked at how beautiful they look when baked.
-
Transfer the pan to the oven. Bake 15 minutes. Rotate pan. Bake 5 minutes more or until nicely golden. Transfer rolls to a cooling rack to cool completely.
-
If making in advance, remove from oven when pale golden brown (about 3-4 minutes less). Cool completely, then freeze on a baking sheet. Once frozen, transfer rolls to a large zip lock bag and store in the freezer. To serve, allow rolls to thaw, then heat for 10-12 minutes at 325˚F.
See Café Tips above in the post for more detailed instructions and tips to ensure success.
Julia says
Another truly amazing recipe. I cannot even believe I made these rolls. Could not be easier or more delicious. I used KA regular flour as I did not have bread, followed the recipe exactly. I did bake a few extra minutes and ended up with truly artisan rolls- as good as any French bakery. I mixed the dough in the morning and baked rolls about 10 hours later. Will make these over and over. Thank you, thank you, thank you - you NEVER disappoint!!!
Chris Scheuer says
Thanks, Julia 💕 and bravo to you!
Patti MacLeod says
Hello Chris,
I have been baking sweets and breads for many years and I am so happy to I have made a few have found your site!y I have made a few of your bread/roll recipes, all of which have turned out amazingly well!
I have a question about the Unbelievably Easy Artisan Rolls. There are two sets of weights for the ingredients, I am wondering why and what difference it makes? I used the weights that were listed after the ingredient, I hope that is okay as I have them sitting all nice and comfy in my warm kitchen, ready to bake tomorrow.
Also, Thank you for using weights in all your recipes. It is just so much easier to work with, and always get the same results!!!
Chris Scheuer says
Hi Patti, thanks for taking the time to share your results. Sorry for the confusion with the two weights. You are correct to use the ones you did. I have corrected this in the recipe so there is only one set of weights. Thanks!
Patti MacLeod says
Thank you, Chris! I baked the rolls this morning and the results are ***** (5 stars). They were unbelievably easy to make, I got 17 rolls at about 60 grams each. The colour was perfect and my own personal taste tester, my husband gave it a thumbs up and said it was a keeper! Again, Thank you!!!
Chris Scheuer says
Yay! Thanks for coming back to share your results, Patti!
Lori says
Is it easy to double the recipe?
Chris Scheuer says
Hi Lori, yes this recipe can easily be doubled!
Lita poppenberg says
Chris can I cut this in half and make two boules in a Dutch oven? thanks for all your recipes ... Hope your loving North Carolina lita
Chris Scheuer says
Hi Lita,
Yes, I think that would work well! You could also make boules freeform as in this recipe: https://thecafesucrefarine.com/ridiculously-easy-rosemary-bread/
Enjoy!
Camryn says
I've made this before and they were fantastic! Will they stick too much or burn if I don't use parchment paper? I'm at college and don't feel like buying some if I don't have to.
Chris Scheuer says
Bravo to you for baking at college, Camryn! You could try sprinkling a sheet pan with a dusting of flour and make sure the bottom of the rolls are also lightly coated in flour. If you can get some parchment that would work best.
Rebekah says
If you're wondering why this recipe has no sugar, it's because yeast is smart enough to break down the flour and turn it into sugar. Adding sugar to yeast bread actually doesn't do much in terms of rising, except maybe gives it an energy boost at the beginning. Because we are letting this rise all day, adding sugar wouldn't really matter. Sugar does change the bread's flavor and texture; it will make the bread moister and have fewer and smaller holes as well as a sweeter flavor, like sandwich bread or dinner rolls. If you want a bread with those big holes and crunchy exterior like this recipe, you don't want to add extra sugar. This is also how you make sourdough. As for the room temperature water, yeast does not need warm water to activate, that is a myth, all it does is speed up the process a bit. Again, because we are leaving this dough out for so long, you could use ice water and it wouldn't matter. Wanna make sourdough? Follow this recipe but instead of leaving the dough out all night pop it in the fridge for a few days (the longer you let it sit, the more sour it will become). Just let it come back to room temperature before step #3.
Chris Scheuer says
Thanks, Rebekah, for this very informative and accurate comment 🙂
Janice says
Can all purpose flour work?
Chris Scheuer says
Yes, it definitely will work with all-purpose flour. I like the results bread flour gives but it's not that significant if you don't have bread flour.
Toni says
After I placed rising dough onto flour to to roll in ball with additional flour I noted a lot of air pockets (from yeast). I’m thinking I should mash out or do I just leave. I mashed some what - after they cooked we ate them so quickly while warm couldn’t really tell what the inside of the rolls looked like. They were great though. Very new at baking artisan so unfamiliar with terminology. They looked great and somewhat crispy. Guess I really need to know if I need to knock down dough or just try to roll dough before separating into individual rolls. Thankyou
Chris Scheuer says
It sounds like you did a good job, Toni! Yes, definitely knead the dough just a bit to get rid of some of the big air pockets before forming into individual rolls. The dough will form more pockets in the oven but they will be smaller and look like the inside of good artisan bread.
Erin says
Do you think these would make good soup bowls?
Chris Scheuer says
Hi Erin, I think they would! You would need to hollow them and let them dry out a bit.
Nancy Miller says
I just tried these and they are AMAZING!! They did not get very brown but the texture inside was just what I was hoping for! I did undercook them because I didn't get them all the same size and I plan on freezing them too. I reheat in my toaster oven or might try the air fryer to brown and crisp the outside. But they are DELICIOUS just like they are!! I can't wait to try some variations, plan on adding nuts and fruit. Could you use this dough to make focacia?
Chris Scheuer says
Thanks so much, Nancy. So happy you enjoyed them. Next time, just let them bake a little longer if you're not planning to freeze and they'll get more golden.
Regarding focaccia, this is a similar recipe but specifically designed for focaccia. I think you'll really like this one too! I don't repeat a lot of recipes but this focaccia is almost always in my freezer 🙂
https://thecafesucrefarine.com/ridiculously-easy-focaccia-bread/
BRENDA says
I'm reposting this-you missed me again (smile). I haven’t tried them yet, but would they work as soup bowls if I made them bigger? Maybe make 6? Do you think they would work for that and if so, how long would you bake? I was just reading a different recipe that mentioned bread bowls and then I saw this recipe and I like anything that says unbelievable easy *grin* and they look good.
Chris Scheuer says
Hi Brenda, thanks so much for re-posting this. I did miss it! Yes, I think it would work for soup bowls. I would do 6 and bake them as directed, then when cool, hollow them out and crisp them up in the oven a bit before adding the soup. Let us know how it goes!
sylvia says
What oven rack level should these rolls be baked? Do you have a preference when you bake rolls or breads?
Chris Scheuer says
I like to use the middle rack for the most part. If I see that bottom of the rolls or bread is pale towards the end, I'll move it down to the lower rack for the last 5 minutes or so.
BRENDA says
I haven't tried them yet, but would they work as soup bowls if I made them bigger? Maybe make 6? Do you think they would work for that and if so, how long would you bake? I was just reading a different recipe that mentioned bread bowls and then I saw this recipe and I like anything that says unbelievable easy *grin* and they look good.
Jen Ulrich says
I made these this morning, and they turned out beautifully! I used instant yeast (and warmer water, no proving), so I opted to combine everything in my stand mixer and kneaded with the dough hook for a few minutes. 20 minute rest, then I shaped into rolls and let them rise for about 20 more minutes. I think I've found my new go-to recipe for easy dinner rolls!
Chris Scheuer says
Yay! That's wonderful, Jen - thanks for sharing your results!
Sas says
Do you use instant/rapid yeast or regular active?
Sas says
My apologies. I just saw that you use dry active yeast. Thanks for sharing!
Chris Scheuer says
Thanks for stopping by The Café!
Chris Scheuer says
No problem1 I miss things reading recipes all the time!
Chris Scheuer says
Thanks for the important information Kristy! You must have a very powerful microwave! I'll check the recipe again, but I know there's a vast difference from one microwave to another!
Elizabeth Ross says
I’ve been making bread for over 40 years and have never had a worse outcome. I’ve been testing recipes for my youngest daughter so she can make easy bread and am exceeding disappointed.
Chris Scheuer says
I'm so sorry to hear that Elizabeth! I always hate it when I have to waste good ingredients. We have made the bread so many times and gotten so many excellent comments!
Maia says
Hi Chris! Hoping to make these soon but am wondering if you've tried using whole wheat flour instead of white bread flour. Any thoughts?? Thanks!
Chris Scheuer says
Hi Maia, I haven't made these rolls with WW flour. If you do try them, please let us know how they turn out!
Michele says
Okay. I left the dough out for about 3 hours. It had already puffed up to fill the bowl so I put it in the fridge before going to bed. Next morning I took the dough out and left to reach room temperature for a couple of hours before proceeding with the recipe. They turned out great!! Thank you Chris for yet another great recipe. I'm off to the kitchen again now to make your easy chocolate cup cake recipe. Husband says they as the best he's had!!
Lorna says
How good are these!!!! Mixed before work this morning, didnt have bread flour so maybe this is why my texture wasn't so "holey" but they were delicious for dinner and more in the lunchboxes tomorrow. Yrt another cafe Sucre Farjne success story. Have to try the brioche next.
Chris Scheuer says
Yay! So happy you had delicious success with these, Lorna! Thanks so much for taking the time to leave a comment.
Michele says
Hi Chris
Do you think it's okay to leave overnight at room temperature here in Thailand ? Or should I pop in the fridge and leave longer than 12 hours? My room temperature would be somewhat different to yours, I'm sure - especially right now, we are experiencing heat wave conditions.
Suzi Nailor says
I've made these rolls several times and each time they burn only underneath and stick to the parchment. I end up having to slice off the bottom. I've tries using more and less flour, longer and shorter bake times...any suggestions? My friend makes them and they turn out beautifully. I continue to try them because it is such an easy recipe and so delicious with melted butter. Love your recipes, Chris!
Chris Scheuer says
Try lightly flouring the parchment paper and baking the rolls on a higher shelf of the oven. You could also lightly spray the parchment with cooking spray! Let me know if you still have trouble and we can figure it out.
Suzi says
Followed your recommendation to spray the parchment and sprinkle with flour. They turned out perfect! The first one was consumed before it even made it to the cooling rack! Thanks for your help!
Chris Scheuer says
Yay! So happy this worked well for you! I know what you mean about a roll not making it to the cooling rack 🙂
Lorrie says
Suzi either your oven is running hotter than you think or you have them on a rack too close to the bottom. try baking on a light coloured cookie sheet. I personally hate and dark coloured bakeware because it gets too hot and burns the bottom of everything.
Chris Scheuer says
Thanks, Lorrie!
Caren says
Thanks for this great recipe! Can I freeze the rolls fully baked, then later defrost and use them without reheating?
Chris Scheuer says
Hi Caren, you can definitely do that - but they're better if you pop them in the oven for a few minutes to get that nice crispness on the outside.
Lisa J says
We made these last weekend. Super easy and amazingly delicious!
Chris Scheuer says
Thanks so mch Lisa! So happy you ejoyed them!
Mel says
Rolls were good fresh but dried out a bit. Good flavor and were great toasted.
Maureen O'Reilly says
Just made these for our NYE dinner. Great flavor and the directions were exact. My only question is, do these brown much for you? Despite baking for the maximmum time per directions, the rolls looked par-baked and very pale. I ended up using the broiler function to brown them, but even with that heat, browning was minimal.
Chris Scheuer says
Hello Maureen, thanks for sharing your results. These rolls shouldn't get super brown but they should look like the pictures, light golden. Every oven is different so next time, just bake a little longer, even if it's more than the maximum.
Shelley says
Love these rolls! So easy and so good! I make a batch of them, throw them in the freezer and pull out how many I need any time for dinner. What a treat to have fresh warm rolls in a few minutes! Thanks for this great recipe which everyone asks for.
Chris Scheuer says
Thanks, Shelley! I appreciate you sharing your results!