
This post may contain affiliate links. For more information, see our privacy policy.
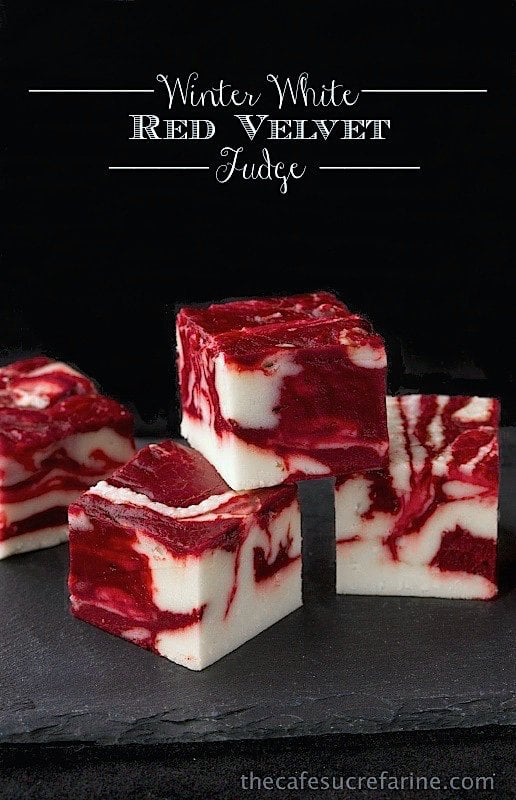
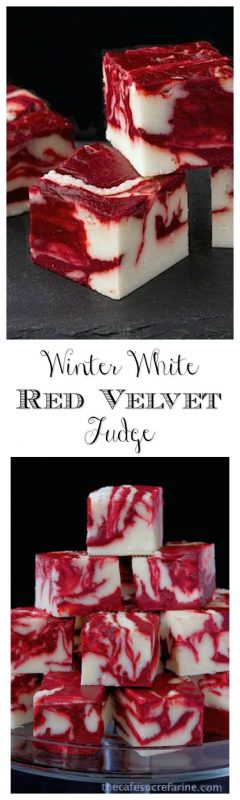
This Winter White Red Velvet Fudge is delicious, beautiful and perfect for any season! Make it for your next party or for gifts!
I've been in mad-scientist mode again this past week. Don't ask me why, but an idea to make Winter White Red Velvet Fudge popped into my head out of nowhere. I loved the idea and thought it would be a delightful treat for Valentines and also for Christmas, so I started tinkering in my little kitchen/chemistry lab. It had to be really pretty and even more important; super delicious, right?
I've been in mad-scientist mode again this past week. Don't ask me why, but an idea to make Winter White Red Velvet Fudge popped into my head out of nowhere. I loved the idea and thought it would be a delightful treat for Valentines and also for Christmas, so I started tinkering in my little kitchen/chemistry lab. It had to be really pretty and even more important; super delicious, right?

A classic recipe with brand new clothes!
I used an old-time favorite fudge recipe for the base. It's the one that's been on the back of the marshmallow creme jar for a hundred years (well, maybe not quite), you've probably seen it. I used white chocolate chips instead of the semi-sweet chocolate that's called for in the recipe and substituted half & half for the evaporated milk. Other than that I followed the recipe pretty closely, using the microwave method although I've also included the stovetop method (both recipes below - the stovetop method may be a bit more precise as microwaves can vary quite a bit in power).
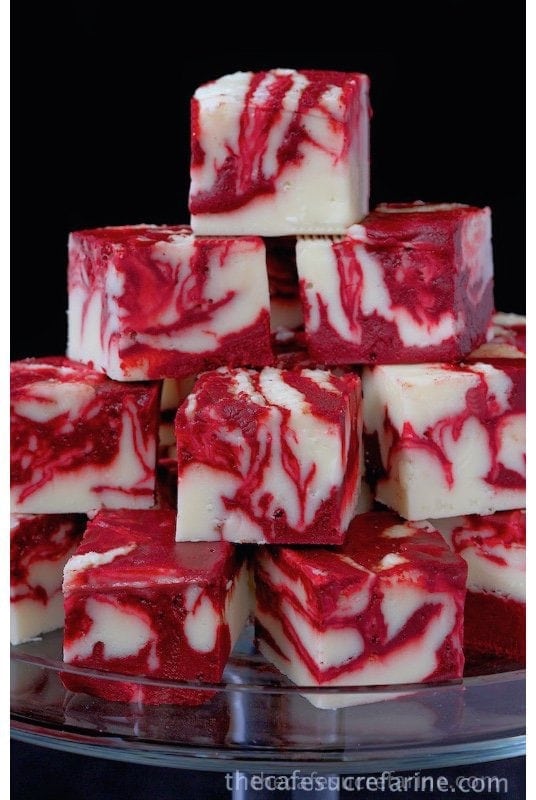
When it was almost finished (according to the recipe), it wasn't really finished... at least in my book. This is where I began to have fun. I transferred half of the hot mixture to a separate bowl, added semi-sweet chocolate chips and a splash of red food color. A good stir was all it took to melt the chips and transform the white chocolate mixture to a rich deep red - a red velvet red to be precise!

It took a few batches to get everything right, especially the swirling technique, but I think it's perfect now and quite simple too.
Everyone will love you!
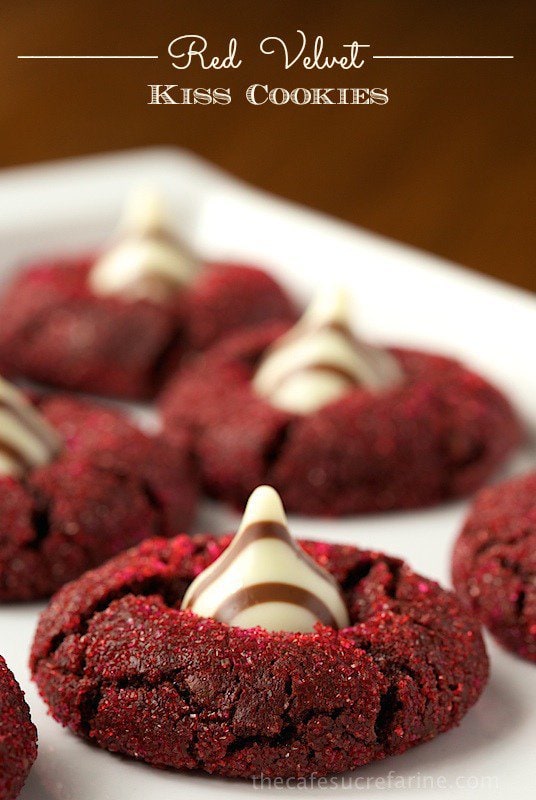
P.S. If you enjoy Red Velvet, I have a feeling you'll love these Red Velvet Kiss Cookies. They're the most fun, delicious, festive, and romantic cookies you'll ever have the pleasure of meeting!! Love cupcakes? Here's our favorite recipe for Red Velvet Cupcakes from The Hummingbird Bakery, a famous London cupcake shop.
Want to see more delicious recipes from The Café? Follow us on FACEBOOK, PINTEREST and TWITTER.
- 3 cups sugar
- ¾ cup butter
- ⅔ cup half & half*
- 1 12- ounce bag white chocolate chips 2 cups
- 1 7- ounce jar marshmallow creme**
- 1 teaspoon vanilla
- 1 cup semi-sweet chocolate chips about 6 ounces
- 3 tablespoons red food coloring I use liquid
-
Spray a 9-inch square pan lightly with cooking spray, then line it with a double thickness of foil (this will make it much easier to lift out of the pan later) with ends of foil extending over sides. Spray lightly again and wipe out any excess spray with a paper towel.
-
Place semi-sweet chocolate chips and food coloring in a heat-safe bowl. Set aside.
-
Place butter in a large microwave-safe bowl. Be sure to use a large bowl as mixture will bubble up furiously while cooking. Also make sure the bowl is made of a microwave-safe material, otherwise it will become very hot and you could burn yourself when removing it from the microwave. I use a large glass bowl. Cover with a paper towel to prevent spattering. Cook on high for 1½ minutes or until butter is melted.
-
Add sugar and half and half; mix well. Microwave on high power for 3 minutes, stir and cook another 2 minutes. Stir well. If butter seems to separate out of the mixture, don't worry, just keep stirring till it mixes back in. Scrape down sides of bowl and return to microwave. Microwave 3 more minutes, stir again, then finish with another 2½ minutes in the microwave.
-
Remove from microwave, add marshmallow creme and stir. Add white chocolate chips and vanilla. Stir until very smooth and all ingredients are well incorporated.
-
Immediately, transfer about ½ of the hot white chocolate mixture to the bowl you prepared in step 2. (The white chocolate mixture will be very hot and will melt the dark chocolate chips). Stir well with a strong handled spatula or wooden spoon until chocolate chips are completely melted and incorporated.
-
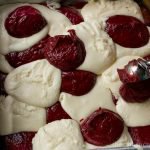
Working quickly, with two clean medium-size ice cream scoops or 2 tablespoons, plop scoops of each mixture in a random pattern into a prepared pan. [url href="https://thecafesucrefarine.com/wp-content/uploads/2014/02/WinterWhiteRedVelvetFudge-10-1.jpg"][/url]

-
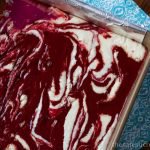
When complete, lift up pan and drop from about 1-inch above work surface. Repeat several times to remove any air bubbles. Jiggle pan to smooth surface then take a small knife, coated with a bit of butter and run the blade back and forth through the fudge to create the swirly effect. Use the blade, (like you're cutting something) not the flat part of the knife to do this. Check out the picture, see the pattern on the right? That's with the blade, on the left, I used the flat edge, not so pretty! [url href="https://thecafesucrefarine.com/wp-content/uploads/2014/02/WinterWhiteRedVelvetFudge-9.jpg"][/url]

-
Cool completely. Use foil handles to lift fudge from pan before cutting into squares.
A few notes for those of you living outside the U.S.
This recipe calls for a few ingredients that may be unfamiliar to you:
Half and half - this is just an American convenience product that many people use in their coffee. It's simply a combination of half milk and half cream (the kind you use for whipping). You could also substitute evaporated milk for this if that is available.
Marshmallow creme, also known as marshmallow fluff. If this is not available you can easily make your own.

- 3 cups sugar
- ¾ cup butter
- ⅔ cup half & half*
- 1 12- ounce bag white chocolate chips 2 cups
- 1 7- ounce jar marshmallow creme**
- 1 teaspoon vanilla
- 1 cup semi-sweet chocolate chips about 6 ounces or 1 cup
- 3 tablespoons red food coloring I use liquid
-
Spray a 9-inch square pan lightly with cooking spray, then line it with a double thickness of foil (this will make it much easier to lift out of the pan later) with ends of foil extending over sides. Spray lightly again and wipe out any excess spray with a paper towel.
-
Place semi-sweet chocolate chips and food coloring in a heat-safe bowl. Set aside.
-
Bring sugar, butter and half and half to full rolling boil in 3-qt. saucepan on medium heat, stirring constantly. Cook 4 min. or until candy thermometer reaches 234°F, stirring constantly. Remove from heat.
-
Add white chocolate chips and marshmallow creme; stir until melted. Add vanilla; mix well.
-
Immediately, transfer about ½ of this cooked white chocolate mixture to the bowl you prepared in step 2. (The white chocolate mixture will be very hot and will melt the dark chocolate chips). Stir well with a strong handled spatula or wooden spoon until chocolate chips are completely melted and incorporated.
-
Working quickly, with two clean medium-size ice cream scoops or 2 tablespoons, plop scoops of each mixture in a random pattern into a prepared pan. [url href="https://thecafesucrefarine.com/wp-content/uploads/2014/02/WinterWhiteRedVelvetFudge-10-1.jpg"][/url]
-
When complete, lift up pan and drop from about 1-inch above work surface. Repeat several times to remove any air bubbles. Jiggle pan to smooth surface then take a small knife, coated with a bit of butter and run the blade back and forth through the fudge to create the swirly effect. Use the blade, (like you're cutting something) not the flat part of the knife to do this. Check out the picture, see the pattern on the right? That's with the blade, on the left, I used the flat edge, not so pretty! [url href="https://thecafesucrefarine.com/wp-content/uploads/2014/02/WinterWhiteRedVelvetFudge-9.jpg"][/url]
-
Cool completely. Use foil handles to lift fudge from pan before cutting into squares.
A few notes for those of you living outside the U.S.
This recipe calls for a few ingredients that may be unfamiliar to you:
Half and half - this is just an American convenience product that many people use in their coffee. It's simply a combination of half milk and half cream (the kind you use for whipping). You could also substitute evaporated milk for this if that is available.
Marshmallow creme, also known as marshmallow fluff. If this is not available you can easily make your own.
Julie says
Hi! I tried this recipe tonight. The fudge was delicious (and I'm not a big fan of fudge)! It's not too rich or overly sweet. I would like to point out that if you have a high powered microwave, the amount of time you have listed to microwave the butter, half and half, and sugar combination is too long. I stopped in the middle of the last 3 minutes (didn't even do the final 2.5 minutes), because mine was boiling over the extra large bowl I used. Other than that issue, it was super easy and tasty! Thanks for sharing!
Chris Scheuer says
Thanks, Julie, it's true every microwave is different. Thanks for sharing your results!
Kim Oborne says
I tried to make this tonight with my grandson and the red velvet part came out greasy. Is this normal?
Chris Scheuer says
Hmmm,no it should not be greasy.
Victoria says
Hi! This is my absolute first time trying to make fudge. Something went horribly wrong. I let the mixture get up to 234, stirring constantly. It even went passed for minutes to get it to temp. I got the colors right, but it's gritty. 😖 Can someone tell me what I missed, please?
Thanks,
Vicky
Chris Scheuer says
Hmm, it's hard to say without me being there Victoria.
Sondra B. says
About how many pieces would I end up with?
Chris Scheuer says
Hi Sondra, that would depend on how big you cut them. If you cut them in 1-inch pieces you would get 64. I usually go about 1 1/4 inch and get abot 40 pieces.
Jim says
a 10x15 inch sheet pan, lined with parchment paper (or waxed, if on a super tight budget)
cut into 1 inch squares - 150 pieces
Jackie says
Hi! Cool recipe! I’d like to make this for my family for Christmas. How long will it last? How far in advance can I make it and does it need to be refrigerated? Thanks so much!
Chris Scheuer says
Hi Jackie, you could make this a week ahead and store it in the refrigerator or you could make it way ahead and freeze it. Just thaw at room temperature.
Towles Kintz says
Hi! I'm a little concerned about red food coloring/dye sensitivity. Could I sub beet juice, or do you think it would alter the taste too much? Thanks!
Chris Scheuer says
Hi Towles, I actually tried beet juice but it turned out terrible. For me, it's okay but if you have a food coloring sensitivity I'd try some other recipe.
Kristina says
Wow super considerate to offer options for those not living in the US! I'm in Canada and although with this recipe I should have access to the ingredients there are times I don't and it is so awesome that you have included more information about your ingredients like you have. Can't wait to try this beautiful fudge!!!
Jolie says
Will the consistency be different if I use gel or paste color? I know from baking that liquids even in small amounts can make a difference for a good outcome. Thanks
Angela says
Is it a good idea to mail this fudge as a gift??
Chris Scheuer says
It should work Angela!
patty. Niten says
Hi, when my son was in the military I mailed him some chocolate fudge. I put it in one of those tin candy boxs. I put wax paper between the layers. It was summertime. When he got it was one big candy. It had gotten too hot and he had to eat it with a spoon. His fellow sailors love it too.
Chris Scheuer says
Haha! I love the story!
kymmieC says
Does this freeze well?
Chris Scheuer says
Honestly Kymmie, it's never lasted around here long enough for me to know if you can freeze it! You might try it with a piece and go from there.
Jim says
freezes great, up to about 2 months
just let it thaw out a bit (15-30 minutes) before serving
jim says
freezes great ... up to about 2 months
just take out and thaw about 15-30 minutes before serving
Maggie says
I've made this fudge about 3 times now. It's always sticky. Took it out of the fridge this morning, cut it, put it in a bag and an hour later one cube was not discernible from the next. I wish I knew what I was doing wrong, may have to find another recipe.
Chris Scheuer says
Not sure what the problem is Maggie, we've never run across that stickiness.
Shelby says
Had this happen to me a million times before and finally last year I made a successful batched of fudge. It is the temperature of your candy when cooking it. You are not hitting the right temperature to temper your chocolate. I can never make fudge with the microwave instructions and found I have to use the stove top method and a candy thermometer. Hope you get it to work out for you.
Sally Knepp says
I made this and it tasted great. However, it came out looking like raw stew meat. We called it Lady Gaga Meat Fudge. LOL We thought it would be wonderful for Halloween! Especially if you take some chocolate sauce, add red food color and drizzle it over the fudge. Perfect for a kids party. I'm making it again today in different colors.
Chris Scheuer says
Haha, I think you might have swirled it a bit too much 🙂
Cookie says
Semi sweet chocolate was a failure. If I ever try to make this again I will not use the chocolate because it wasn't a bright right like the picture. Mine looks so horrible that I refuse to take it to a work party.
Chris Scheuer says
So sad, I'm not sure why you didn't get the red velvet color. It should be a deep, deep red. Did you use enough of the red food color? Except for red velvet, I never use that much food coloring but you have to for this.
ronni says
I followed the directions. It's an hour later and it's still very soft. (That's what she said.) No, but really. It's still soft. I currently have it in the freezer.
Chris Scheuer says
Thanks Ronni, for your comment. It does have to cool completely before it's ready for prime time!
Chris Scheuer says
I would probably double the recipe for a 9x13-inch pan or at least 1 1/2 times it. Yes, I think it would be too thin otherwise.
Elena says
Good morning, Chris.
I'm from Ukraine.
Сould you please specify the quantity oh white chocolate chips is one cup + 12 ounces?
Chris Scheuer says
Thanks and welcome Elena! I added that information to the recipe! Stop by the Café anytime!
Cheyann says
How much does this make?
Chris Scheuer says
Hi Cheyann, it depends how big you cut the pieces. If you cut 1" pieces, it would yield 64 squares.
renee says
I just made them. They're cooling right now but the mixes were not thick like in the photo. I'm not sure what happened :-(. It was runny. I'm cooling it anyway to see what the end result will be...
Chris Scheuer says
Renee, it will probably firm up just fine, mine got thicker because we were taking pictures of it, and, as it cools it gets thicker.
Karen Nearhood says
I made this for Christmas and it was wonderful!!Also a very pretty candy for holidays.I will definitely make it again.
Chris Scheuer says
Thanks so much for your feedback Karen! Glad you enjoyed it!
Tasneem says
Where does the red colour come in in the method? Can't se it, lol
Tasneem says
Ok found it, silly me!
cindy says
Mine turned out ugly like brown & white marble. Could not now or never have bee mm able to make dark brown turn red. Whats the secret?
Chris Scheuer says
Not sure why yours didn't turn the traditional red velvet color. Did you use enough of the red food coloring? I don't really like using a lot of red food color but with this recipe, if you don't use the full amount, the color will be quite dull.
Terri says
Oh my so easy and so good. Will make several batches to give as presents. Thank you so much! Merry Christmas!
Lynn Collins says
I used the microwave method. My fudge is grainy. Is it supposed to be? How do I get it creamier? Thank you very much.
Chris Scheuer says
So sorry Lynn, I think because microwaves are so different the result can vary. I personally used the microwave and have had reports from others who have had great success but the stovetop method is probably more consistent.
Lori says
The Microwave recipe for this recipe was extremely disappointing! Being an experienced candy maker I knew better, but once in awhile you hope for a short cut? This recipe isn't it! The microwave recipe came out super grainy! I am convinced you just can't make good, smooth, fudge in a microwave. I will try this again, however i'll use the stove top method.
Chris Scheuer says
Hi Lori, I actually had good result with this in the microwave as have others but I do believe the stovetop method is more consistent.
Teresa says
I made the microwave version last night for our Christmas spread at work! Oh the fudge turned out so pretty and everyone loved it--even people who don't usually eat sugary things!!
reyhane says
Very nice