This post may contain affiliate links. For more information, see our privacy policy.
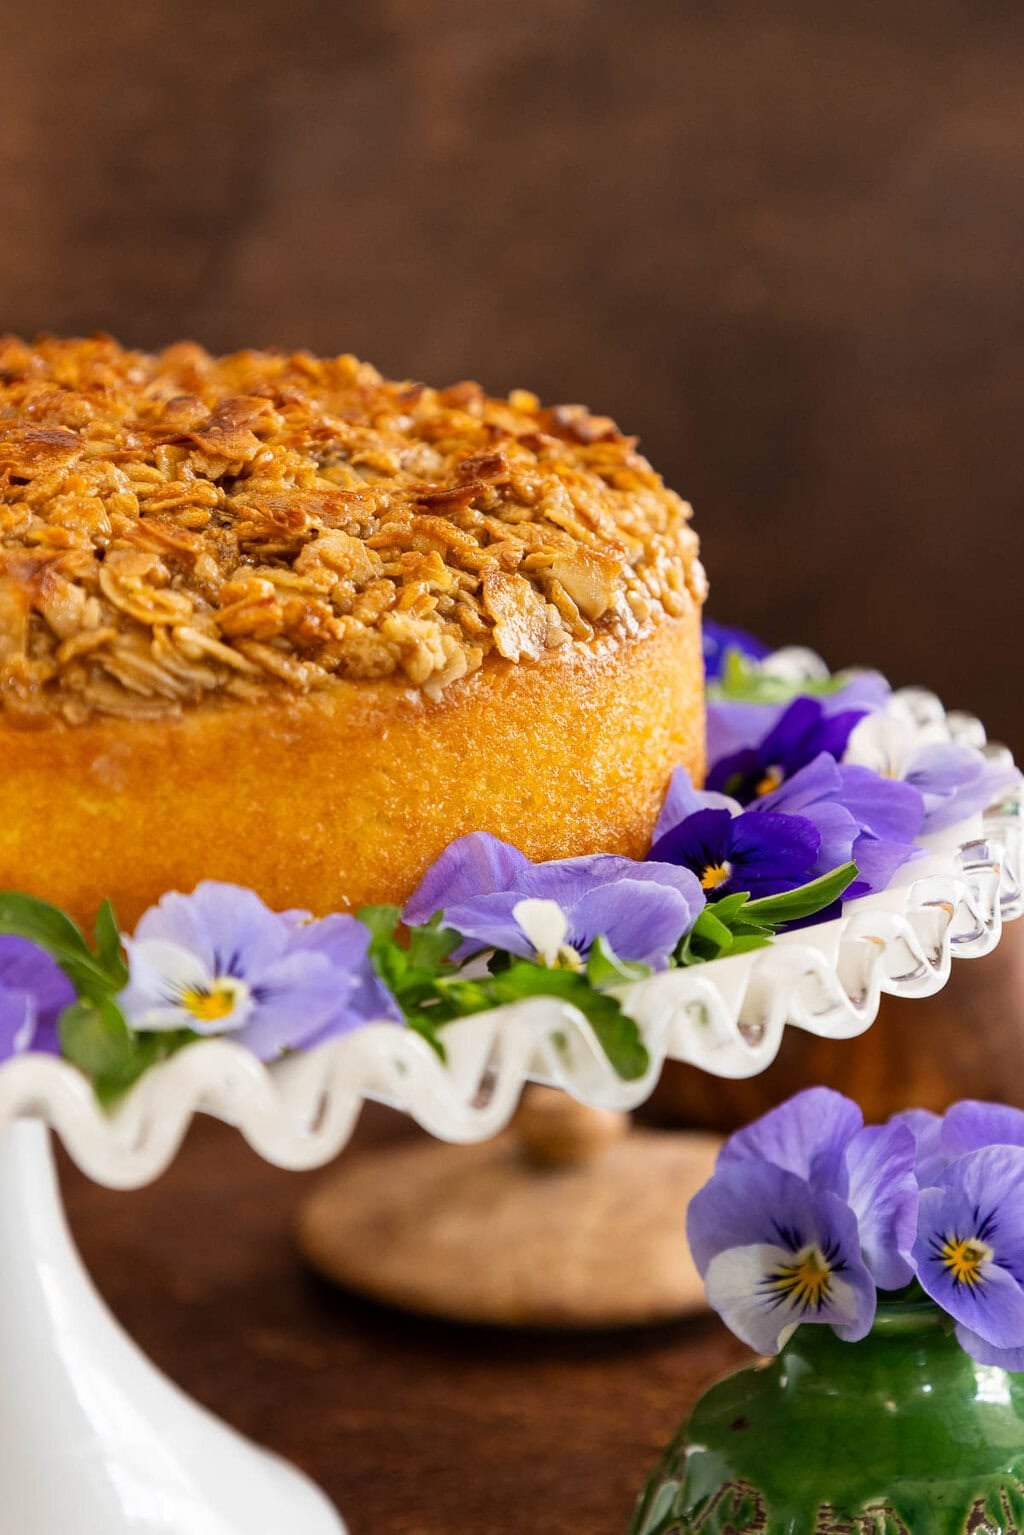
This one-bowl, no-mixer Lazy Daisy Cake (aka Danish Drømmekage) is moist, tender and crazy delicious! The crisp caramel-coconut broiled topping is truly the crowning glory!
I have a dear friend who's celebrating a milestone birthday this month. She recently returned from visiting family in Denmark so I thought it would be fun to make her a birthday cake that would reflect her Danish heritage. Here in The States, this delicious cake is called Lazy Daisy Cake. In Denmark, it goes by, Drømmekage (translated; Dream Cake).

Lazy Daisy Cake or Drømmekage (Danish Dream Cake)?
Who copied who? Did Lazy Daisy Cake originate in Denmark or the other way around? The more I read about it, the more it seems that it's like the "chicken or the egg" question.
According to Epicureous, Drømmekage (Danish Dream Cake) originated in Brovst, a village in Jutland (Denmark). The article reports; "In 1965 a young girl baked her grandmother's secret family recipe in a competition and won, and the cake has been a favorite of Danes ever since."
The history of Lazy Daisy Cake here in the U.S. is not as clear, but according to The Food Historian, "It was a 1920's era staple". The recipe has been included in many cookbooks over the years, including Marion Cunningham's popular book, Lost Recipes.
Call it which ever one suits your fancy. Lazy Daisy cake is great but, if you're Danish or just feeling a little fancy, go ahead and call it Drømmekage (pronounced like this) - it truly is a "dream" cake!

An easy, nostalgic recipe
This Lazy Daisy Cake feels like it's straight out of grandma's kitchen and, like most old-fashioned cakes, it couldn't be easier to put together. One bowl, a whisk, and a few simple ingredients are all you need to create the tender, buttery yellow cake base. No mixer is required, which makes this a perfect treat for a last-minute sweet craving or a low-key weekend bake.
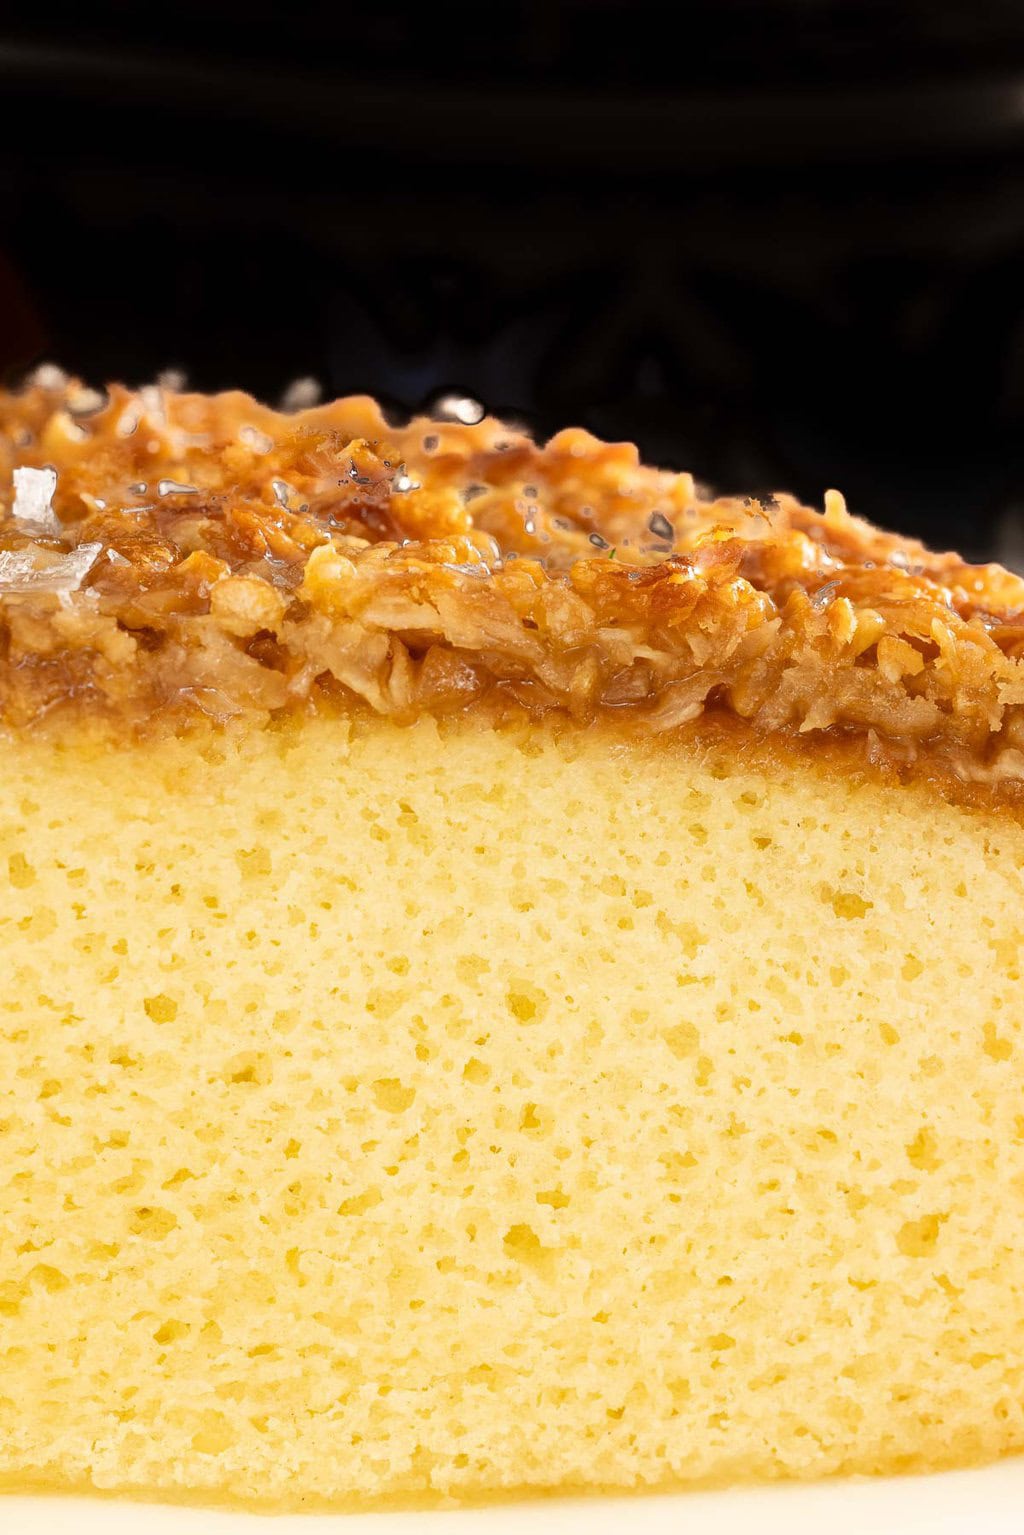
A peek inside
As you can see from the images above, this Lazy Daisy Cake is pretty as a picture. But the true test is always what's inside, right? The crumb of this cake is tender, light and infused with delicious vanilla flavor. Check it out:
The crowning glory
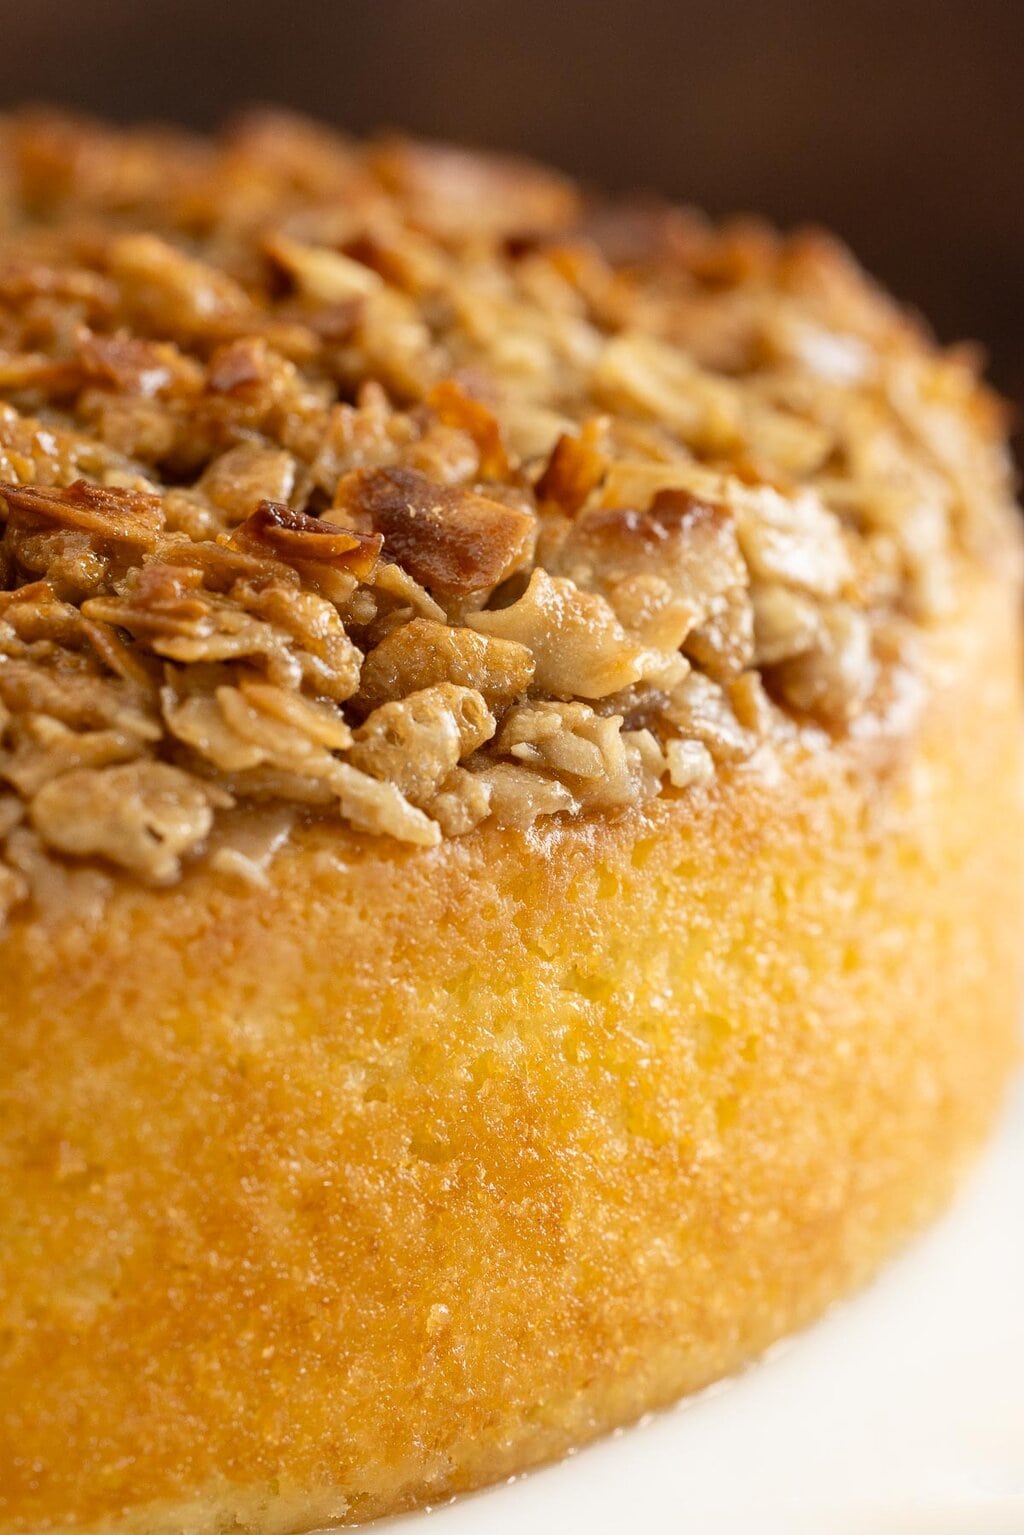
But what really makes this cake shine is the magical topping. Once the cake is baked, it gets a warm coconut-caramel topping that's broiled until golden and bubbly.
It's crisp but also chewy and forms an irresistibly delicious layer over the soft, moist cake beneath.
A secret ingredient
If you're a Café follower, you know I like to add my own little twist to traditional recipes. This Lazy Daisy Cake is no exception.
I include a generous scoop of crispy rice cereal (I use Rice Krispies) in the classic Lazy Daisy broiled coconut topping. The traditional ingredient list calls for butter, brown sugar, milk and coconut. The rice cereal lightens the topping, gives it a little extra crunch and a lovely, intriguing presentation.
Oh, and did I mention how easy the topping is? It comes together in the microwave in just one bowl (I just wash out the cake batter bowl while the cake bakes.) There's no stovetop stirring, no splatter, no stress.
An optional glaze (but so pretty and delicious!)
I like to brush the sides of the cake with a simple glaze to seal in the moisture. The glaze also gives the edges of the cake a beautiful shine. This glaze is optional - the cake will be delicious without it - but it comes together quickly with just two ingredients.

You might be wondering...
Yes! This cake stays moist and tender for a day or two when stored in an airtight container. In fact, the flavors get even better the next day. Just make sure the topping is fully cooled before storing.
No need! It's best stored at room temperature for up to 2 days. If you want to keep it longer, pop it in the fridge and gently warm slices in the microwave before serving.
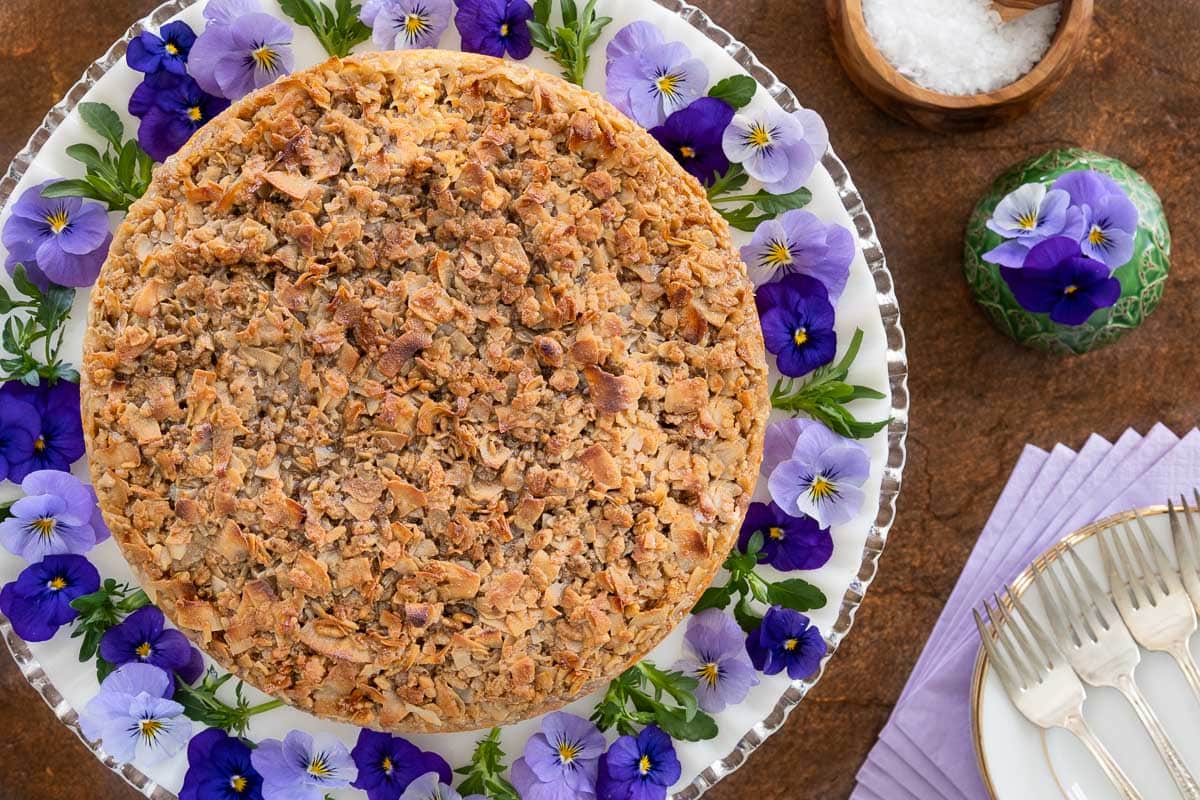
There are several options. You can use shredded or flake coconut. I've used both with good success. For the pictures in this post, I used the larger, flake coconut.
I usually use unsweetened coconut but sweetened also works. Sweetened coconut will make the topping slightly more chewy and rich-just keep an eye on it when broiling, as it may brown faster.
Yes! This cake freezes beautifully. Let it cool completely, then freeze it for an hour, unwrapped. Once the cake is frozen, you can wrap it in plastic wrap or store it in a ziplock bag.
You can also wrap individual slices.
Freeze for up to 2 months. Thaw at room temp or warm gently before serving.
You can use 2% milk, but half and half or whole milk add the richest flavor and texture.
You can also sub buttermilk for the half and half (or milk).
This recipe also works well in an 9-inch square pan or even a 9-inch springform pan. Keep in mind the baking time may vary slightly.
How to serve this Lazy Daisy Cake
- Serve it at room temperature or slightly warmed with a scoop of vanilla ice cream or a dollop of freshly whipped cream.
- Drizzle it with a bit of this Microwave Caramel Sauce or this Ridiculously Easy Raspberry Coulis.
- It's also a fabulous breakfast treat to enjoy with your morning coffee or for a brunch get together.
However you decide to serve this easy, one-bowl cake, it's sure to win hearts! It's humble and fancy, all in one. It's also fabulously delicious. Enjoy!
Café Tips for making this Lazy Daisy Cake
- It's important to prep that pan (as directed in the recipe) with baking spray and a circle of parchment paper. This will allow the cake to release easily from the pan.
- Baking spray is different from non-stick cooking spray in that it contains both shortening (or oil) and flour. It's designed to prevent baked goods from stick to the pan during baking. I use Baker's Joy or Pam baking spray.
- Most cakes will dome a bit in the center. This occurs because the outer edges of the cake bake and set before the cake is fully risen. To prevent this you can use cake strips which are moistened with water, then wrapped around the pan. I use these velcro cake strips which attach easily and can be used over and over. I've had mine for years and the have held up well. You can take the strips off after the first 20 minutes of baking which allows the edges of the cake to brown nicely.
- The coconut/brown sugartopping is added to this cake after it's baked and cooled slightly. After spreading the coconut toping over the cake, it's broiled until bubbly and golden. Watch the cake carefully when it's under the broiler as it can go from beautifully golden to blackened and charred quickly - so sad!
- No need to change the height of the oven rack when broiling the topping. It will brown nicely in 1-2 minutes on the center shelf (same shelf the cake is baked on.)
Thought for the day:
The steadfast love of the Lord never ceases;
His mercies never come to an end;
they are new every morning;
great is Your faithfulness.
Lamentations 3:22-23
What we've been listening to for inspiration:

If you enjoy this recipe, please come back and leave a star rating and review! It's so helpful to other readers to hear your results, adaptations and ideas for variations.
Scroll Down for the Recipe - or Save It to Your Inbox
We'll email you the recipe so it's easy to save, print, or share.

Lazy Daisy Cake (AKA Danish Dream Cake Drømmekage)
Ingredients
For the cake batter:
- ⅔ cup half and half or whole milk
- 6 tablespoons butter, I used salted butter
- 3 large eggs
- 1 cup granulated sugar
- 2 teaspoons baking powder
- ½ teaspoon kosher salt
- 1 teaspoon vanilla extract
- 1 ¾ cups all-purpose flour
For the topping
- 4 tablespoons butter, I use salted butter
- ⅔ cup brown sugar, light or dark, I like to use dark
- ¼ cup half and half or whole milk
- 1 ½ cups dried flaked or shredded coconut, I use unsweetened but sweetened will also work
- 1 cup crisp rice cereal, I use Rice Krispies
- flaky sea salt, for garnish
For the optional glaze:
- 6 tablespoons powdered sugar
- 2 tablespoons water
Instructions
For the prep:
- Preheat the oven to 350°F. with a rack in the center of the oven..
- Spray a 9-inch cake pan (with 2-inch sides) with baking spray. Line with a circle of parchment paper. You can also use a 9-inch springform pan or a 9-inch square pan. Set aside
- Combine the half and half (or milk) and butter in a microwave-safe bowl. Microwave on high power for 60-90 seconds or just until the butter is melted. Set aside.
For the cake batter:
- Whisk the eggs in a medium-large bowl until well combined.
- Add the sugar and whisk for 1 minute (don't cheat).
- Add the baking powder and salt and whisk until combined then add the vanilla and whisk well one more time.
- Add the flour and whisk just until smooth.
- Lastly, add the warm butter mixture and whisk until incorporated.
- Transfer the batter to the prepared pan and bake for 35-45 minutes or until the internal temperature of the cake is 200˚F when checked with an instant thermometer. You can also use the toothpick test but the thermometer test is much more accurate and will ensure that the cake is perfectly done.
- Transfer the cake to a wire rack and let the cake to cool in the pan for 10 minutes before adding the coconut topping.
For the topping:
- While the cake is cooling, make the topping.
- Place the butter in a medium-size microwave-safe bowl and microwave on high power for 60-90 seconds or until melted.
- Add the brown sugar and milk and stir to combine. Microwave on high for another two minutes, stirring halfway through. The sugar should be mostly dissolved.
- Add the coconut and rice cereal and stir until nicely combined.
- Transfer the coconut mixture to the center of the cake then carefully spread all the way to the edges of the cake but don't let it go down the sides.
- Toward the end of the 10 minute cooling time, preheat the broiler to medium, leaving the rack in the center of the oven.
- Place the cake back in the oven and broil for 1-3 minutes, just until the coconut mixture is bubbly and starting to turn golden.
- Remove from the oven and allow the cake to cool completely in the pan.
- Once the cake is cooled, run a thin-bladed knife around the edges of the pan to make sure it will easily release. Place a dinner plate on top of the cake and flip it upside down to release it from the pan. Place another plate (or a serving platter) on top of the inverted cake and flip one more time so the coconut layer is on the top.
- If using the optional glaze, turn the cake back onto a cooling rack when flipping the second time. Brush with the optional glaze or just serve and enjoy!
- Sprinkle with flaky sea salt before serving, if desired
For the optional glaze: (This glaze seals in the moistue and adds a pretty shine to the edges of the cake.)
- Combine the powdered sugar and water in a small bowl and stir until combined and lump-free. If the lumps are stubborn, you can microwave the mixture for2 0-30 seconds.
- With the cake on a cooling rack set on top of a piece of foil or parchment paper (for easy cleanup), brush the glaze over the edges of the cake. Excess glaze will drip onto the foil (or parchment).
- Allow the glaze to dry before serving.
For storage:
- Store the cake, covered, at room temperature for up to 3 days. It can also be frozen for 4-6 weeks. (I like to freeze it uncovered for an hour then transfer it to a ziplock bag.)
Notes
Nutrition
Shop Our Café Loves
We’ve gathered our favorite kitchen tools, tableware, and entertaining treasures in one place, the Café Loves store. It’s a wonderful spot to find something special for yourself or the cooks and hosts you love!


How long has this cake “been around?” My mother was making Lazy Daisy way back in the 1950’s. My grandfather was from Denmark. It is the same cake!
Hi Mary Ann, that's so cool! Chris talks a little bit about this in the post!
It says something that I knew - with zero doubt - that I could make a cake ... what would be the relevant equivalent of "sight unseen"? maybe taste uneaten? ... anyway, that I could follow the recipe for a heretofore unknown cake, absolutely knowing for a fact that it was sure to be more than good enough to bring to an Easter dinner. And was it ever! Such a hit. In was so good, in fact, that I made it again today just for fun, and to play! This time I added *beaucoup* d'épices, Myers rum in the batter and in a butter-rum soak/glaze, used half white and half dark brown sugar, substituted in 1/4 cup of hazelnut flour (because I had it left over from something so why not?), rubbed the zest of an orange into the white sugar, and used half butter, half blood orange infused olive oil. A *very* different cake in many ways, but clearly in the same family - like a third cousin, twice removed, once by force, or something. I'd eat either version - or both - again any time. Thank you, Chris, you baking guru!
Oh, yum! I wish I could have tasted your second version, it sounds deeevine! Thanks for sharing your review, John!
I haven't tried this yet but will because it sounds simply delicious! A question - have you ever made this with chopped nuts in similar size to the coconut vs Rice Krispy cereal?
Hi Leslie, chopped nuts would be wonderful!
Hi, I recently joined your website and like all of your recipes. I would like to make this Lazy cake. My friend does not like coconut. What could I use instead? Or should I just leave it out? I know this is an old recipe and I used to have it, but lost it, so lovely to have it again.
Thank you.
Hi Renee, thanks for your kind words. You could use cornflakes or chopped nuts like pecans or walnuts.
Is there any difference between baking this cake in a regular 9 inch cake pan, or in a 9” springform pan?
Thanks!
Hi Donna Jo, you could use a springform pan. The only problem is that this is a thin batter and if your pan is not leakproof, that could be an issue.
Chris, thank you for another delicious looking recipe. The rice cereal is in the ingredient list but doesn't show up on the printout.
Hi Cathy, I have cleared my cache so it should be there now. Just refresh the page.
Hi Chris,
Thank you for your wonderful site! Clarification question about the warm butter mixture- do we warm the butter and half & half together until the butter is melted and then ad this in step 5?
Thanks,
Mary
In the recipe for step 5 you reference adding the warm butter mixture, but there is no directions on what this is. Is the butter supposed to be melted and mixed with the milk? Is the milk supposed to be warmed and the butter added to that? I looked at the tips and read thru the post but I don't see anything that explains this.
Hi Kathi, yes the butter and milk are warmed in the microwave. I have clarified that in the recipe. Thanks!
Hi Mary, the butter and milk are warmed in the microwave. I have clarified that in the prep steps of the recipe. Thanks!
The amount of rice cereal is missing from the recipe. Can you please add this? Thank you.
Hi Jennifer, it's there now, just refresh your page. Thanks!
During the Depression, our mom used cornflakes in place of coconut(it was during WWII actually.
I bet that would be delicious too! Thanks for sharing that interesting little twist, Nadine!
Where is "RICE CEREAL" LISTED INN THE INGREDIENTS???