This post may contain affiliate links. For more information, see our privacy policy.
Combine a crisp, buttery, French shortbread cookie with a double burst of bright lemon and you've got a heavenly sweet treat! The fact that these Lemon-Glazed French Sable Cookies come together easily in one bowl (no mixer needed!) seals the deal!
I was intrigued by a recipe for French Sable Cookies with a lemon glaze that came through my inbox recently. The email was from King Arthur and, being a sucker for all things lemon, I quickly clicked on the link. The cookies looked delicious, but when I read the reviews I was disappointed as many of the comments described the recipe as fussy and the dough sticky and difficult to work with.

That didn't deter me though as I already had a wonderful, no-fail French Sable Cookie (pictured below) recipe.

It was easy to adapt the recipe to include lots of flavorful lemon zest and a simple lemon glaze. I'm super happy to introduce you to these DELICIOUS Lemon-Glazed French Sable Cookies.

What are French Sable Cookies?
Sables (aka French Butter Cookies or Breton Biscuits) are the French equivalent of shortbread cookies. Like classic British Isle shortbread cookies, the ingredient list is short and sweet. All of the recipes start with butter, sugar and flour. Variations can include powdered sugar, brown sugar, corn flour and/or corn starch.
The main difference between classic Scottish or Irish shortbread and French sables is eggs. Sable recipes include eggs or, as in this recipe, egg yolks. The egg adds a rich flavor and delicate texture. Sable means sand or sandy in French and refers to the crumbly, melt-in-your-mouth texture of these delicious cookies.

Dip, Drip and Flip
Back in 2017, while making Christmas cookies, I came up with a super easy decorating technique. It's gone in a bunch of different directions over the years, but the basic method for all of the variations is what I call the Dip, Drip and Flip technique. These French Sable Cookies employ the same easy technique for the lemon glaze. My daughter-in-law, Lindsay created a video demonstrating how easy it is to dip, drip and flip! Check it out:
So versatile!
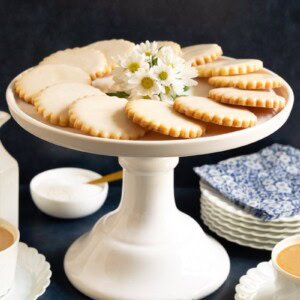
These French Sable Cookies are wonderful to serve as a sweet treat with a tall glass of milk. They're also perfect for tea parties, and coffee breaks. They make a lovely dessert on their own or paired with ice cream.

For an easy, make-ahead dessert, I love to serve vanilla ice cream in pretty bowls drizzled with this jewel-toned Raspberry Coulis (pictured below) and a few of these buttery lemon cookies - DELISH!

Give them away!
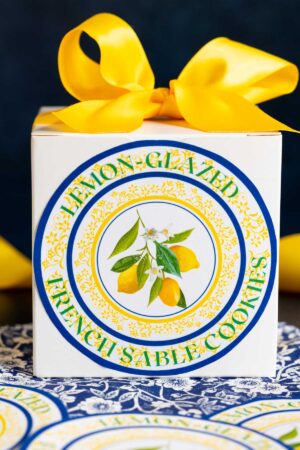
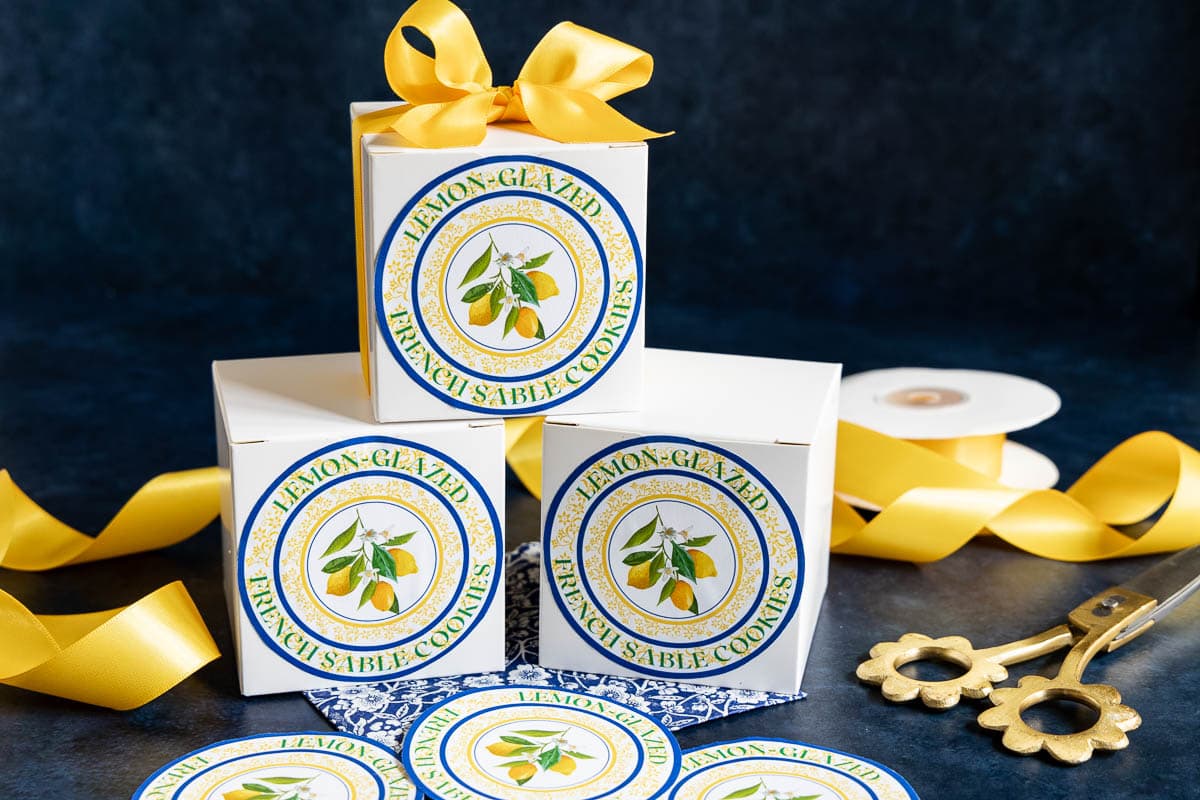
Another fabulous thing to do with these French Sable Cookies is to gift them to family, friends, co-workers, new or old neighbors, teachers - really anyone you want to give a little TLC. To make gifting even more special, we've created a pretty label to pizzazz up your gifts. We're happy to share a PDF for these free printable labels with you.
Get your free printable labels...
Don't wait, you probably have everything you need to make a batch of these Lemon-Glazed French Sable Cookies. The aromas wafting from your kitchen will be amazing... like a fine little Parisian patisserie. But the best part will be the smiles on the faces of family and friends as they take a bite of these crisp, buttery, melt-in-your-mouth delights!

Café Tips for making the French Sable Cookies
- Because there's no mixer used, the butter needs to be very soft when mixing up these French Butter Cookies. Either let the butter come to room temperature by letting it sit out overnight or you can use the microwave. A short stint in the microwave on power level 10 (10%) works like magic to soften butter. You'll need to experiment a bit with your microwave though, as they're all different. Start with 20 or 30-second increments at power level 10 until you learn how long your microwave will take to get the butter nice and soft, but not melted.
- I like to use a good-quality butter for these French Sable Cookies since the ingredient list is short and each one is important. My favorite butters are Land O' Lakes and Kerry Gold but there are lots of other good quality brands of butter. Also, I'm a bit of a rebel in the culinary world as I have always used salted butter. I know that unsalted butter is the choice by many "experts" but I totally agree with Christopher Kimball (founder of Cook's Illustrated and America's Test Kitchen and more recently, Milk Street) in this article regarding salted vs unsalted butter.
- You might wonder why these cookies need to be chilled for 30 minutes before baking. The chilling helps them keep their shape in the hot oven. Also, chilling the cookies, uncovered, helps them to dry out a bit which is a good thing with shortbread, as it intensifies the flavor. So it's a win-win!
- A small amount of corn starch in these Lemon-Glazed French Sable Cookies also helps the cookies to keep a nice shape in the oven and adds to the crisp texture. (It's optional - so if you don't have corn starch, don't go out and buy it just for this recipe.)
- The cookies will be slightly puffed after being in the oven for a while. Right when they come out of the oven, you can smooth them out by pushing gently on the tops with a metal spatula.
- I like to use a fluted or scalloped cookie cutter for these French Sable Cookies but any shape cutter will work.
- I used to be TERRIBLE at rolling cookie dough for cut-out cookies. I could NEVER get it even. Then, a few years ago, I discovered a wonderful rolling pin that makes me look like a pro. It has removable discs in 4 different sizes that make it simple to roll to an even thickness. Check out the pictures of these cookies above in the post. No one would know that, on my own, I would need remedial rolling lessons!

- A few tips on rolling and cutting out cookies:
- Keep your work surface and rolling pin dusted with flour.
- I also like to rub the cutting edge of my cookie cutter in a little flour in between each cookie.
- Press fairly firmly when cutting out the cookies, but don't twist the cookie cutter as the shape will get distorted.
- If you don't have room in your refrigerator to chill the cookies on two sheet pans, just transfer all of them to one pan after cutting. Then later, once they're chilled, you can divide them between the two pans for baking.
- It's fine to reroll the scraps and cut more cookies.
Thought for the day:
So we fix our eyes not on what is seen,
but on what is unseen,
since what is seen is temporary,
but what is unseen is eternal.
2 Corinthians 4:18
What we're listening to for inspiration:

If you enjoy this recipe, please come back and leave a star rating and review! It's so helpful to other readers to hear your results, adaptations, and ideas for variations.
Scroll Down for the Recipe - or Save It to Your Inbox
We'll email you the recipe so it's easy to save, print, or share.
Lemon-Glazed French Sable Cookies
Ingredients
For the cookies:
- 1 cup very soft butter, I use salted butter
- ¼ cup granulated sugar
- ½ cup powdered sugar
- 2 egg yolks from 2 large eggs
- 1 teaspoon vanilla extract
- finely grated zest from 2 large lemons
- 2 cups plus 2 tablespoons all-purpose flour, Or you can use 2 cups of flour and 2 tablespoons of corn starch. I like the cornstarch as it gives a little extra crispness.
For the glaze:
- 2 cups powdered sugar
- 3 tablespoons fresh lemon juice
- ½ teaspoon vanilla extract
- 1-2 tablespoons half and half
Instructions
For the cookies:
- Preheat the oven to 350˚F. (177˚C.) Line two baking sheets with parchment paper. Set aside.
- In a medium size bowl, combine the soft butter and sugar. Stir until smooth and well combined.
- Add the egg yolks, vanilla extract and lemon zest. Stir to combine. Add the flour and stir until well incorporated and the dough starts to come together. The mixture will seem crumbly at first. Just keep stirring until it comes together.
- Sprinkle a work surface with flour. Have some extra flour on the side in a small cup.
- Turn the dough over several times to coat lightly with the flour then divide the dough in two and cover one half with a piece of plastic wrap.
- Keeping the surface and your rolling pin lightly dusted with flour at all times, roll out the dough to the desired thickness. I like mine about a ¼ thick for thinner cookies and closer to ⅜ for thicker ones. You can go thinner or thicker it's just important to keep the surface underneath the dough lightly floured as you roll. (I also like to dip my cookie cutter in flour before cutting each cookie to keep the dough from sticking to the cutter.)
- Use a cutter of your choice (I used a scalloped 2.5-inch cutter) to cut out the cookies, transferring them to one of the prepared sheet pans as you go. Space the cookies 2 inches apart.
- Bring the dough scraps together then roll out more cookies until the dough is used up. Repeat with second ball of dough. Chill the cookies in the refrigerator for 30 minutes before baking.
- Bake the cookies for 12-16 minutes or until light golden brown. If the cookies have puffed a bit or have some little bubbles, you can flatten them at this point with the back of a flat metal spatula. Transfer the cookies to a wire cooling rack to cool completely.
For the glaze:
- Combine powdered sugar, lemon juice, 1 tablespoon half and half and vanilla extract in a medium-size bowl. Mix until smooth. The glaze should be fairly thick, but pourable. Add a little more half and half if too thick. Add more powdered sugar if it's too thin. (See picture above in the post.)
- Transfer the glaze to a small shallow bowl (a little larger than your cookies). Slowly stir the glaze to release and air bubbles.
- Holding onto the edges of one cookie, dip the top surface into the glaze, being sure all of the surface touches the glaze. Pull cookie straight up out of the glaze and allow excess glaze to drip into the bowl for about 15-20 seconds. (You can gently shake the cookie back and forth and up and down to get it to drip a little faster.) Then quickly flip the cookie to the right side up and give it a gentle jiggle to allow the glaze to flow evenly over the surface. If the glaze drips over the edge of the cookie, you didn't let it drip quite long enough.
- Repeat the dip, drip and flip technique with the remaining cookies. Place cookies on a cooling rack and allow the glaze to dry for 20-30 minutes. If you want to stack the cookies in a storage container or box for gifting, you'll need to let the glaze dry for at least 8 hours. I like to let them sit out overnight before stacking.
- Store in an airtight container. These cookies actually keep well for several weeks once the glaze is set and dry.
- (You'll have a fair amount more glaze than you need, however, to the dip, drip and flip technique properly, you need this amount. You can use it for something else, if desired but it will probably end up with some crumbs in it.)
Notes
Nutrition
Shop Our Café Loves
We’ve gathered our favorite kitchen tools, tableware, and entertaining treasures in one place, the Café Loves store. It’s a wonderful spot to find something special for yourself or the cooks and hosts you love!


How do you get four large yolks from 2 large eggs?? hmmm lol
Hi Brenda, I'm not sure what you're asking. The recipe calls for 2 yolks from 2 large eggs.
Lovely recipe-cookies came out perfect. Please send labels for these cookies-they would make a great gift. Thank you
Hi Andrea, Thanks for the great review and your kind comments! So glad to hear how well this recipe turned out for you. We've implemented a new system for labels, so all you need to do is scroll up to the box that says "Get your free printable labels", fill in your name and email address, and the labels will be automatically sent to your inbox. Enjoy!
'labels please!
Hi Ann Marie, We've implemented a new system for labels, so all you need to do is scroll up to the box that says "Get your free printable labels", fill in your name and email address, and the labels will be automatically sent to your inbox. Enjoy!
I am having trouble with all of your labels. I use an IPad so perhaps that is the trouble but there is no box to fill in a request
Hi Trish, Thanks for letting us know about the issue you're having - that sounds frustrating! We tested it on our end using iPads and the boxes are showing up, so it may just be a browser/loading issue. Sometimes refreshing the page, trying a different browser, or turning off ad blockers helps. If it still isn’t working, just let us know which labels you’re trying to access and we’ll help get them to you!
Hello Chris,
I would love to have the gift labels for the above cookies.
Thanks,
Linda P. Myers
Hi Linda, We've implemented a new system for labels, so all you need to do is scroll up to the box that says "Get your free printable labels", fill in your name and email address, and the labels will be automatically sent to your inbox. Enjoy!
Hello…..where can I get the labels? Thank you
Hi Cheryl, we will email them to you.
I’ve been making these awesome cookies for a few years now! They are the best.. I always bring them to my mom’s senior facility where they are over the moon happy with these cookies. Thank you…..Cheryl
Awesome! Thank you for the review, Cheryl!
How do I get the cute labels?
Hi Nancy, I'll email them to you now!
Love this recipe! I’ve been making these for a few years now and they always get rave reviews and special requests for more! Therefore, can you please send the details so I can print the pretty labels? Thank you for this wonderful recipe!
Thanks, Denise! We are happy to send the labels!
May I please have the labels to these cookies? Thank you!
Sure, Judy!
Please send me the PDF for the Glazed French Sable Cookies. They look delicious!
Sure, Barbee!
I love shortbread and lemon, so this recipe is a must try! Can't wait to bake them. The labels are adorable, please send me the link!
Sure, Miriam!
could I please have labels
Sure, Diane!
I haven't tried the cookies yet but just looking at the ingredients I know they will be wonderful! Love all your recipes! Please send me the lemon glazed sable cookie labels. Thank you for your generous giving of recipes!
Sending them your way, Kathy!
Hi, It’s hard for me to combine ingredients by hand due to arthritis. Is there any reason why I couldn’t use a mixer? Thanks.
Hi Karen, it's fine to use a mixer! Just mix until the ingredients are blended so the dough doesn't get tough.
I can't wait to make these cookies! I lived in France and loved all of the pastries, especially the mille feuilles..please send me the information on the labels. I am looking forward to your other recipes and will share them with my daughter who does meal prep for many clients. The best part of reading through this recipe was when I read the Bible Verse of the day that you had chosen. I will cherish that verse; I needed to hear those words, especially today. Thank you so very much.
Hi Linda, so nice to here from you! How fun to have lived in France - sometimes I think I might have been born on the wrong continent as I love France and Europe so much. Hope you enjoy the cookies, I'll send the labels now.
And I love that God used that verse to speak to you - His Word never comes back void!
I’m a lemon lover. Please send the labels. Thank you.
Sending them your way, Judith!
May I please have the labels for these cookies?
Sure, Judy!
These look delish!
May I have the labels please?
Thank You!
Dianne
Thanks, Dianne! Sending them your way.
This cookies look absolutely delicious.
I would live the labels, thank you.
Sending them your way, Monica!
Please send me the labels of these delicious cookies thankyou
Sure, Lesley!
I love everything lemon, and I'm sure I will love these, too.
May I have the beautiful labels as well.
Sure, DoLee!
Sign me up for the labels please! Thanks.
Sure, Liz!
May I please have the labels?
Thank you!
Cindy
Sure, Cindy!
Labels please! These cookies look amazing!
Thanks, Laurie! Sending them your way.
May I have the labels please? Thank you!
Sure, Dotti!
where did you get the pretty boxes or are they your pretty labels can you send the labels then i can get boxes and ribbon thank you
Hi Erika, we will send you all the info. Enjoy!
So tasty!! 🍋🍋
May I have the labels please?
Sure, Brigitte!
Big thanks to Lindsay for the dip, drip and flip video - good job, great help!
Jane
Thanks, Jane! So glad it was helpful!
Looking forward to making these lucious cookies.
Please send me those gorgeous labels!
Also, where did you get those boxes from? I would love to order some.
Thank you so much. Many blessings
Jane
Hi Jane, we will send you all the info!
Please send the labels!!
Please send the labels!! What a great hostess gift.
Sure, Tammy!
Oh, what lovely cookies. I have the boxes and the ribbon from another one of your wonderful projects. I only need the label, and I am good to go. Thank you again, love your site!
Best,
Sandra Lee
That's great, Sandra! Sending them now.
I would love to have your labels for lemon glazed french sable cookies. I plan on giving these to a friend who loves all things lemon. Thank you
Sending them your way, Susan!
I too would enjoy having the link to the labels!
Sending them your way, Susan!
May I ask you for the Labels please
Sure, Dee!
Lemon is my favorite flavor and lemon cookies tickle my sweet tooth. I will look forward to baking these and giving them to friends and family. May I have your lovely labels to adorn the boxes that I will gift them in. Thank you so much
Sure, Carol!
Thank you for the delicious-looking recipe! I am planning to give them a try with some fresh lemons given to me by a friend.
Also, I would love the labels, if you are still sending them out. They are beautiful!
Sending them your way, Meredith!
Had this cookie tonight at a friend's home and could not believe how delicious they were....and the texture was awesome!! I plan on making them tomorrow....i would LOVE stickers if you have any left as i know it has been a while since you printed this recipe on the Internet.
Thank you for making me and my stomach smile!!
Happy Holidays!!
Diana from New York
That's great, Diana! Sending the labels your way.
Loved!!!! Loved!!!!! These cookies!!!
Best lemon cookie!!!!!
Please send link for labels, boxes and ribbon
Thank you
Thanks, Barbara! We will send all that info.
I love French Sable Cookies. Thanks so much for sharing this recipe. I can’t wait to try making them next week. I would love the stickers if they’re still available. Wendy
Sending them your way, Wendy!
I can't wait to try these cookies. And I appreciate the info on the rolling pin. I would love to get the labels, please.
Thank you.
Carolyn Davis
Happy to send the labels, Carolyn. Let us know that you've gotten them.
Can't wait to ry these cookies. And love the tip on the Joseph Joseph rolling pin. I would love to have the labels, but have requested them for other recipes and never received them. Trying a different email.
Thanks so much!
Carolyn Davis
Looking forward to trying this recipe and sharing it with my boys' teachers during Teacher Appreciation Week next week (and so, I'd love the labels, please). Side note, the first line in the cafe tips section says "Irish Shortbread". 😉
Hope everyone enjoys them! We'll be happy to send the labels. And thanks, for the heads up, Ann-Lorraine! I have corrected the Café Tips.
Oh, we LOVE anything lemon-flavored. We experimented through the years, and found out that lemon zest is the best way to get good lemon flavor in our baked goods! Thank you so much for this recipe. Please send the labels too!
Sending them your way, Carlos!
I just at this moment discovered your delightful website, attracted by this recipe... But the cause of my comment is your phenomenal blessing of your readers with the scripture verse and the "inspiration song" link to "Hope of Christ"... What a beautiful song, and truly inspirational... I just sent it to my brother who is hovering over his beloved dying dog, drowning in tears.
Thank you for your goodness, kindness and faithfulness... Thank you for sharing your beautiful gifts with all of us. I look forward to exploring your website, and thank you especially for your graciousness in sharing the Lord with us.
Michele
Thank you so much, Michele, for such a kind and encouraging comment. I Love that you shared the song with your brother and hope he was encouraged in this sad time.
Hope you enjoy the website and recipes in the future!
Kindest regards,
Chris
Another delicious recipe! Would you please send the pretty labels for these French Sable lemon-glazed cookies? With many thanks.
Thanks, Cheryl! Sending the labels your way.
I'm reading a book about a French bakery and had to look up a sable cookie. Now I can make them! What a lovely gift they will make. Please send the labels.Thank you.
Sure, Donna!
Was very excited to try this recipe as it had good reviews. But my dough turned out too soft. Don't know what went wrong as I had followed the recipe exactly. I could not use a cookie cutter with it and ended up rolling the dough into little balls, placing them on the parchment paper, then flattening them. They still tasted great 🙂
Hi SY, I'm so sorry you had difficult with this recipe. It's hard to say what went wrong without having been right there in the kitchen with you. It should not be a dough too soft to roll.
I make a chocolate sable cookie and can’t wait to try lemon. Please send the printable label pdf
Sending them your way, Jane!
I can hardly wait to make these. Please send the Labels.
Thank you for all your wonderful recipes. Always enjoy
Thanks, Sharon! We will send the labels!
Hi Sharon, the labels could not be delivered. It says due to spam content. You may need to update your email settings.
These sound wonderful! Plan on making these for Easter gifts. Love all things French and your recipes! Please send the PDF for the labels. They are perfect!
Thank you for the hints and tips!
So glad you are enjoying the site, Holly! Sending the labels your way.
I can’t wait to try these cookies!!!! I am also a lover of ALL THINGS LEMON! Please send the pdf labels.
Sending them your way, Alice! Enjoy!
Please may I have the PDF for these lemon cookies. Thank You
Sure, Susan!
These cookies look like the perfect companion for a cup of tea. I can’t wait to try them. Please send the label pdf. They will make a perfect gift for my tea drinking friends. Thank you.
Sending them your way, Joyce!
This recipe is perfect timing! My daughter and daughter-in-law and I got excited with making cookies over the holiday and were just talking yesterday about ways to continue to make more elegant cookie options. Butter and Lemon - couldn't be more delicious! Would you please send the labels, too. If I'm going to play with these lovelies, I will surly need to share them so we don't eat them all ourselves. When we do, I will come back with a star rating review, too. Thank you!
Sending them your way, Marguerite!
Yummy!! I make the other cookies and want to try these. Can I please get the labels?
Merry Christmas!
Sure, Michelle!
Excited to try since I have so many egg yolks left over from making French macarons. Please send me the pdf for the labels, they are adorable.
Sending them your way, Patty!
I have been looking for a cookie that will travel well and I think I’ve found the perfect one. Could you please send the pdf of the labels? Thank you so much.
Sure, Lila!
Hello! Id love to gift these this year..can I please get the labels? Thank you!
Sending them your way, Pam!
Both Beautiful and Elegant cookies!
would love the labels PDF
Thanks
Beautiful cookies! Would love the labels.
Thanks
Sure, Monica!
Help! The recipe says half & half for the glaze but does not specify what! But a lovely recipe!
Hi Sam, half and half is an American convenience product often used for coffee. Its half milk and half cream.
Hi Chris! I'd love the pdf for these bright and cheery labels. Thanks so much, for for the inspirations and song links. I appreciate them. 🙏
Sending them your way, Terry!
Delicious ! Would love to have the labels!
Thank you!!
Sure, Julie!
Hello,
Thank you so much for posting this wonderful recipe. The pictures are such a beautiful accompaniment, and I look forward to trying the recipe.
I would greatly appreciate being able to receive the template for the lovely labels you created for this delicate cookie recipe.
With kind regards,
Tracy Mahr
Happy to send them, Tracy!
Can’t wait to try these cookies. I’d love to have the labels for gifting. Thank you!
Sure, Julie!
these will make perfect gifts. I'd love to have the labels
Sure, Rebecca!
Yum!
I would love to have the labels for these cookies! Thank you very much!
Sure, Heidi!
I love this recipe and would like to have the labels pdf so to share like a pro!
Sure, Veronica!
I really love the cookies, but somehow I have lost my label file. Could you send me the labels pdf? I’d love to make these for a friend who helped us during our recent power outage and storms.
Thank you!
No problem, Susan!
I’m baking these 🍋 cookies next week for a best friend’s birthday celebration. I would love the label file. Thank you!
Sure, Sharon!
Beautiful, looking foward to making these cookies! Can you please send PDF of the label? Thank you so much!
Sure, Laurie!
OMG, these are amazing! Thank you so much for the recipe. Could you kindly send me the label and box link. Thank you again.
Thank you, Joy! We will send the labels your way.
Just popped the first tray of Lemon Sablés into the oven. Cannot wait to try the with the glaze! May I please have the pdf of your pretty labels and where I may purchase the adorable boxes and ribbons. Already have made a mental list of who to gift these luscious cookies.
Sending them your way, Lorraine!
These look delicious and perfect for Easter gifts. Would you kindly send the labels? Thank you!
Sure, Sheila!
These look so pretty! I love shortbread cookies but have never tried this type....I would love to have the French Sable label for gifting purposes...off to get some butter so I can make them later today!
Sending them your way, Charlene!
Hi I am going to try this delicious sounding recipe soon and would love to gift the cookies. Could you please forward the labels. I love your website! Thank you!
Thank you, Marilyn! We will send the labels your way.
Tried the cookies. Loved them and your label is quite impressive. I would love to receive your pdf and print some up to gift cookies along with the re
Thanks, Bob! We will send the labels.
Would love the labels. The cookies turned out amazing!
That's great, Julie! Sending them your way!
Love anything lemon, and these look tasty. May I please have the label, thanks.
Sure, Lynda!
Please send label for French Sable Shortbread cookies. Can’t wait to gift them to others.
Sure, Diana!
I love lemon anything! Please send pdf file, thanks!
Sure, Cynthia!
Hi, thanks for the recipe, love this cookies.
Please send me labels. Thanks a lot . yaschamdan@hotmail.com
Sure, Yasmin!
Hi, Chris--
These cookies received high acclaim at our house. "Dip, Drip and Flip" produced perfectly iced tops with no runny sides. I would love the PDF so I can gift some of the next batch. Thanks!
Wonderful! We will send the labels, MJ!
Hi please send me the pdf labels thanks
Sure, Gregory!
Would love to have the pdf for the labels. Planning to gift the lovely cookies for an upcoming birthday party.
alzenamcneil@att.net
Thank you
Sending them your way, Alzena!
Please send me the label file. Plan to make these beautiful cookies for my daughter's rehearsal dinner as a nice treat for the guests. Thanks so much, Linda Paker
Sending them your way, Linda!
Hi Linda, could there be an error in your email address? The labels were not able to be delivered.
Please email.me the PDF.file. I revised my email.Thank you!
Ok!
Beautiful cookies and beautiful packaging. Would love the label file. Please and thank you.
Thank you, Caryn! We will send the labels your way.
I love all things lemon and am eager to bake these cookies. Please send me the label in case I decide to share.
Sending them your way, Patricia!
I love your attention to detail and love the very appealing and attractive label and box used for packaging. Ive's just printed your recipe to bake these cookies this weekend. It sounds delicious and looks beautiful!
I would like to request your FREE PRINTABLE LABEL for your DELICIOUS Lemon-Glazed French Sable Cookies.
Thank you,
Julie
Sending them your way, Julie!
I think I put my comments at the wrong place! L O L
Your site is my most very favorite one and I eagly look forward to all your recipes. I’ve tried many of them and this weekend I will be doing the lemon cookies. I would love the labels and where I can buy the boxes because I think I will do that for Valentine’s Day with a little sprinkle of red on the icing, keep up the good work as you inspire so many people with your messages and recipes!Nancy
Thank you, Nancy! We will send the labels your way.
I love the recipe! Absolutely divine! Thank you for sharing. May you please send the adorable labels. 🥰
Thank you, Cathy! Sending them your way.
Ooooh! Sounds so yummy! I wanna try these, please send the labels, boxes, & ribbon info. TYSVM - manga
Sure, Manga!
I love lemon in baked goods. These cookies look delicious. I would love to have the pdf label as well - I have so many friends who will love these cookies.
Thank you!
Sending them your way, Jan!
Hi Chris,
These were fabulous. Can you please send me the printable label? Thank you so much!
Thanks, Monica! We will send the labels your way.
Love lemon and shortbread. Can ‘t wait to try these! Please send the label file. My friends will be amazed!
Lemon and shortbread are a match made in heaven! Sending the labels now, Diane!
I'd love the PDF for the darling labels. These lemon cookies will be a hit with my adult children!
Hi Fay, happy to send the labels!
Love your recipes, can't wait to try this one, love anything with lemon. Could you please send me the labels. Thank you.
Thanks so much, Vivienne! The labels should be in your email.
Hi Chris,
Please send PDF for theses labels - the cookies are amazing!
Thanks, Glynis! Just sent the labels.
I've been looking for this exact recipe. Thank you, thank you, thank you. Please send me the labels and source for the adorable boxes. Thank you.
That's awesome, Brenda! Just sent the labels via email.
Looking forward to trying this recipe for the Lemon Glazed French Sable Cookies. Please send me the pdf label for these cookies. Thank you. Looking forward to additional recipies
Hope you enjoy them, Mary. Just sent the labels.
These cookies sound wonderful. I especially like the scripture you included!
I love that Scripture so much! Hope you enjoy the cookies, Karen!
Love these cookies, my new favourite! Could I please get some labels w/instructions for these most delicious Lemon-Glazed French Sable Cookies. I would love to share them along with your recipe to my family & friends 🙂
Thank you,
Joan
Happy to send the labels, Joan!
Chris,
Please send me your cute labels for the French Sable Lemon Cookies!
Happy New Year! So looking forward to 2023 journeying with you!
Thanks!
Gale
Sure, happy to send them, Gale! Thanks for your kind words too 💕
Can’t wait to make these cookies. Love the look of the labels.
Thanks, Viola! Sending the labels now.
Your recipes are superb and have never disappointed. I’d be thrilled to receive the gift label PDF for these French
Sable Cookies. Anxious to give these as gifts to very special friends.
Thank you very much.
Thanks so much, Judith! 🥰 Just sent the labels.
Please forward theses super great looking labels. Thanks so much!
Pat
Hi! Happy Sunday! Pat I Really Enjoyed This Recipe, But I Needed To Ask About Using A Sugar Substitute! Myself & Friends Are Diebectic, And I Wanted To Check In. Also It Was Funny As I Was Reading & Thinking, When I Got To The Part ' Don't Twist The Cookie Cutter'. It Used To Be During The Holidays & My Husband Was Alive, I Would Bake Cookies & He Would Do The Meal. I Was Still Working SOOOO Baking Cookies Was About All I Had Time For, I Worked In Retail!! Thanks For The Recipe, Maybe I'll Become Abit Of A Cook After All, I Don't Have A Lot Of Family Left. Thanks SOOOO Much! Marcia Dove
Hi Marcia, I haven't tested this recipe with a sugar substitute so I can't say how they will turn out. If you try it, let us know!
Sure, sending them now, Pat!
Would love to make these cookies and give as gifts. Please send labels. Thank you
Just sent the labels, AJ! Hope you enjoy the cookies!
These are delicious! Because of you, I look bake like a culinary genius! My family and friends are so impressed:)
Thanks in advance for the labels.
Lynn
I love it! Sending the labels now, Lynn!
I am trying these out today and yes I would love your printable labels
Hope you enjoy them, Lisa. Happy to send the labels.
Hi Chris
I love lemon and can hardly wait to make your Lemon Glazed French Sable Cookies. I would like to have the labels for this recipe as the cookies would be a great gift.
Thanks Chris
Janet
These will be great for gifting! Sending the labels now, Janet!
Dear Chris,
Please send me the labels for your Lemon Glazed French Sable Cookies. Thank you!
Just sent them, Sue. ENJOY!
Chris,
I am so glad you are a very determined woman. And a lover of Jesus. Please send me the labels for the lemon sable cookies. I love anything lemon.
Haha! Both are true, Shirley! Happy to send the labels.
Oh my gosh! You and your daughter-in-law continue to get me baking, cooking and jamming. Thank you for the inspiration and the labels.
Oh I cannot wait to try these! I love anything lemon. Please send me the labels. They are lovely and I will use to gift some of these cookies. Yum
Sending the labels your way, Nancy!
That's awesome, Kathryn! The labels should be in your email!
I would like a copy of the pdf, please, adorable! Lemons are some of my very favorite things. The cookies sound yummy.
Yes, we love lemon too! Just sent the labels, enjoy!
These cookies look amazing! Great combination...I would really like the labels! Thank you so much!
Sure! They're coming your way, Kathleen!
Definitely adding these to my must make list. Like the labels as well
Hope you enjoy them, Annie. Just sent the labels.
This recipe sounds fabulous, can’t wait to make these. And those labels are beautiful!
Thanks so much, Terry! Sending the labels now.
These sound delicious and I can’t wait to try. I have Celiac disease so am going to try with GF flour. Have you ever tried it gluten free?
Hi Vicki, I haven't tried these with GF flour. Let us know if you do!
Vicki, did you succed? If so, what flour(s) did you use and did you need to make any other changes?
Hi Danielle, I haven't tried these cookies personally with GF flour but other readers have reported good success with AP 1-t0-1 GF flour.
Hi Chris,
Can’t wait to make these cookies. I love making the other Sable Shortbread for gifts as well as us. I would love the beautiful labels.
Thank you,
Gayle
Hope you enjoy them, Gayle! Just sent the labels.
I've enjoyed making so many of your cookies.
I would love to have this label too.
Thanks so much.
Happy to send them, Ellen!
Please send the label for Lemon Glazed French Sable cookies.
Sure, sending them now, Jane!
I love your labels, they make my gifts look elegant...please send the printable one for these!
I just took these delicious cookies from the oven and covered them with the glaze. They are so perfect to look at as well as gobble down. Lovely Christmas gift . Many thanks. What a little treasure Ruth
Yay! So happy you've already made them Ruth!
Thanks so much, Mary. Just sent the labels.
This recipe sounds wonderful- and I have a Meyer lemon tree loaded with lemons just waiting to be used. Please send the PDF of the printable labels. Thank you.
Lucky you, with your own Meyer lemon tree! Sending the labels now, Linda!
Looking forward to baking these, please send me pdf of the label.
Hope you enjoy them, Maryann! Sending the labels now.
Hi Chris, I would love the labels for these lemon shortbread cookies. Thank you.
Hi Carolyn! Hope you're doing well! Just sent the labels.
Hello Scott & Chris,
I love anything lemon! These sound and look amazing! I would love to have the gift label pdf for these cookies. Thank you so much!
You're welcome, Cheryl - enjoy!
Looks like another winner, Chris. Shortbread and lemon, what's not to love?
Please send me the pdf of the gift labels.
So true, Leslie! The labels should be in your inbox.
I thoroughly enjoy your recipes as they are so unique and unusual. I am looking forward to making the Lemon Glazed French Cookies.
I am requesting a printable label for the Lemon Glazed French Sable Cookies
Thank you . . .
The recipe looks amazing. Please send pdf label as these would makelovely Valentines gifts. Thank you and Blessings
They will be perfect for Valentine's! You could use a heart-shaped cutter! Just sent the labels.
Thanks so much, Dianne. Happy to send the labels.
Can't wait to make these cookies. Love your recipes and labels. Please send me the pdf for the labels.
Thank you.
Jayne
Thanks, Jayne! Just sent the labels.
Wonderful lemony shortbread cookies. Could you please send labels
Sending them now, Steph!
I’d love the label too! Thank you
Sure, happy to send them, Maria!
I have just started making shortbread cookies. I haven't been pleased with my results so far, but these sound absolutely wonderful. I am leaving for the grocery store right away as I need 2 large lemons! Your "Dip, Drip, and Flip" looks beautiful...I hope I can do this. Thanks for all of your recipes and recommendations.
Also, I would like the PDF for the cookies.
You can do it, Suella! Just sent the labels your way!
Thank you for your delicious recipes. Could you please send me the labels, I will be gifting these.
Thank you
Hi Lois, just tried to send the labels but they were returned. Perhaps your email is not correct?
I would love the labels! I can’t wait to try this recipe!
Sure, they're on the way, Robin!
I would like to receive the labels for the French Sable Cookies.
Just sent them, Kathy!
Would love the labels for the French lemon shortbread cookies.
Thank you!
Sure, sending them now, Julie.
Hi Chris..definitely going to try this recipe..
Can you freeze these sable cookies?
Love your blog and all your recipes and your great tips ❣️
Hi Rose, yes these cookies freeze well. Be sure to let the glaze completely dry though before freezing.
Hi Chris,
I just love anything lemon! These lemon glazed french sable cookies look amazing, the recipe already has my mouth watering for all the lemony goodness. I would love to have the gift label pdf for these cookies. Thank you so much!
Best regards,
Candace
Happy to send them, Candace!
I love all of your recipes. In this one, you mention using a small amount of cornstarch. Can you please tell me how much and do you add it to the dry ingredients?
Thanks, Vickie, I have added that to the recipe.
I have just received this beautiful and not tried. I certainly will. Love lemony anything in baking. Thank you for this treasure. Hope your day is smooth as silk. Ruth
Thanks so much, Ruth!
I absolutely love lemon, so thank you for posting this recipe. They look so delicious!!
I would also appreciate the free printable labels. 🙂 🍋
Kind regards,
Maria
Sure, happy to send them, Maria!