
This post may contain affiliate links. For more information, see our privacy policy.
These buttery, 5-ingredient Peach Raspberry Thumbprint Cookies are super easy and melt-in-your-mouth delicious!
Have you ever heard the old saying, "Many hands make light work?". It's an old classic proverb that dates back to the early 1300's. It was first recorded in a knightly romance called Sir Bevis of Hampton.

In addition to "making the work light" there's another bonus to "many hands". Fun, lots of fun, especially when it's many little hands coming together to help make the work light...
Now I didn't say many little hands make "calmness", "peacefulness" or "promote organization" - or actually anything along those lines. But fun? Oh yes!
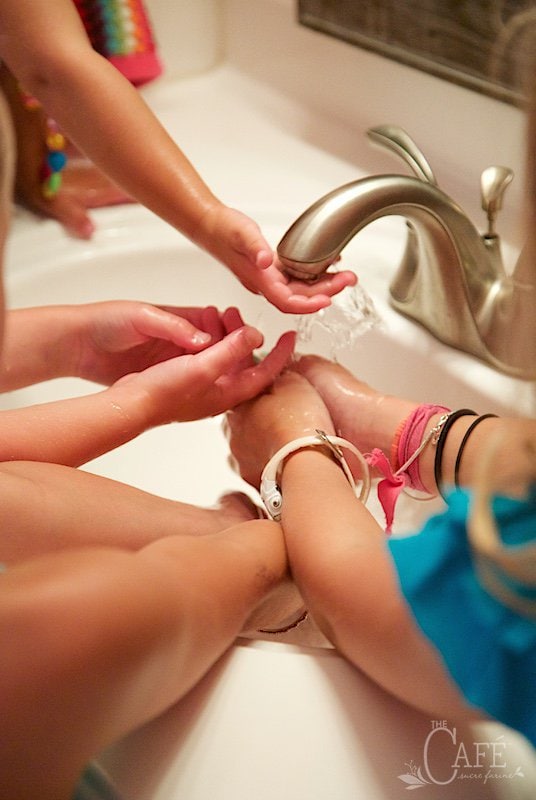
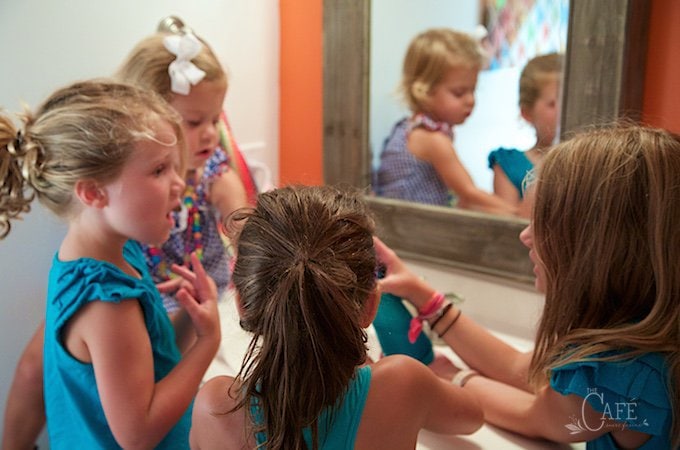
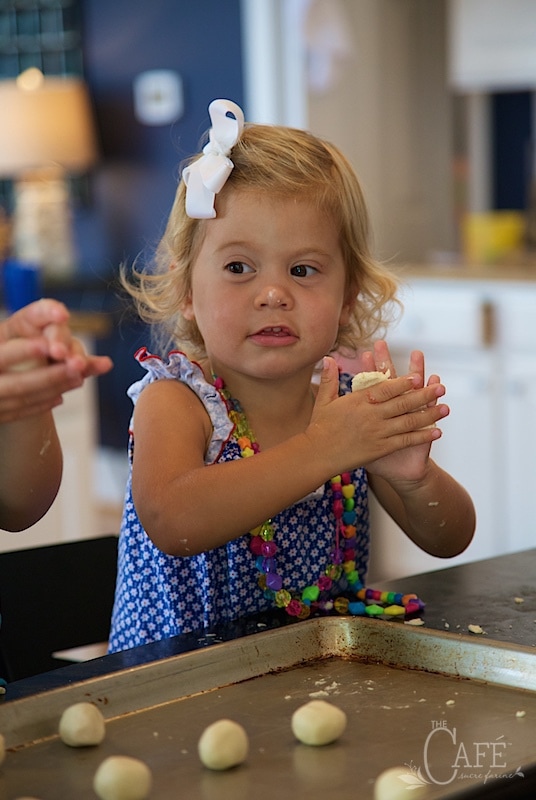
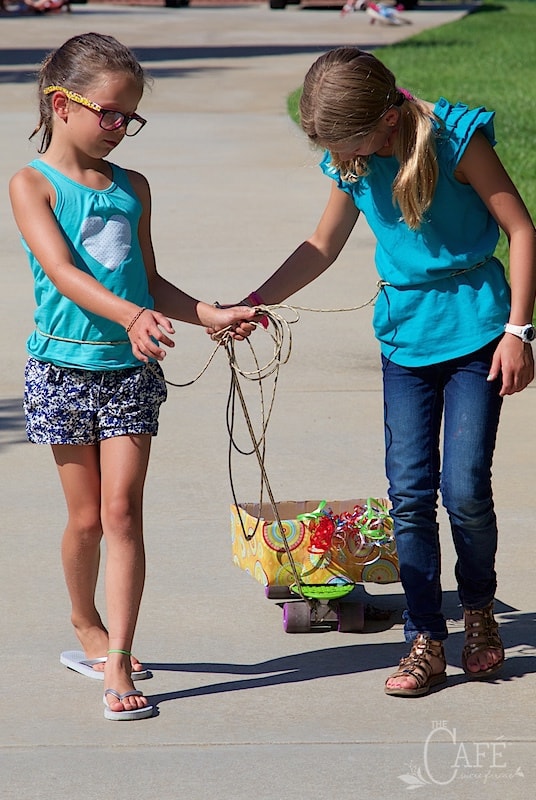
Scott and I had the opportunity to spend a few days with family this past weekend. It was a wonderful time, and with five grandchildren, nine and under, there never seems to be a dull moment. They all love to "help", especially if there's a baking project going on.
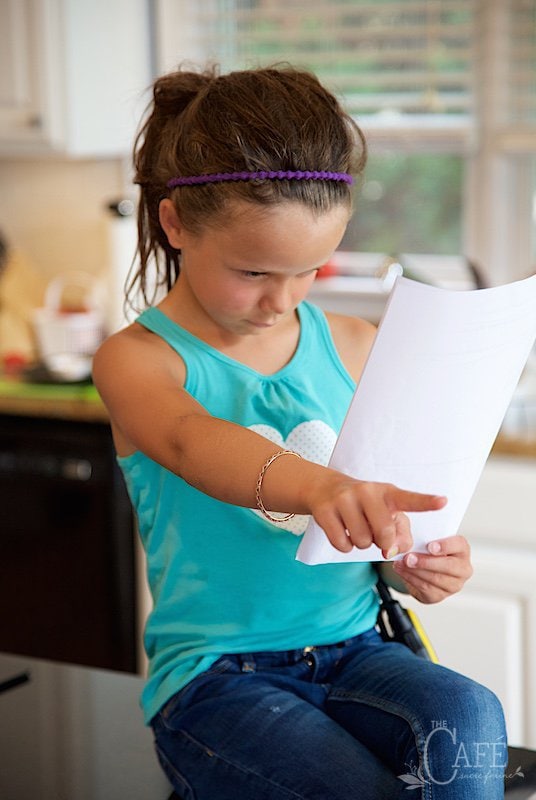
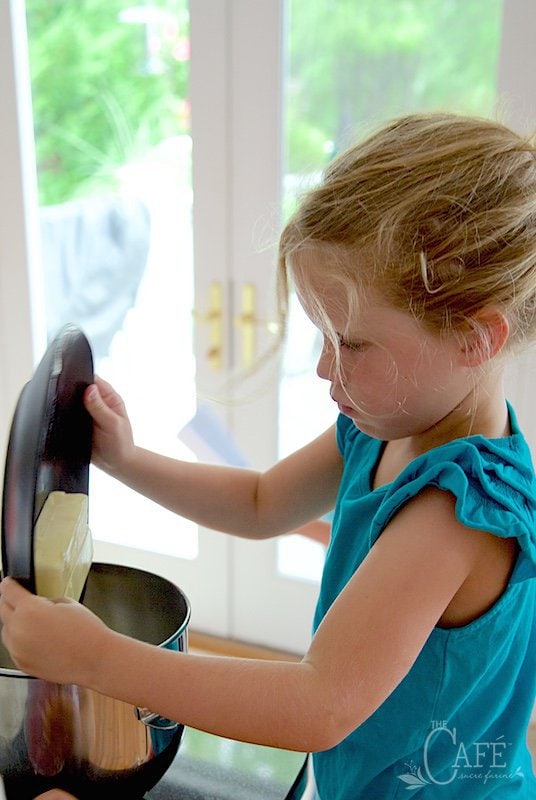
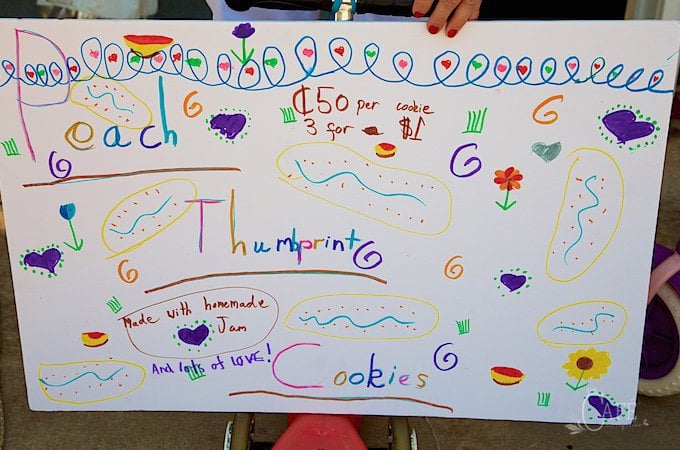
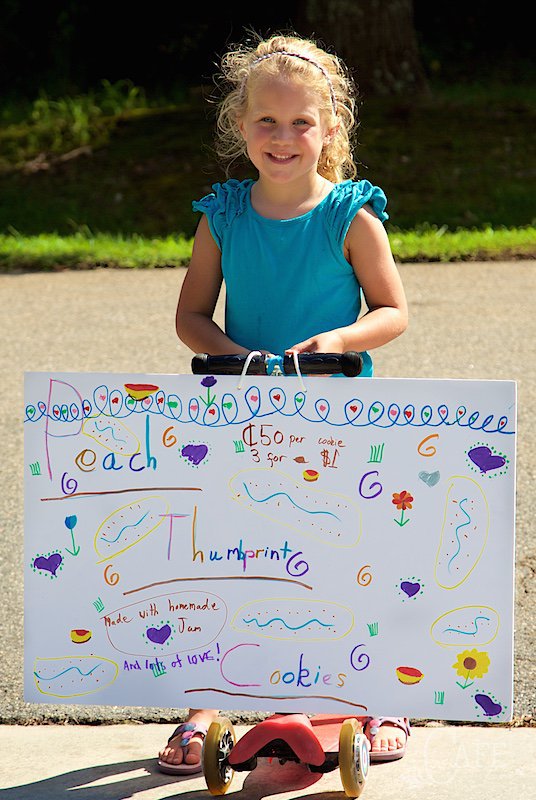
Our three oldest granddaughters wanted to do a "cookie sale", similar to the one we did last summer. There are lots of wonderful teaching opportunities when you involve kids in a project like this, and I love being with these little ones, so I didn't waste any time looking for a yummy cookie recipe. I wanted something fairly easy, yet super delicious; it wasn't long before I remembered one of my all-time favorites.

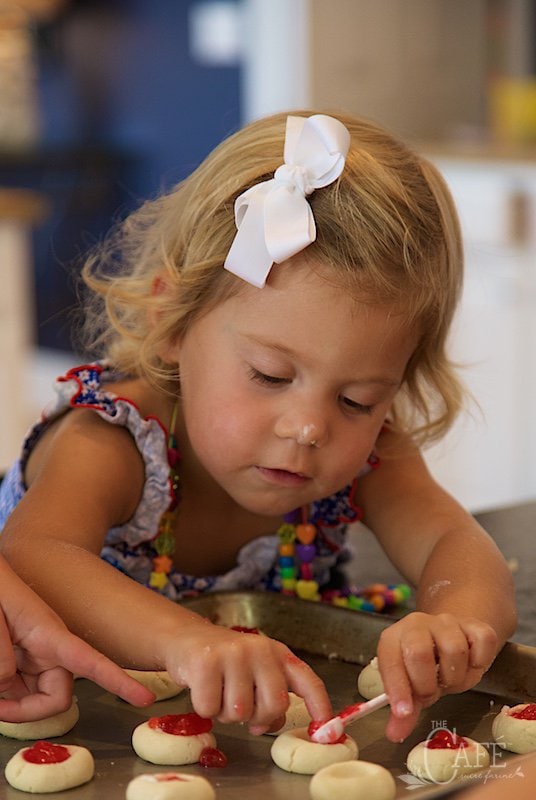
It's a classic thumbprint cookie recipe from Land O'Lakes that's super easy to throw together; with just 5 ingredients: butter, sugar, flour, almond extract and jam. Traditionally, these cookies are made with a little dollop of raspberry jam in the center, but I thought it would be fun to try them with the Peach Raspberry Freezer Jam I made last week.

I was right - the cookie sale was a huge success!
Scott captured the whole adventure with his camera, so I'll let his pictures tell most of the story.
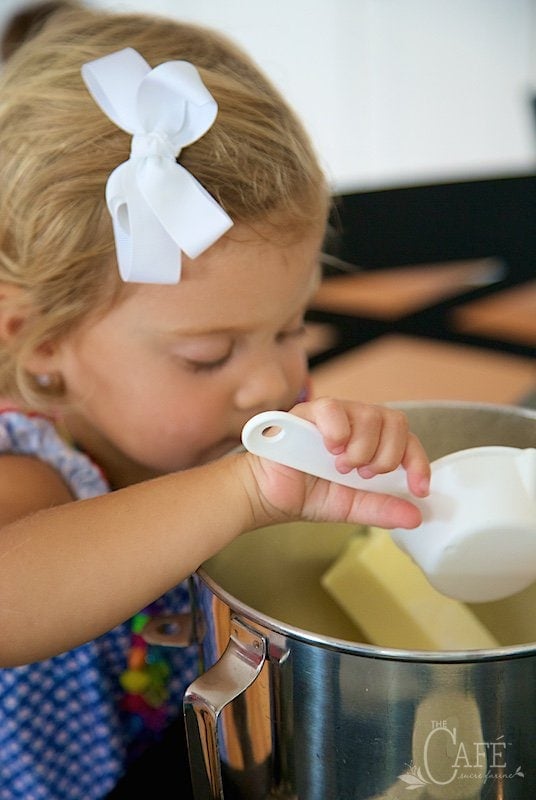
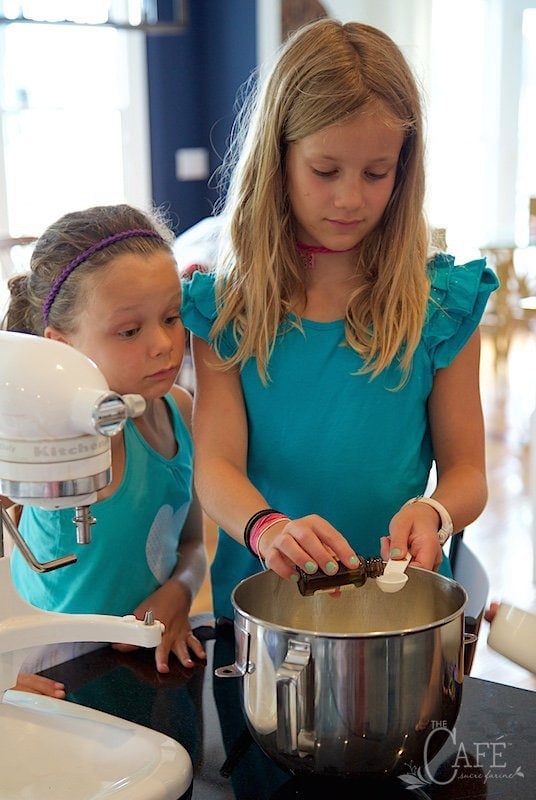
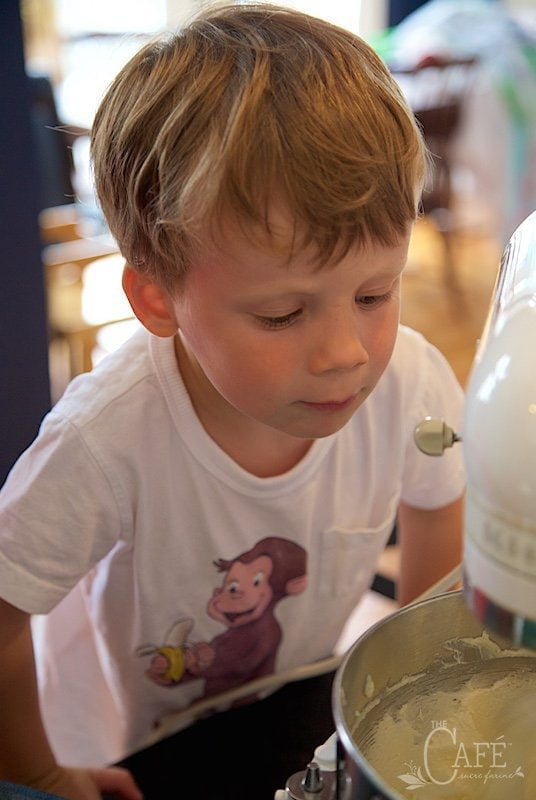
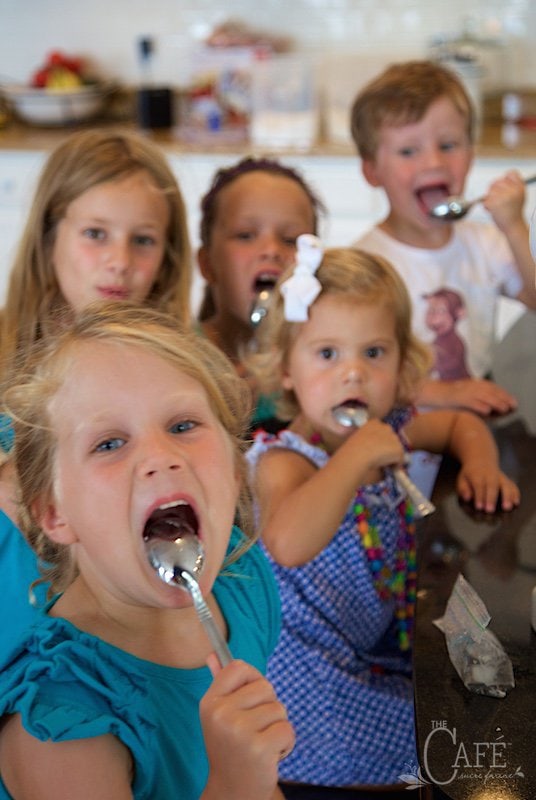
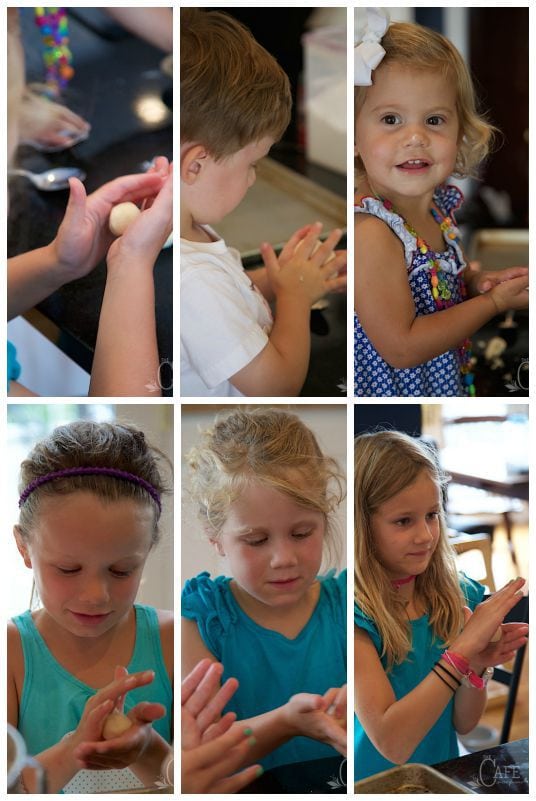
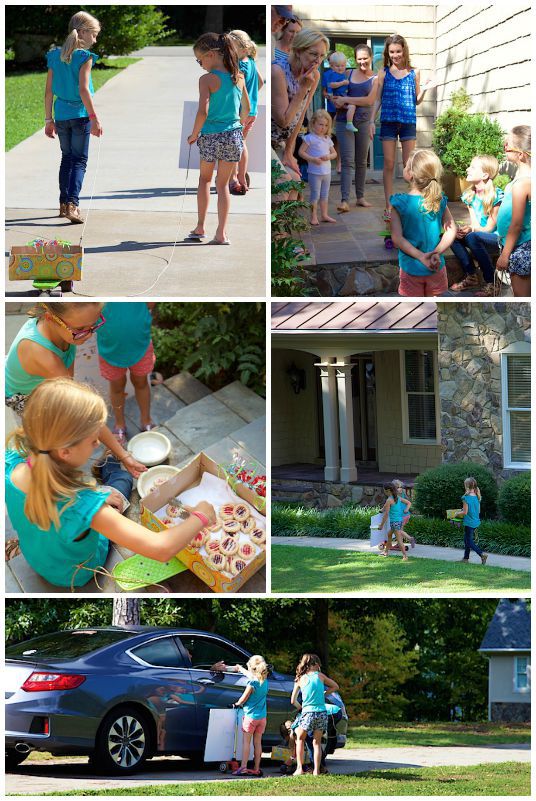
As you can see, these are great cookies to make with kids, as they come together so easily. But don't let that fool you; they're also so delicious, no one can eat just one.

The shortbread base is melt-in-your-mouth delicious and pairs perfectly with the sweet jam center. The jam also gives the cookies beautiful visual appeal.

The recipe calls for a drizzle of icing, but they're also wonderful plain or with a simple sprinkle of powdered sugar.

We made most of the cookies with the Peach Raspberry Freezer Jam, but the girls also wanted to try a few with my Sweet Cherry Freezer Jam. They couldn't decide which they liked better! Feel free to use your favorite jam.
Scroll Down for the Recipe - or Save It to Your Inbox
We’ll email you the recipe so it’s easy to save, print, or share.

Peach Raspberry Thumbprint Cookies
Ingredients
- For the cookies:
- 1 cup butter*, softened
- ⅔ cup sugar
- ½ teaspoon almond flavoring
- 2 cups all-purpose flour
- ½ cup Peach Raspberry Freezer Jam, or your favorite jam
- For the glaze:
- 1 cup powdered sugar
- 2-3 teaspoons half & half or milk
Instructions
- Combine softened butter, sugar and ½ teaspoon almond flavoring in bowl of a stand mixer.
- Beat at medium speed, scraping bowl often, until soft and fluffy
- Add flour; beat at low speed, scraping bowl often, until well mixed. Cover; refrigerate at least 1 hour or until firm.
- Preheat oven to 350°F. Line two sheet pans with parchment paper for easy clean up.
- Scoop and shape dough into 1-inch balls. I use a small ice cream scoop.
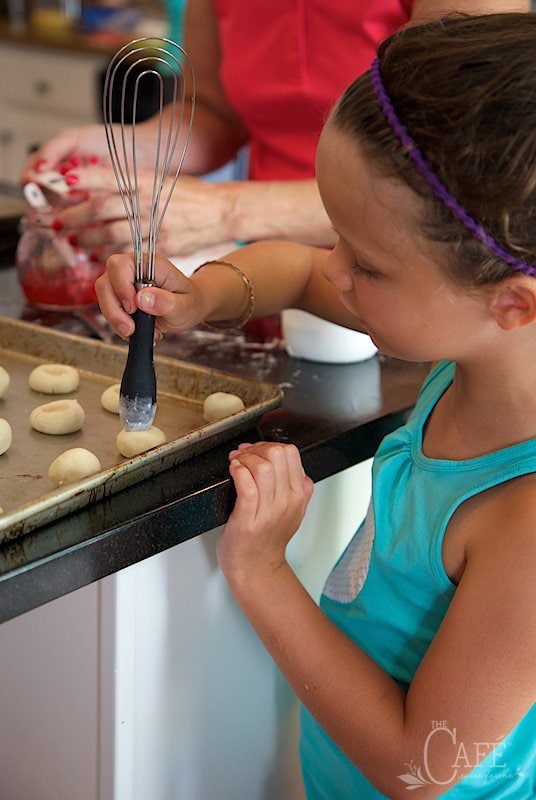
- Place cookies 2 inches apart onto prepared cookie sheets. Make an indentation in center of each cookie with thumb (edges may crack slightly) or a round-ended utensil. Fill each indentation with about ¼ teaspoon jam.
- Bake 14-18 minutes or until edges are lightly browned.
- Let stand 1 minute on cookie sheets then remove to cooling rack. Cool completely.
- Combine all glaze ingredients in bowl with whisk until smooth. Drizzle over cookies.
- You can also serve these cookies plain or with a dusting of powdered sugar.
Notes
Two little decorating tricks:
1.) If I want the cookies to look super pretty, I add the ¼ teaspoon of jam (as in the instructions, step 6) before baking and then I remove them from the oven after 10 minutes and add a teeny bit more jam to fill the craters. I finish baking them for the remainder of the time as instructed in step 7.
2.) When I make these with the children we just drizzle the icing on with a spoon or the prongs of a fork. If I want them to look really pretty and professional, I pour the icing into a little plastic squeeze bottle and drizzle it on that way for straight, perfect drizzling.
Shop Our Café Loves
We’ve gathered our favorite kitchen tools, tableware, and entertaining treasures in one place, the Café Loves store. It’s a wonderful spot to find something special for yourself or the cooks and hosts you love!


These are now my favorite Christmas cookie. Missed seeing my brother over the holidays, so I threw his in the freezer. Just remembered them and they were still good after 6 months.
That's awesome, Linda! Thanks for letting us know 🙂
I would like to make these for Christmas.. Could you tell me how they should be stored, and for how long? Do they travel well ~ I'm thinking of sending a care package across the province. Thank you.
I would store them in an airtight container with wax paper in between the layers.If you're going to make them more than 2 days in advance, I would store them in the freezer. They should travel just fine as long as they're packed well.
If you're making them more than a few days in advance, I would freeze them. I think they should be fine for mailing as long as they're packed well.
I just found this and tried it using only peach preserves, a huge hit. I whirled a couple tablespoons of preserves directly into the cookie dough and since I don’t care for almond flavoring, I added some vanilla and a couple of tablespoons of peanch liqueur. Compensated the extra liquid with a few extra tablespoons of flour. Delicious and simple!
So happy you enjoyed these cookies, Deb!
I like the mix you made with the jams, I m use to see these kind of cookies with only one jam but using different types produce a very good looking picture! What do you use to get the perfect imprints on your cookies?
We used the end of a whisk to make the imprints. You can see in the photos. Enjoy!
What a perfect day cooking with the junior bakers - they looked like they had an amazing time and will have those memories forever. Those cookies look super divine.
Cuteness overload.
Every time I have strawberry jam I think of you. Thanks for that great recipe.
Your little kitchen helpers are as cute as can be, Chris. I love working in the kitchen with my grands. I have wonderful memories of helping my grandmother and want to pass that tradition along to them. I made some strawberry rhubarb jam that I bet would be delicious in these pretty little cookies. Lovely post!
That is absolutely the cutest and most dear post I have ever seen and read. I swear you could have hired those 5 dolls from a modeling agency and no one would have disputed that you did it. They are gorgeous children, more intent on making cookies than posing for pictures! Not only did the cookies look delicious with the homemade jam, but the lessons taught were priceless. And, yes, that's a memory for sure.
What a fun day for your sweet grandchildren and you! The photos Scott took will be family treasures--as will the memories of special times with you both. And your cookies look fabulous---I have a feeling it was your homemade jam and all those loving touches that pushed these over the top!!
Oh my gosh, Chris, these cookies look sooooo good! I would love some of that beautiful peach raspberry jam slathered all over a piece of toasted brioche. (Hey, forget the bread, I'd eat it from the jar!). Perfect for the center of these pretty cookies. And what a gorgeous family you have. Looks like good fun was had by all!
Dear Chris - give all your lovely and absolutely adorable helpers a big hug from me!!! They all look so happy and cute! What a fun and summery post with outstanding photography and a wonderful kid-friendly recipe!
Thank you two for brigthening my early Saturday morning with this wonderful post of yours!
Andrea
That is so adorable Chris! That's exactly what is going on in my kitchen when I'm blogging a recipe. I should be doing a snapshots of my helpers too 🙂 love the cookies!
Seems like just a short time ago Emmy was in her high chair. It's so nice of you and Scott to share your beautiful family with us along with the recipes and pictures.
Oh my goodness Chris how did you survive such a mega dose of cuteness as your Grandtots?! They are darling and what keepsakes these photos are! The cookies too are gorgeous. What a fun time.
What a deal! 3 for a $1 - awesome. Those cookies, and your helpers are all beautiful. What a fun experience for all. Love the cookies!
I don't know, Chris, I think you need to have a reality show with this clan! You are so great about getting those kids active in the kitchen, I feel a little guilty when I see it because I wasn't so inclusive with my own girls, I was too concerned with the 'mess'. You've inspired me so that if and when I have grand kids I'll do things differently 🙂
Adorables!! I'm glad my grandsons like to help in the kitchen occasionally too - although it's hard to stick with the recipe all the way through 🙂 I think they like to watch the mixer best just like Lukey. What fun you had and I won't ask about what your kitchen looked like afterward 😉 What a versatile and delicious cookie base. Pinning!
Chris, your grandchildren must love coming to your home - what a lovely tradition to pass on! I don't ever use my thumbs to make thumbprint cookies either! These look amazing!
What a fabulous post and of course, wonderful cookies! Sounds like a wonderful project to do with the grandkids 🙂
Thanks Jennifer, we all had fun!
What precious family time and photos! You have the best sous chef, Chris. Those cookies look divine!
I do have the best sous chefs ever Angie, thanks so much!
Chris those photos just make me so happy. It looks like so much fun! I can't believe how big the youngest two are. Weren't they just born?!?!
My sister and I used to set up little stalls outside our house all the time and had so much fun doing it. Whenever I see kids doing it now (which is very very rare sadly) I always stop and buy something because I remember the thrill of selling my goodies.
Oh Claire, I can just picture you and your sister in your little stall! Such a great memory. I know you will be creating lots of wonderful memories with your little Ollie and his little sibling-on-the-way!
Fun! Your grandchildren are adorable and those cookies are beautiful! How do you drizzle the icing so perfectly? Congrats on a successful cookie sale!!
Hi Sandra, I added a few notes to the recipe about drizzling the icing.
Beautiful.....isn't this what love and life should be about.....? Touching and so lovely...
Thanks Marika, so true!
Just delightful and so many sweet helpers.
I love thumbprint cookies and these are like perfect gems! What a fun day in the kitchen, it's clear that the little ones had a fantastic time!
Thanks Laura, it's funny I think of that jam in the center looking like "gems" too!
I can hear Lilly's little voice saying, "Really good cookies." Makes me tear up. Miss them so much already! Emma Kate would have loved this event! XOXO
Thanks Melissa, you are so sweet! Your girls are so adorable, I wish they could be involved in one of our little baking adventures!
OOPS!! Since there was no salt. DUH!!
I knew you meant that Charlotte! I do that all the time, my fingers can't type as fast as my brain is flying. 🙂
How precious!! Delicious looking cookies also I might add.
Needs there was no salt in the ingredients do you used salted butter?
Thanks Charlotte for bringing up the salt. There is no salt in the recipe but I added a little note about that to the directions.
Hi Chris, looks like you all had a wonderful time and what wonderful memories you are creating. Beautiful post.
MY FAVORITE POSTS OF YOURS!
Gosh they are changing in a blink of an eye..so cute..and your wee girl w/ her iced nose..
dolls..all of them♥
I hope Emmy never stops wearing her perfect little bows.
I have just come in from the garden and am hungry now..look at that pointed finger!
Haha, thanks Monique, they do grow up way too fast!