This post may contain affiliate links. For more information, see our privacy policy.
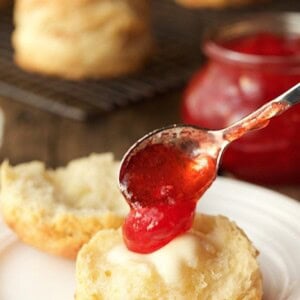
These tall, flaky, Ridiculously Easy Buttermilk Biscuits take less than 10 minutes to throw together. They're also ridiculously delicious!
"Brilliant, simply brilliant!" That's what I said, right out loud, when I read the unbelievably easy directions for preparing these buttermilk biscuits.

The technique was created by the super-smart folks over at Cook's Illustrated. When I read their method for making drop biscuits, I figured it was too good to be true. But being a curious cat when it comes to all things culinary, I couldn't resist giving it a try.
You would have probably laughed if you saw me just after I read the article. I ran to the kitchen, turned on the oven and pulled out a bowl, along with measuring tools and the necessary ingredients. All super basic ingredients that I had in my pantry and fridge (you probably do too!). The simple cast of characters includes flour, baking soda, baking powder, salt, sugar, buttermilk and butter, that's it!
Classic Technique
Why did this sound too good to be true? Well, buttermilk biscuits can be a bit tricky. The technique usually calls for combining the dry ingredients, then "cutting" in cold butter with a knife, a pastry cutter or between your fingers. The liquid is then added and everything is gently combined.
If done correctly, the tiny pieces of butter, evenly distributed throughout the flour mixture, are what give classic buttermilk biscuits their lightness, flakiness and layers of peelable, buttery deliciousness. It's not a difficult technique, just a bit time-consuming, and the results are not always consistent. The Cook's Illustrated technique is totally different... and ridiculously easy!
Ridiculously Easy Technique
How does it work? Well, I'm glad you asked... start by placing a cup of buttermilk in the freezer for a few minutes while you melt the butter in the microwave. Let the melted butter sit while you prep the other ingredients. Then, it's just a matter of combining all the dry ingredients in a bowl and giving them a good stir. The melted butter is then combined with the super-cold buttermilk. And this, my people, is when the magic begins!

When the warm butter hits the cold liquid, small, buttery globules form as you can see in the picture below.

Do you see where this is going? When this buttermilk mixture is added to the dry flour mixture and it's all stirred together, you'll notice tiny pieces of pale yellow butter dotting the simple dough. Yep, it will look just as if you spent the time to cut them in!
Would this technique work for traditional, rolled biscuits?
The Cook's Illustrated recipe is for simple drop biscuits, meaning you just drop spoonfuls onto a sheet pan, then bake. Would this technique work for a more classic, cut-out style biscuit, I wondered? You never know until you try, so I decided to give it a whirl!
I turned out the dough onto a floured work surface, kneaded it a few times, then patted it into a small, square. Dipping a round biscuit cutter in flour, I cut four circles, then rerolled the scraps and cut two more for a total of six. (Since then, I've also used a smaller cutter, yielding 8 biscuits.)

It was easy enough; actually ridiculously easy! The biscuits rolled out of the oven tall and golden brown with a heavenly aroma. But you're probably wondering how this version tastes and how they stack up to traditional buttermilk biscuits, right?
The results?
When Scott and I took the first bite, we looked at each other incredulously. The biscuits were light, tender, buttery, flaky and crazy-delicious. "Wow, these are amazing!" Scott said. I agreed.
In fact, we ate far too many that day, smothered with melted butter and strawberry jam. You'd probably frown on us if I told you these biscuits also ended up being dinner that night, so I won't share that bit of information. I guess I'll just say, it wouldn't have been a good day for counting calories!

I've had quite a few happy taste-testers since then, and everyone is shocked when they hear how easy these wonderful buttermilk biscuits are to make. In fact check out the video below, to see for yourself!
Try it! You'll be shocked (and delighted) too... you might even have the inclination to exclaim "Brilliant, simply brilliant!"
Bon Appétit!

Café Tips for making Buttermilk Biscuits
- If you don't have buttermilk, make your own. Place 1 tablespoon of fresh lemon juice or vinegar in a measuring cup. Fill to 1 cup level with milk and stir well. Allow to sit for 5-10 minutes or until slightly thickened. The mixture may curdle a bit, that's okay! Use in recipes in lieu of buttermilk.
- Don't skip chilling the buttermilk (step 2). It will definitely make a difference. If the buttermilk isn't really cold, the little butter globules won't form.
- I made these biscuits when I was in London visiting my daughter. I learned that all-purpose flour (Plain flour) is a bit different there and it seemed like I needed more, probably closer to 2 ¼ cups.
- These biscuits freeze well, both unbaked and baked. To freeze them unbaked or baked, place biscuits on a sheet pan or a plate spaced at least a half-inch from each other. Freeze till frozen, then transfer biscuits to a ziplock bag or air-tight storage container. If you've frozen them unbaked, bake them as directed in the recipe right from the freezer. Give them a couple extra minutes in the oven to compensate for the fact that they were frozen.
- If you freeze these buttermilk biscuits after baking, allow them to thaw when you're ready to use them and then warm in the oven for 5-8 minutes at 300˚F.
- If I'm feeling a bit pinched for time or just lazy, I'll pat the dough into a 6-inch circle and use a bench scraper to cut the dough into wedges. I either put these wedges on a sheet pan lined with parchment paper or in a 9-inch cake pan lined with parchment.
- Another shortcut is to simply scoop up the dough, right from the bowl onto a sheet pan and bake as directed.
- We love to serve these biscuits with our Easy Strawberry Freezer Jam or this Overnight Raspberry Freezer Jam.
Love these biscuits? Then you'll also go crazy over these Ridiculously Easy Cheddar Chive Biscuits, made with the same easy technique!

Thought for the day:
Show me your ways, Lord,
teach me your paths.
Guide me in your truth and teach me,
for you are God my Savior,
and my hope is in you all day long.
Psalm 25:4&5
What we're listening to for inspiration:
Scroll Down for the Recipe - or Save It to Your Inbox
We’ll email you the recipe so it’s easy to save, print, or share.
Ridiculously Easy Buttermilk Biscuits
Ingredients
- 1 cup buttermilk
- 9 tablespoons butter, divided
- 2 cups all purpose flour, more for counter
- 1 tablespoon sugar
- ½ teaspoon baking soda
- 2 teaspoons baking powder
- ¾ teaspoon table salt
Instructions
- Adjust oven rack to middle position and heat oven to 450°F. Line a sheet pan with parchment paper or spray a sheet pan with cooking spray.
- Measure 1 cup of buttermilk and place in the freezer for 10 minutes while prepping other ingredients.
- Place butter in a microwave-safe bowl, cover and heat on high for 30 seconds. If not completely melted, return to microwave for 10-second intervals till melted. Set aside while prepping other ingredients.
- Whisk flour, baking powder, baking soda, sugar,and salt in large bowl.
- After buttermilk has been chilled in the freezer for 10 minutes, combine it with 8 tablespoons of the melted butter. (Reserve the last tablespoon for brushing on the baked biscuits.) Stir with a fork until butter forms small clumps or globules. (See picture in the post.)
- Add buttermilk mixture to dry ingredients and stir with a rubber spatula just until all flour is incorporated and batter pulls away from sides of the bowl. The dough should be stiff and not super wet. If the dough is wet, add more flour 1 tablespoon at a time, stirring to combine, until fairly stiff.
- Generously flour a work surface. Dump biscuit dough from bowl onto prepared work surface and turn to coat all surfaces with flour. Knead on counter 5-6 times (about 30 seconds). Flip over on the work surface to coat with flour then pat into a 6-inch square. It should be a 1½-2-inches in height.
- Cut four biscuits with a 2 ½-inch biscuit cutter. Place biscuits on the prepared sheet pan. Knead scraps a few times till they hold together, then pat into a small rectangle and cut two more biscuits. Transfer last two biscuits to the sheet pan, spacing about 1 ½ inches apart. (See Café Tips in the post for an even easier cutting technique).
- Place in oven and bake until tops are golden brown and crisp, 8 to 18 minutes. (start checking them after 8 minutes as ovens vary. You want them to be a nice golden brown, but not too brown - check the pictures above for correct color.)
- Re-melt remaining tablespoon of butter in the microwave, if necessary and brush tops of hot biscuits with melted butter. Serve and enjoy!
Notes
Nutrition
Shop Our Café Loves
We’ve gathered our favorite kitchen tools, tableware, and entertaining treasures in one place, the Café Loves store. It’s a wonderful spot to find something special for yourself or the cooks and hosts you love!


RIDICULOUSLY EASY, PEEZY!
The days of flour all over the counter are over.
Hi Lorna, We appreciate your lovely review! It's great to hear how much you enjoyed the method for making these biscuits as well as the final results. Thanks so much for encouraging us with your kind comments!
These are the best biscuits ever! I live in the south and these are as authentic as my grandmother's! Absolutely love them!!!!! They're versatile as well. You can add whatever you want inclusion-wise.
I frequently add cheese or jalapeños.
Thanks so much for the wonderful review, Angel! It's such a compliment that these are as authentic as your grandmother's biscuits, and your addition of cheese and jalapeños sounds delicious! We appreciate you taking the time to share your thoughts with us!
I have used this recipe twice and I have no interest in finding any other recipe. Short sweet and simple recipe without over working yourself on a sleepy morning. Got some on my plate right now, sitting right next to some salmon croquettes like my grandma used to do every Saturday. 🥰
Hi Sylvia, Thank you for the excellent review! A sleepy morning with buttermilk biscuits and salmon croquettes sounds absolutely lovely - what a nice tribute to your Grandma! It's wonderful to hear how much you enjoyed both the process of this recipe and the end results. Thanks so much for letting us know!
I made some delicious chicken and gravy and needed a good biscuit recipe to serve it over. I had some buttermilk in the freezer so I decided to make this one! As someone else commented, checking these at 8 minutes was perfect timing. I think mine went for a total of 10 or 11 minutes and were done to perfection. Just the right amount of crunchiness on the outside with a tender soft inside!
Perfection!! 🤌🏼
Thanks for the fantastic review, Mary! Serving these biscuits with chicken and gravy sounds over-the-top delicious - wish we could have tasted it! It's great to hear how well these turned out for you, and it's thoughtful of you to share your precise baking times to help other readers. We appreciate you taking the time to let us know how much you enjoyed this recipe!
My husband bought buttermilk by mistake, so I was looking for something to make with it. This recipe is super simple and turned out great. I've never made biscuits before (I'm English - to me a biscuit is what you call a cookie!) in fact I don't think I've ever had one! My old and cranky oven did well at 450 for 10 minutes. Usually it doesn't like going above 400. They could possibly have had one more minute to brown the top, but I didn't want to push my luck. I got 10 biscuits out of this recipe. Eaten warm with butter and strawberry jam, they seemed similar to British scones, but lighter and fluffier. Amazing recipe, thank you!
Hi Anne, Thank you for the wonderful review! It's lovely to hear how well these biscuits turned out for you, and we're honored that you chose our recipe for your first American-style "biscuit" making experience. Thanks for taking the time to let us know how much you enjoyed them!
I have made biscuits before and was always dreading "cutting in the butter." However, I chilled the buttermilk in the freezer and added it to the butter and suddenly little clobs of cold butter happened! I baked mile high biscuits for the first time. Thank you for a wonderful biscuit recipe and quoting Psalm 25. It too lifted my spirit.
Thanks for the great review, Sandra! So glad to hear how much you enjoyed the technique of adding melted butter to chilled buttermilk - we love it too! Thank you for taking the time to let us know how well these biscuits turned out for you and for sharing your encouraging comments!
I have made these a few times and each batch turns out fantastic!! This is the easiest biscuit recipe that produces great results repeatedly. I have seriously tried soo many other biscuit recipes and the recipe didn’t work out for me or the 2nd time biscuits turned out disappointing.. NOT THIS RECIPE! Definitely a keeper
Thanks for the excellent review, Shana! It's great to hear that you've made this recipe repeatedly with success every time! We're honored that you've made a Café recipe a "keeper" and so appreciate you taking the time to let us know how much you enjoy these biscuits!
These tasted too salty like baking powder and did not rise enough. They did not taste like buttermilk or butter at all. However, they were ridiculously easy to make.
Hmm, I'm wondering if you could have used baking soda, AnneMarie? Soda has a very salty taste and would cause the biscuits to have a lot less rise. Baking powder is much more mild. I've had a lot of comments on this recipe but no one has ever said they were too salty.
Oh, my goodness! What amazing results...so beautiful and delicious! They were just like my Gran used to make...but much easier. The cooking technique of adding the frosted buttermilk to the hot molten butter is simply genius. This is a recipe I will be making often and passing down to my family for many generations. Thank you so much for sharing such a creative recipe. Love all of your recipes in the Cafe! Merci!
Hi Stella, Thank you for the absolutely wonderful review - Wow!! It's delightful to hear how well this recipe turned out for you, and that they reminded you of your Gran's biscuits except easier. We do hope that you and your family will continue to enjoy this recipe together. Thanks so much for taking the time to give us such encouraging feedback!
I have tried for years without success to make buttermilk biscuits. I've scoured through all my cookbooks and the internet looking for the perfect recipe. I finally found it! Not only was this recipe incredibly easy, but the result was a flaky, sweet buttermilk tasting biscuit. Thank you for sharing this recipe. It had a permanent spot in my collection.
.
The tip to check the biscuits at 8 minutes was spot on. Mine baked for a total of 10 and were perfect.
Thanks for the absolutely lovely review, Susan! It's wonderful to hear how well these turned out for you and we're honored that our recipe earned a spot in your permanent collection. We appreciate you taking the time to let us know how much you enjoyed these biscuits!
DELISH!!! I don't normally comment on recipes, but I could not resist on this one. It is so simple, flaky & fluffy, crispy & tender and the same time. The yummiest biscuits ever. It is my go-to biscuit recipe from now on. Thank you so much for sharing it.
Hi Jeana, Thank you for your very encouraging comments and the great review! We think your creative description of these biscuits is spot-on and we just love hearing how well they turned out for you. Thanks so much for taking the time to let us know how much you enjoyed this recipe!
Wow- I adore the technique of adding melted butter to the ice cold milk to form butter globules. I used to make my biscuits in a food processor (to cut in the butter) but this is far easier, and the biscuits more tender from less processing.
My only change was to use half and half that had gone ‘off’— just enough to not be coffee worthy.
The biscuits were fabulous—
Hi Patricia, Thanks for the excellent review! So glad to hear that you liked the method of incorporating the butter and that the biscuits turned out so well for you. We appreciate you letting us know how much you enjoyed this recipe!
In my opinion this is holy grail of biscuits. My gold standard has been Loveless Cafe in Nashville but I will not be thinking about them now. Absolutely wonderful.
Hi Pam, Thanks for the very high praise and fantastic review - Wow!! It's so encouraging to hear that our biscuits have become your "gold standard". We're delighted that you enjoyed this recipe and so thankful that you took the time to tell us how much you love these biscuits!
First time ever making buttermilk biscuits and this recipe was super easy! AND my goodness they were sooooo good!
Thanks for the wonderful review, Mia! We're honored that you chose a Café recipe for your first biscuit-making effort, and thrilled to hear how well it turned out for you! We so appreciate you taking the time to let us know how much you enjoyed this recipe!
I have tried sooo many buttermilk biscuit recipes but this one is the best AND EASIEST thus far! I will be making this again!
Thank you for the excellent review, Nidhi! It's great to hear that not only did you love the biscuits themselves, but you also loved the process of making them - thanks for letting us know!
So Easy!!! And so good, Thank you for relieving all the stress.
Hi Pab, Thanks for the great review! It's so encouraging to hear how well these turned out for you. Thank you for taking the time to let us know how much you enjoyed this recipe!
This is now my go to biscuit recipe. I have made it a couple dozen times and always recieve rave reviews. The frozen buttermilk with melted butter is game changer because let's be honest who wants to cut in butter for something im making first thing in the morning.
Thanks for the wonderful review, Jessie! So glad to hear how well these turned out for you and how much you like the method with the melted butter and cold buttermilk (we agree that it's especially handy first thing in the morning!). We appreciate you taking the time to let us know!
These were wonderful, little fluffy, tasty, buttery biscuits. I made them small( not on purpose) and they came out perfect. What a great recipe! Thank you! I love your thought for the day! ❤️Annie
Hi Annie, Thank you for the excellent review and your kind comments! It's lovely to hear how well this recipe turned out for you. Thanks so much for taking the time to let us know how much you enjoyed these biscuits!
Im not a baker and followed this recipe. It was easy and the biscuits were a win. Will make them again.
Thanks so much, Jane! We appreciate you taking the time to share your results! Now you're a baker!🥰
Tasty, Not flaky. I used half regular flour and half White Lily red grapeseed type flour. Would consider making again. Easy recipe.
Hi Susanna, so happy you enjoyed this recipe! If you use 100% AP flour you'll find them to be nice and flaky. Red grapeseed type flour is great nutritionally but it will affect the texture as well as the flavor.
I did this recipe two times, everyone loved the biscuits. I don’t melt the butter, however, I dice it very tiny and put in the freezer along with the buttermilk
Hi Marie, Thank you for the wonderful review and for sharing your experience with this recipe! So glad to hear how well the biscuits turned out for you - thanks for taking the time to let us know!
My mom used to make the most beautiful biscuits ... I did not inherit that gene. However, this recipe makes up for my shortcomings! Thanks for sharing!!
Thanks for the great review, Daisy! It's lovely to hear that this recipe helped you make beautiful biscuits like your mom's. We appreciate you taking the time to let us know!
These turned out light, fluffy and super tasty. Since it's a lot of dishes I'm going to see if the dough freezes well. 🤞
Hi Michele, Thanks for the great review! The biscuit dough freezes beautifully. Just portion them out and freeze, than bake them from frozen and add a few extra minutes to the baking time (watch them carefully for the last few minutes!). Enjoy!
I never make biscuits. I have tried many times; but they always come out like hockey pucks. Last night in desperation; I searched for buttermilk biscuits; because I had leftover buttermilk from making pancakes. Your recipe was the top of the list.
These were amazing! So, so easy and they came out great! I will be making these again. And I am so excited to have found your site. I will be looking for more lovely recipes!
Hi Marie, Welcome to the Café and thank you for the excellent review! It's wonderful to hear how much you enjoyed this recipe and we hope you'll find many more. Thanks so much for taking the time to say hello - we'd love to hear from you again!
Terrible, terrible recipe. Do not use this
I'm so sorry you had trouble with this recipe. It's impossible to say what went wrong without having been right there in the kitchen with you. You might want to read the 100s of fabulous reviews on this recipe and give it another try!
Hi Chris & family,
Absolutely the best buttermilk biscuits, the chilled buttermilk/butter step is a game changer.
Thank you so much for sharing!
Hi Diane, Thank you for the great review and your kind comments! So glad to hear how well this recipe turned out for you. Thanks for letting us know!
Hey 👋🏾 these are the best biscuits I have ever made! They are great. My kids love them. Thank you very much for sharing this recipe. Will be trying all your other recipes. Thank you 😊
Thanks for the excellent review, Anthony! It's wonderful to hear how much and your kids enjoyed this recipe - we so appreciate you taking the time to let us know!
Hello. I was wondering if this method could be used for pie crust by using ice cold water instead of buttermilk?
Hi The Dude Abides, thanks for your question. It's unlikely that this technique would work for a pie crust because there's not enough liquid in a pie crust to combine with the melted butter. A food processor is probably still the quickest and easiest way to make pie crust. But if you end up trying this method with success, we'd love to hear about it!
I love this recipe because I've never liked the pinch method! The only thing is that my biscuits are a little too dark on the bottom. I cut the temp down the second time I made them and had to extend the baking time, but the bottom was still pretty tough. Any advice?
Hi Alex, so happy you enjoyed this recipe. Regarding the bottoms of your biscuits, it sounds like your oven runs a little hot at the bottom - there are two options that should help. One, you could raise the shelf in your oven one notch. Two you could bake them on a double sheet pan. I have to do that sometimes with my scones so the bottom doesn't get too dark.
You can experiment to see which works better for you or try both!
Chris, I left you a message yesterday, but I don't see it today so let me say this again. I made these on Saturday and they were very good but I had an issue with the performance of the dough. I used White Lily flour, I stock that flour along with King Arthur and Pillsbury flour. I stock the 3 flours due to the protein content.
My dough became was very wet and I kept adding more flour. I couldn't seem to get it to not be very loose so to speak. I kneaded it and cut out the biscuits and they were very flat and they stayed very flat. I wanted to know what brand of flour you use to make these biscuits? And ask you if you thought that the protein level of the White Lily flour was too low? Thank you in advance for your help.
Hi JK, see response below.
Chris, help please...
I made these biscuits, they taste great. Here in lays my issue; I used White Lily flour.
And this must have been my mistake. I stock White Lily, King Arthur and Pillsbury flour, because of the different protein levels. I think now I should have used King Arthur flour with this recipe. Not sure where my head was when I chose White Lily. My dough was extremely sticky/wet. I kept adding more flour, however it didn't work. The stickiness was gone, however, dough extremely soft. After I kneaded the dough and cut them, they were not as high as a biscuit shape should be. They baked great, but they were wide and spread out so to speak. What brand of flour do you use when you make these biscuits?
That's the only thing I can gather that would have produced this issue
Any help would be appreciated, thank you.
Hi JK, I'm sorry you had difficulty with this recipe. I always use King Arthur Unbleached White Flour for this recipe. I think your issue probably was the Lilly White. It's great flour but it's not perfect for all biscuit recipes.
Delicious will never make biscuits any other way. Froze well after baking and also froze well before baking. Awesome recipe.
Hi Annette, Thank you for the wonderful review! It's great to hear how well this recipe turned out for you - thanks so much for taking the time to let us know!
Just made these for my Mother- These are just beautiful - flakey and fluffy! Loved the cold buttermilk and melted butter technique. Will be making these again and again!
Thanks for the excellent review, LA! It's wonderful to hear how well these turned out for you and your Mother. We appreciate you taking the time to let us know!
İ'd be very happy if you could let me know what can be used to replace buttermilk?
Thank you,
Mizyal
Hi Mizyal, there are several substitutes you could use if you don't have buttermilk. You could use sour cream, creme fraiche or yogurt that is thinned down with milk to the consistency of heavy cream. Another option is to add 1 tablespoon of white vinegar per cup of whole milk. Stir this combination, wait 5 minutes then use as directed.
I can't always afford butter can you tell me if I could use Imperial brick margarine?
Hi Claudia, I haven't tried this recipe with margarine but, it should work! The flavor may be a little different, a little softer and not as flaky but still delicious!
These came out delicious! A very tasty treat. Did you use salted or unsalted butter?
Thanks for letting us know how well these turned out for you, JS! Café recipes are always tested with salted butter. Enjoy!
I never thought of freezing the buttermilk first. It made a huge difference!! I love this recipe! Thank you!🥰
Hi Morgan, Thanks for the excellent review! It's wonderful to hear how much you enjoy this recipe and we so appreciate you taking the time to let us know!
I have failed at every try to make a great biscuit until now . These are perfection !!
Hi Carla, Thanks for letting us know how well this recipe turned out for you - Enjoy!
Best recipe I’ve EVER made!!
Hi Winona, Thank you for the excellent review and for taking the time to let us know how much you enjoyed this recipe!
So easy, and so delicious!!
Thanks for the great review, Tami! So glad to hear how well and easily this recipe turned out for you - we appreciate you taking the time to let us know!
These biscuits are amazing! I will never use another recipe.
Hi Lyndal, Thank you for the wonderful review! So happy to hear how well this recipe worked for you - Enjoy!
Great Recipe. First time making biscuits. They turned out light and delicious and so ridiculously easy. lol Question: I bought a bread box but unsure if it's keeping the baked goods at their best. I read that refrigerating is not good. I do freeze if I'm not using right away. What do you suggest for bread storage?
Thank you.
So happy you had great results, Sandy, with your first biscuit-making adventure!
Regarding your question, you're right, refrigeration is not the best option for bread. I'm like you, I love to freeze whatever I don't use as it keeps everything so fresh. That said, I think the biscuits would be fine in your bread box for 12-24 hours.
Haven't made biscuits since Home Economics in high school. lol And they turned out like little bricks as I recall. These came out so light and delicious. The way you approach recipes gives me the confidence to try things I've never made before or haven't attempted in years. Thank you so much.
All of your recipes so far are sure winners.
Recipe was very easy to follow & the biscuits turned out fluffy & delicious. Really liked the info about how to freeze cooked/uncooked biscuits. There are only two of us in our house so knowing how to store was an added bonus.
Hi Connie, Thank you for the kind review! So glad the biscuits turned out well for you and that the added freezing and storage info were helpful. Enjoy!
These are not only ridiculously easy, they are ridiculously delicious!! Made the cheese and chive version to go with a salad and soup lunch for guests today, and they were a hit! Thank you!
😊
Numbers 6:24-26
Wonderful! Thank you for the review, JoMo!
Hi Chris,
Just wanted to say Happy Thanksgiving to you and yours I wanted you to know I made your Ridiculously Easy Buttermilk Biscuits and the Ridiculously Easy Buttermilk Cinnamon Raisin Biscuite this morning they were as good has always family and friends enjoyed the treat.,
Sorry I have not replyed to all the recipes I have made from your blog that were very good. I will continue to try a lot more of your recipes has I have time to do so.
Sandra Stewart
Thank you for the kind comment, Sandra! We're so happy to hear you're enjoying the recipes!
This is my go-to biscuit recipe now! It's so easy and conveniently uses up the buttermilk I have in my fridge. The biscuits turn out great when baked from frozen and are tender and delicious!!
Wonderful! Thank you for the review, Laura!
Random, I know, but I just wanted to tell you how low-vision/blind-friendly this recipe is. I have been working on baking as a severely visually-impaired home cook for the last two years. I have made biscuits, and they turned out great. However, trying to figure out how much to mix the butter in once cut or grated was not my favorite activity. The whole process was messy as I could not see what I was doing and had to feel. With this technique, you can feel when the butter is in globules as you stir it into the cold buttermilk so there's no guesswork. I have made this recipe 6 times over the last month for the freezer and demonstrating for a couple of other blind home cooks. Fantastic results every time! Now, to figure out if this tecnique will work with pie dough, the bane of my culinary existence. Truly, thank you for all of the wonderful work on this recipe and your very screen reader-accessible blog!
We're so happy to hear that, KT! Thank you for taking the time to let us know!
I've made this recipe about 4 times now and my one daughter and I love these so much. She loves them enough that she's learning how to bake to ensure our freezer is stocked so she can have fresh baked biscuits in the mornings!
That's great, Simone! Thanks for the review!
Honestly, I really loved this recipe, even though I had to make my own buttermilk, used a plastic cup as a cutter, and the biscuits came out a bit undercooked. Popped everything in the microwave for about half a minute, and they're perfect!
Thank you. 🙂
I'm glad it worked out! Thanks for the review!
These were simply the best biscuits that I have ever made. My husband even commented that they were light, fluffy, and had a tender texture on the inside. Although I have made biscuits in the past, and they turned out pretty good, these were far superior. I am not sure that I will ever try another biscuit recipe again!! I absolutely loved the technique of putting the buttermilk in the freezer to get the butter globules. Soooo much easier than cutting in the butter.
Wonderful! Thank you for the kind review, Lynne!
OMG! Thank you!! I’ve tried soooo many different biscuit recipes and they never turn out. I was hesitant to try this one because ALL the others I tried ALWAYS used grated frozen butter, they would be too dense or by the time the tops were a little golden the bottom was very brown and hard, and they rather flat. This…this recipe to my utter delight was completely opposite! Tall, fluffy, light beautiful biscuits! Finally!! In 54 years I have NEVER left a comment on a recipe but I just had to thank you! Silly to be so excited over making good biscuits but I’m genuinely doing a happy dance!
That's awesome, Trish! Thank you for your review!
I made these and they didnt come out right. The butter did not incorporate with the buttermilk like shown. It just stayed a melted layer on top. After everything was mixed, it still was only a batter. Very wet. I added flour, but they did not rise in the oven and were very dense.
Hi Alice, I'm sorry you had trouble with this recipe. I hate wasting good ingredients.
If the butter did not form clumps, your buttermilk was not cold enough. If you try the recipe again, make sure the buttermilk is very cold and the melted butter has had a chance to warm up a bit. It really does work well if you get the nice clumps to form. The dough should not be a wet batter, but very thick. Not sure what happened there - it's impossible to say without having been right there in the kitchen with you.
Ridiculously easy and ridiculously delicious. I’ve made these several times and they always turn out amazing. The chilled buttermilk / butter trick is genius, as it removes the most messy and tedious task (cutting cold butter into a dry mixture) from the equation. I always dread that step!
Everyone I share the recipe with feels the same. And everyone who tastes them raves. Thanks for this great recipe.
Awesome! Thank you for the review, RailGrl!
These were really easy to make and they were very good, but I found them to be a bit too salty. Since I'm using salted butter, could I reduce the table salt to 1/2 tsp? Thanks!
Absolutely, that will work fine, Alan!
Absolutely amazing! I have never made biscuits before and these were crazy easy and delicious!!! Is it possible to make the dough ahead of time and bake later? We camp quite a bit and would tlove o take these camping but prefer them fresh out of the oven!
That's great, Anna! Yes, you can freeze the unbaked dough and bake them from frozen.
Holy cow! Never made biscuits so I googled recipes..yours was very easy to follow so I made them. Came out perfectly fluffy and very tasty. Thank you..I will be making these from now on!
Awesome! Thank you for the review, Janis!
Wanted to love this recipe so much. Quick to put together, and easy to follow. However, I am sad to say I followed the recipe EXACTLY, and they rose beautifully, but tasted like baking soda and salt.
Again, I followed the recipe exactly and used high quality ingredients (including butter). Very sad it didn’t come out the right way, which it doesn’t make sense because it has so many good reviews. Don’t know what went wrong.
Hi Ally,
I’m really sorry you had less than stellar results from this recipe.
It’s really impossible to say exactly what went wrong without having been right there in the kitchen with you.
With only ½ teaspoon of baking soda in the recipe, it seems strange that you’d end up with a strong flavor of baking soda???
You’re correct in saying that so many others have had such delicious results - (well over 200 5-star reviews). Again, sorry this recipe didn’t work for you. I hate wasting ingredients and time.
I just made these and they were great! I read my flour bag and I had self rising flour in my hand. I was thankful to catch that. I just wonder if you didn't use regular flour? That is the only offer I have. Try again. Too deliciously easy, even the day after!
Thanks, Molly!
Omg…these are the best biscuits I’ve ever made in my 50 years of baking!! Melting the butter is a lifesaver vs freezing & dicing it. I replaced the buttermilk with a cup of milk, mixing in 1 tablespoon of white vinegar before putting in freezer. I used salted butter & added no salt. Bake time around 10-12 minutes. Thank you so much for this recipe!!
Great! Thanks for your review, Hilda!
I’ve never been successful at baking biscuits…UNTIL NOW!
This recipe and method was a game changer for me. They turned out perfect on the first try.
I love all of your recipes, Chris, but this one is worth its weight in gold!
Thank you so much for sharing it.
Awesome! Thanks for the review, Deborah!
Did you use salted or unsalted butter?
Hi Shannon, I always use salted butter.
I would like to freeze biscuits. Do you know how they freeze? And should I unthaw before baking?
Hi Lisa, they freeze beautifully! Bake them from frozen and just add a couple extra minutes (keep an eye on them) Enjoy!
Love these biscuits! Have you ever tried adding fresh fruit like blueberries and maybe a glaze on top?
Thanks, Michelle! We haven't, but you might be interested in our scone recipes! They use the same method and there are lots of variations- https://thecafesucrefarine.com/the-ridiculously-easy-way-to-make-scones-10-fabulous-scone-recipes/
Hello! An you double this recipe and get the same result?
Hi Jodi, yes that will work!
I don't think I ever commented on this recipe. Your method is a game changer and the biscuits are great!
I had forgotten about this until a cook at a restaurant I go to was tasked with making biscuits. He'd never made them before - and when I shared your method with him he was elated!
That's awesome, Kathy! Thanks for letting us know!
These are the best biscuits and incredibly easy to make. I never even broke out the cutter. simply patted the dough into a rectangle and cut into square biscuits. My guys loved them.
Awesome! Thanks for letting us know, Erin!
Hi. This recipe looks great! Is the calorie count based on 6 biscuits, or 8?
Thanks!
Hi Kathy, the nutritional information is for 8 biscuits.
I made these as mini biscuits , they are absolutely delish. Will be my go to biscuit recipe from now on. So easy! Love it with just butter and honey! Only thing I did different was fold the dough a few times for the layered look before cutting them out. This is really the only way to go, not fussy only takes a few minutes for buttery flaky biscuits.
Thanks for the review, C!
I will never make biscuits any other way, these came out amazingly! After gently kneading, I hand- shaped the dough into a rectangle shape and cut into 8 pieces for rustic looking biscuits then baked as instructed. They were so delicious with a nice, lofty rise. Not having to cut in cold butter is a game changer! We'll be eating biscuits a lot more often in our home!
Wonderful! Thanks for the review, Jen!
Ridiculously (simple) delicious and light! My new go to for biscuits!
Awesome! Thanks for the review, Gerrie!
I FINALLY got some sort of rise on my biscuits!
That's great, Ashley!
I came all the way to my computer to write this review. I am 31, new to baking and never have ever had any luck with breads, rolls, etc. I need easy, flawless instructions. I am SO GLAD I found this page. Its true. They are ridiculously easy! If I can do it, anyone can. Not only were they easy, they were DELICIOUS! My husband raved about them, and ate two at one time and wanted more. Mine ended up yielding 9 biscuits, and I used a mason jar to press into them (and not twist) to cut the perfect sizes. I took photos because I was so proud of myself. We tried bites with butter, honey and then jam. They are fluffy and perfection. Thank you again, this one is a KEEPER! Yummy!!
Wonderful! Thank you for the review, Amanda!
I'm not lying when I tell you this is the first time in my life that I've ever made a perfect batch of biscuits. I've tried everything. They're either hockey pucks or crumbly. These were absolutely perfect... and easy! Thank you!
I love that, Linda! Thanks for sharing!!
Love to bake, desserts are my passion, anything but biscuits. I halved the recipe and gave it a go..... 0.38tsp of salt was a challenge but I just pulled biscuits out of my oven that I would be proud to post a picture of (future feature possibly?)
Thank you for giving me big biscuit energy!
Love your ridiculously easy recipes, they have me grinning like a 2 year old who just deposited digested food where it's supposed to go and is bursting with pride for the accomplishment.
Ha! Thanks for the review, Andrew!
Love this recipe a lot and especially love the buttermilk trick, but I'm super duper lazy so I've been dividing the dough into muffin tins instead of cutting them out :p
Haha, don't feel bad, Janet, I do that too!
You know it’s even easier. I just use an ice cream scoop and scoop them out on the pan. They come out perfect every time.
That's great, Kimberly!
Could I use self rising flour and omit the baking powder and salt in this recipe?
Hi B, I haven't tested this recipe with self rising flour. To ensure success, I would stick with the recipe as written. The proportions would be different with SR flour.
Throwing away any other biscuit recipes I have. These were very easy and turned out perfectly! I love the chilled buttermilk in the melted butter trick!
Thanks, Julie! So glad you enjoyed these!
I’ve made these numerous times and this is my go-to recipe for biscuits. I don’t put the buttermilk in the freezer and it still works! The one thing I always do is use really good butter. My favorite is Kerry Gold. Easy, yummy, and a classic. I’d never use frozen after making these.
Thanks for the review, Kristi!
So easy and delicious. Thank you so much for the recipe. Perfect New Year’s Day breakfast.
Wonderful! Thanks for letting us know, Wendy!
I made these for dinner with soup and they were amazing. Very easy and came out perfect.
I love the trick of melted butter with cold buttermilk it is a game changer!!!
Awesome! Thanks for the review, Joann!
A special thank you for your easiest of all buttermilk biscuit recipe ever! The taste is sensational!
Awesome! Thanks for the review, Kelley!
I’ve made these biscuits so many times over the last few years. We just love them and they are ridiculously easy! I usually just cut my patted out rectangle into 8 biscuits. Tonight I decided to freeze 6 of the uncooked biscuits to see how that works. Trying to decide if I should let them thaw first or bake them from frozen, in which case I’m not sure how much time to add. Any thoughts on that. Thanks for a terrific recipe!
Thank you for the review, Kathy! You can bake them from frozen, it should just be a few extra minutes.
These are fantastic...family was very impressed. Do you think you could make these a few hours in advance and store formed biscuits in fridge before baking?
Yes! That even works well to do it the night before. So happy you enjoyed them!
Wow! So easy and better than BoJangles!! I wonder if the dough could be used for dumplings (ie in chicken and dumplings)....I will be making these biscuits whenever the grandkids are visiting and then just for my husband and myself too - yay!
Would love some of your free printable labels.
Hi Sharon, so glad you enjoyed these! We do not have labels for this recipe at this time. We haven't tested this recipe as dumplings, but you might be interested in this one- https://thecafesucrefarine.com/easy-chicken-and-dumplings-recipe/#wprm-recipe-container-67961
Omg. I've made biscuits many times, but this is the tenderest fluffy biscuit I've ever had. I usually do drop biscuits just cause it's easier, but this was well worth the trouble! The first one I had with pear preserves, the second only butter because the biscuit is so good! Thank you! Looks like I'll buy buttermilk often. Lol great recipe!
Awesome! Thanks for the review, Mj
I only have one hand I can use. So it's hard for me to knead with one hand. Could you knead these in a mixer and if so for how long.
Hi Willie, wow, I guess it would be difficult for you to knead. I wish I could say yes to your question. However a mixer would destroy the texture of the biscuit dough. Perhaps you could have someone help you?
Super Impressed. Tested them for Thanksgiving and my very picky brother-in-law. (He still won't like'em;) They were as close to a perfect biscuit as I think I can make. A little flaky but more crumbly, buttery, and delicious. Fast and easy with great instructions. Not sure if this will help but I read that folding will help increase flaking so I'll give that a shot. Either way super yummy and can't wait to finish them off with coffee this AM.
Wonderful! Thanks for the review, John!
I have made this recipe several times and always with good results! Homemade biscuits problem solved!
Awesome! Thanks for the review, Joann!
This is my go to recipe...no more hockey puck biscuits!!!
Awesome! Thanks for the review, Anita!
This is my first post on your website. I've loved all of the recipes I've tried so far, including these biscuits! Question: I live at high altitude (4,800 ft). I have been using buttermilk powder, mixed with whole milk (attempt #2) and half-milk, half half-and-half (attempt #3). Both times, the dough was way too wet, and I ended up using at least 1 1/4 cup (or more) of flour. The biscuits turned out great, but I'm wondering if I need to adjust the amount of leavener? And btw, on attempt #1 I mixed up this recipe with your scone recipe and ended up reconstituting the buttermilk powder with whipping cream - a heavenly mistake! Talk about NOT counting calories!
Hi Mika, we live at 2700 feet in the mountains of NC. I don't have to adjust this recipe at all but I'm not an expert with higher elevations. Not sure why your dough was so wet. The only thing I can think of is that it may be a difference in the type of flour.
O have never baked anything in my life like this. It was so easy and fun they turned out perfectly. Thank you so much this is how I will bake homemade biscuits for now own.
Awesome! Thanks for the review, Yolanda!
This recipe was so easy and it was incredible. The flavor was perfect and so light and fluffy! I have definitely made e tough mover-kneading biscuits in the past this over kneading.
Wonderful! Thank you for the review, Ellis!
Love it! The only recipe I use now. I like the buttermilk and melter butter trick - makes it so much easier <3
Wonderful! Thank you for the review, Julie!
Delicious!! Better than our previous tried and true recipe. Is it possible to make them smaller and, if so, how would you adjust the cooking time? The size is great for biscuits and gravy but it would be nice to also make smaller ones to serve with other breakfast meals.
Thanks, Marina! Yes, you can make these smaller, just use a smaller biscuit cutter or glass to cut them. I'm not sure of the exact baking time, but start checking them a couple minutes earlier.
Absolutely delicious biscuits! So easy to make and in no time these were done & ready to devour.
Many thanks!!!
Wonderful! Thank for the review, Nomah!
Great recipe. I don’t have a pastry blender and I always struggle to get the butter in recipes like this to be crumbly no matter how cold it is. I will say I used about 2.5 cups of flour (lost count of how many tablespoons I added) but I was using European flour (405) which is different than American). So if anyone else is making it with 405 thry should start out with 2 1/4 cups (as you said you did in the UK) and go from there. The butter is also a bit different in Europe I think (higher fat content).
But after I got the flour amount right it patted out nicely and I got 10 good sized biscuits (I was using a heart shaped cutter though because I won’t have a circle and it was easier than using a glass). They were delicious with sausage gravy. I also tried one with jam so I got a taste of the biscuit more and they were so tender and tasty. The cold buttermilk trick is great and I may try to adapt it for pie crusts too!
Thanks for the review, Sarah!
The best tasting and textured biscuits I ever made! Thank you for sharing that trick! I started to give a 4 star because they did not rise much. But figured that may have been caused something I did. Don't know what, though ha! Thank you again. My husband and son are happy 😊
Awesome! Thanks for the review, Bunny!
Can you use a kitchen aide mixer instead of spatula to mix? Thanks these are amazing!
Hi Fitch, I would not recommend using a mixer for this recipe. The texture would get tough.
So easy to make. No hard kneading and they came ot fluffy.
Great! Thanks for the review, Alyssa!
Wonderful, easy recipe with standard kitchen ingredients. I have been looking for my go-to biscuit recipe and I have found it. Turned out so good. Thank you!
Awesome! Thank you for the review, Eric!
Hi! The biscuits are fabulous! Is the sugar necessary for the chemistry aspect of the recipe?
Hi Valerie, you don't have to add the sugar but it does help balance the flavor.
First time making these and they came out perfect.
So glad i found this recipe.
That's great, Sarah! Thank you for taking the time to leave a review!
I have been trying to 'crack the code' on easy biscuits with dismal results. They either don't rise. Or the dough is too shaggy or too wet. THIS recipe hit it out of the park. I was done and had them in the oven in under 20 minutes. It was indeed ridiculously easy. The cold buttermilk and warm butter mix was soooo much easier than cutting butter in. I have shared this recipe with multiple friends.
This goes in 'The Binder'.
Thank you!
Awesome! Thank you for the review, Dale!
I found this recipe for your biscuits on Pinterest and knew that this was a very similar recipe my mother used many years ago. I had tried every thing I could think of and I didn't pay enough attention to her making them - only knew that I had never found her secret to making these biscuits. So I made a double batch last night for supper for my daughter and I and they were very nearly perfect. We ate them for bread and later had them for desert. I subscribe to Cook's magazine but I had never seen this recipe - also watch their TV shows. I do know that Mom melted her shortening (Crisco) and your recipe caught my attention immediately when I read you melted your butter. Butter is so expensive but I will try it to see if I think it will be better or as good as shortening.
Thank you so much for releasing this recipe. I"m 87 years old and have been searching for a solution to my biscuit dilemma.
Thank you, LaVerne! So glad you enjoyed this recipe!
Making biscuits from scratch should be in my DNA. My paternal grandmother started making them before she was a teenager. She raised her younger siblings when her mother died and then raised 8 boys of her own. Her biscuits were the size of large hamburger buns. My maternal grandmother cooked for the oil field workers, then her biscuits and gravy were hot items when she worked in the cafeteria at Aerojet. My mom made the fluffiest biscuits that made your mouth water. Then I came along. The dog turned his nose up to my first attempt. My biscuits have been an embarrassment until now. Today I tried this recipe for the second time. Followed the recipe religiously the first time and they were pretty good. This morning I didn't have butter milk so used 3/4 sour cream, 1/4 cup of water instead. They were so good my eyes rolled back. My brother was pretty impressed also.
Haha! Your comment made me laugh out loud, Mary! So happy you have finally had success. Thanks for taking the time to write 🥰
These were super yummy says my southern husband and I can't agree more! Thank you for this easy, delicious recipe.
That's great, Alexis! Thank you for letting us know!
I can't believe I've waited this long to make homemade biscuits. They are ridiculously and ridiculously delicious! I,too, was worried about the sugar but they are not sweet at all. I made sausage gravy for my husband to go over the biscuits and he went back for seconds! Thanks for such a wonderful technique! Next up: ridiculously easy scones. With homemade clotted cream and raspberry jam.
Awesome! Thanks for your review, Alicia!
Easy to follow recipe with extraordinary results!
I'm a 70-something mechanical engineer who just retired about 1 year ago. Soon after I retired I started baking for something to do and so that we could have baked goods from time to time. (My wife is an amazing cook, but dislikes baking.)
I've been doing bread for us, cookies for our granddaughter (shortbread cookies Grandpa!) and even a couple cakes for my grand-nieces. I love a warmed up biscuit with blackberry preserves, my wife enjoys a biscuit split and an egg between the sections.
I never experiment with recipes at this point in my baking, I follow the directions explicitly. Ambiguous instructions don't fly for me and if I run into that I move on. THIS recipe was easy to follow and easy to complete and produced such great results. I do a double batch with half being larger so that my wife's egg fits better with less hanging over.
I bought an Airbake sheet from a fund raiser some years ago when they were a more popular thing. We never really used it until I recently started baking. In all the things that I've baked, as an utter novice, on a sheet nothing has ever been bottom-burned on the Airbake. I'm not sure how readily available they are any more, though.
This recipe page doesn't expand upon the science of baking buttermilk biscuits; why cold buttermilk is used, how to ensure lamination, etc. For anybody who is interested in that you can google something like "chemistry of buttermilk biscuits."
That's great! Thank you for taking the time to leave a review!
Do you have to add the sugar? Not a fan of sweet biscuits.
Hi Tina, these biscuits are not sweet. The sugar just helps balance the flavor but you can skip it if you prefer.
I made them! So they taste *so good*. But there ugly. Who cares! I did want to ask, can I refrigerate the dough before cutting or dropping next time? I had to use SO much flour on my counter and they would not unstick. I was worried I’d added too much flour at the end. Still turned out good, just don’t want to deal with the stress of sticking to the counter again.
Hi Kimber, you can refrigerate the dough but I wouldn't do it for more than 10-15 minutes or it won't be easy to work with.
I can't believe I waited this long to try making biscuits. I make them now and it's so easy. I make some for the freezer and when my college son comes with friends I make delicious breakfast sandwiches and they rave about them!
That's great, Crystal! Thank you for the review!
I Love this recipe! So easy and delicous. Have you ever tried it with cake flour? It is all I have right now. Thanks, Ellen
Hi Ellen, I haven't made these with cake flour but it should be fine!
Great recipe! Thank you so much! I was being lazy so I didn't want to roll the dough out plus I like when the edges are soft, so I put them in muffin tins. They turned out great! The top and bottom were crispy. Very delicious! Melting the butter and pouring it into cold buttermilk is genious! After I added the butter, I threw it back in the refriderator for 15 plus minutes while i was doing some other things. I will continue to use this recipe! Thanks again!
Great! Thanks for the review, Palma!
I agree! Very easy and DELICIOUS! My husband described them as “restaurant quality”! This will also be my new go-to biscuit recipe 🙂
Awesome! Thanks for the review, Rachel!
I found this recipe and did the same thing, went straight to the kitchen to give it a try.
Ridiculously easy is correct!! I whipped these up and once they cooled, we went at 'em! OMG!! They were PERFECTION!! Light, fluffy and absolutely delicious! This will definitely be my go-to biscuits recipe from now on!!
Thanks for sharing!!
Awesome! Thanks for the review, Holly!
Can this recipe be doubled? I need a dozen biscuits, and would prefer to make them all at once.
Hi Kelly, you could double the recipe but make sure to use a very large bowl.
I have been making Baking Powder Biscuits for years but these are truly a southern biscuit with all the feels! I make soup all the time and I guess this will be my new recipe. I am happy to see you can make them and freeze them- saves times when you have friends over.
Thank you for the review, Jill!
I took a look at the dough b4 the knead step, & made drop biscuits. They turned out Great!! I’m southern born and raised,. Will definitely do again!
Thanks, Holly!
I’m in shock, these were so easy and so delicious! My first time ever making homemade biscuits and they turned out fantastic!
Wonderful! Thanks for your review, Lindle!
SO easy & delicious. I loved them. They definitely needed longer cook time but I also made them thick. Next time I'll make them thinner. Really good biscuits!
Thanks, Mary! Glad you enjoyed these!
I've made so many of your recipes and will also make this one. All the recipes I have tried have been superb!! There is one thing I need to ask. It states: "Let the melted butter chill while you prep the other ingredients." Later in the explanation it states: "When the warm butter hits the cold liquid, small, buttery globules form as you can see in the picture below". Please help. Thank you.
Hi Josephine, so happy you've enjoyed our recipes.
Regarding your question, sorry if that was confusing. I will change the wording a bit. What I was saying was to let the butter cool down just a bit while the buttermilk is chilling. It will still be melted and somewhat warm, just not piping hot. Hope that helps!
Very helpful. Thanks so much.
Made them! Delicious! Everyone love them. I didn't make them into biscuit shapes. I just pressed the dough in a 6x6 baking dish lined with parchment paper.
Great! Thanks, Momma!
If I make the dough the night before, should I roll and cut the biscuits or wait to do that part in the morning?
Hi Nancy, you can roll, cut and refrigerate them. They're actually better that way!
This recipe is brilliant! I made my first biscuits with my mother over 60 years ago. This recipe beats anything I’ve done before. Now, anyway you can conjure up a pie crust recipe that is this easy? I still can’t duplicate my grandmother’s flaky crusts.
That's great, Bec! Thanks for your review!
"If I'm feeling a bit pinched for time or just lazy, I'll pat the dough into a 6-inch circle and use a bench scraper to cut the dough into wedges."
I use a pizza rocker. The Bakery Police never said biscuits couldn't be square, right? What are they gonna do, throw me in Biscuit Jail?
Ha! That's great, Mark!
Can’t rate, but sounds yummy and easy. If I scoop them, what size scoop? I have the 1,2,and 3 tablespoon scoops. Don’t want to mess these up and want to surprise my husband with these and my homemade sausage and gravy. Thank you in advance.
Hi Sheila, I would use your 3 tablespoon scoop.
Hello. Did exactly as you said and they came out DELICIOUS AND PERFECT. Wanted pictures but got eaten too fast.😁
Awesome! Thanks for letting us know, Sheila!
My family absolutely loves these bisquits, they request that I make them every weekend.
That's great, Kathryn! Thank you for your review!
These are amazing, and so very easy!!! I plan on making up several batches this weekend to freeze and then pull them out on Thanksgiving to bake them up!!
That's great, Heidie! Thanks for letting us know!
I made these biscuits last night. They are awesome. #Bookmarked
Awesome! Thanks for letting us know, Kam!
Hi Chris!
What about using White Lily all purpose flour?
Pat
Hi Pat, that should work fine!
I have started making these to serve with soups this fall and they are officially now a recipe I am famous for! People have started asking me to make them all the time, and this recipe is easy enough to make with my toddler. Love it! Thank you!
Awesome! Thanks for your review, Julie!
Hi - just getting ingredients ready to make these - do you use salted or unsalted butter in your recipe. Thanks.
Hi Janet, I always use salted butter.
Oh my gosh, these came out beautiful and so so easy!! I've been making these for my elderly Dad because he loves them and it reminds him of his Mom when she used to make them. These are the best yet! This will be my go to from now in. Thank you!!
Wonderful! Thank you for your review, Sherri!
I think if I make them again I will cut them thicker and freeze the actual biscuits for 10-15 minutes prior to baking. The biscuits tasted very good but spread out and were very thin. I believe bringing them back to a colder temperature would have the rise vs. spread out. All in all, not disappointed and will try again.
Thanks, Kathy!
Kathy, when you try them again you may want to add more flour for a dry consistency. I added at least a half cup more flour because they were to wet. Hopefully that helps
Thanks, Sherri!
I want to try these but have a question can I use self rising flour when making this recipe?? And would I use the same amount as the other flour? Thank you for sharing..
Hi Judy, I would not use self rising flour for this recipe. The proportions of leavening agents would be off and you would need to adjust. It's best to use all-purpose or plain flour for this recipe.
Do I have to cut these in circles? Can I just make a rectangle and use a knife to cut 6 squares? Will they not lift properly? Can wait to try this recipe, this is our 2nd grade science lesson for the day!
Hi Stephanie, I love that you are using these for a science lesson! Yes you can just cut them with a knife if you prefer. Enjoy!
I want to make these biscuits for a camping trip ahead of time, do they freeze and thaw out well. Any suggestions on how to do it.
Hi LD, they do freeze well. I have frozen them both unbaked and baked. I would try to keep them in a container so they won't get crushed.
Easy, lovely bisquits!
Thanks, Kimberly!
Well, this was an easy recipe that used up my buttermilk and last stick of butter. Fear not, I had 4 tablespoons left, in the back. This was amazing, easy and quick.
Awesome! Thanks, Marinda!
I have been making these for years and love them. I did have a question, is it possible to make the dough the night before and keep it in the fridge until morning? I've frozen the biscuits plenty and it worked perfectly. Just wondering.
Hi Brandi, so happy you’ve enjoyed this recipe! Regarding your question, yes, that works really well to make the biscuit dough the night before!
Hi Brandi, yes, you can definitely do that! I often do that when we have guests.
I’ve made biscuits a handful of times but as a novice biscuit maker, I’ve never found a recipe I thought was worth the effort. Until now! This recipe is SO easy that even I can make beautiful and great tasting biscuits!! Thank you so much, Chris, for sharing your recipe and method. It makes all the difference to me between an OK & a delicious biscuit!
Awesome! So glad to hear that, Glinda!
I’ve made this several times with all-purpose flour and it is a wonderful recipe. I tried it last night with Bob’s Red Mill One to One Gluten Free Flour and it worked quite well.
That's great, Tiff! Thanks for your review.
These were lovey and light and easy to make but being in Australia and using plain flour and noting your comments in notes I now think I should have added the extra 1/4 cup as the mix was really soft and sticky. Do you think this would apply to all your all-purpose flour recipes, as I would like to try other cakes on your blog, they look so delicious.
Hi Susan, I haven't tested any of the cakes with plain flour although we have other readers in Australia who seem to do fine with the cake recipes as they are written.
Has anyone ever used whole wheat flour to make these?
Hi Courtney, I haven't used WW flour but perhaps one of our readers has.
I’ve always been intimidated by baking biscuits but I think I could make these! One question - could I use this same recipe to make tea biscuits for country ham? What size cutter would I use? How long to bake them? Ok, three questions. My family would love this for holiday brunches! Thanks for your time! Love your blog.
Hi Alicia, that will work great! You can make these biscuits as big or small as you want!
I am eager to try this recipe, but curious as to how many it makes. The recipes says 8 large, the description calls for cutting out 6. Thanks in advance.
Hi Ann, I've made 6 and I've made 8. Either works well, just depends on how large or small you want the biscuits to be.
WOW! These really are very simple to make and delicious as promised! I remember making biscuits a long time ago and they were great but SO MUCH WORK! This is a new favorite recipe, as I pretty much always have the ingredients on hand and they were just too good and easy - THANK YOU SO MUCH!
Yay! Thanks for letting us know, Mary Ann!
Fabulous biscuits. I love the ice cold buttermilk and melted butter tip. These biscuits are light and fluffy.b
Thanks so much, Robin!
Can you bake these in a cast iron skillet instead? Excited to try this one.
Yes! Enjoy, Julianne!
I've just discovered your blog and love it! This is a fantastic technique, which I've used a number of times. I HATE cutting butter into flour - and will never do it again! A couple of alternative ingredients: 1) Use self-rising flour and just add baking soda, and 2) If using milk (whole, please), omit the baking soda. So you would need only three ingredients for fabulous biscuits!
Thanks, Gail!
TOO GOOD TO BE REAL! My forever recipe! It was SO EASY, I just felt like a real cook!
So happy to hear that, Susan!
I've made these twice now, once with grated lemon rind and cranberries, and once with less sugar, chopped herbs, and grated cheddar, both times they were delicious. I'm tossing my old recipe! BTW I used a pizza cutter to quickly cut the dough into squares. I used a silicone baking mat and they worked out nice and crispy on the bottom. Thanks for a keeper recipe!
Wonderful! Thank you for letting us know, Lisa!
I'm curious, what is the reason when you adapted this from another recipe you increased the oven temp? My instinct was to lower it to 425-degrees so the inside would cook before they over browned in my baking experience. Was it to get more lift? Thank you!
Hi Julie, the original recipe was actually 475˚F. I reduced the temp as they would get too brown, too quickly.
Oh, I thought I saw it lower. Thank you for your kind and quick reply!
Made these a few days ago… technique blew my mind and they were crazy delicious!
Question, can you make the dough and then refrigerate it? Would you do anything or let it warm up before you bake?
Thanks!
Awesome! Thanks for letting us know, Amy. Yes, you can do that. It might just need an extra minute or two. You can also freeze them, unbaked and then bake from frozen.
I made these with bread flour instead of all-purpose and added cheddar cheese and jalapeños. They were super fluffy and delicious!
My oven required a 13 min bake time.
That's great, Patti! Thanks for letting us know.
I have tried making biscuits since my early twenties and they’ve always came out like rocks! I make a mean batch of homemade white gravy so I always always super sad I couldn’t master the biscuits to go along with it I’d have to use store bought. I was nervous making this because I’ve never succeeded and I was blown away!! They’re not rocks!! Thank you so so much for sharing this recipe. And I used the vinegar in regular milk method and it’s perfect 🤩
Awesome! Thank you for letting us know, Katie!
This recipe is amazing! Just as you said, Chris. Tall, flaky and ridiculously delicious! Thank you!
Wonderful! Thanks for letting us know, Jan!
Chris I made these yesterday afternoon and you are correct. The method is fabulous, works so well. Loved them. Today I sliced, toasted and topped with butter and homemade bumbleberry jam - wow! Thank you
Yay! Thank you for letting us know, Brenda!
This method of making buttermilk biscuits is genius!!! Why haven’t I thought of this before haha! I would always have to grate my butter, freeze it, then knead it piece by piece into the flour mixture. Would usually take a while. This way I think it took my 10 minutes total to get the dough fully together and into the pan! They turned out delicious and buttery just how you want biscuits to be. Thanks for sharing! Definitely my go to recipe from here on out!
this was so incredibly easy! They turned out very moist and flakey. Next time I will add different herbs to change it up a bit. I can't wait to try scones using this method.
Awesome! Thanks, Jenn!
If I do the scoop method, does the baking time change? Asking in anticipation of my laziness tomorrow morning.
Hi Lauren, so sorry, just seeing this. I use the scoop and level method or stir, scoop and level however, with this recipe, it shouldn't make too much difference.
These came out golden and pretty but were still raw in the middle. I'll stick to my usual recipe.
Hi Amber, so sorry you had difficulty with this recipe. You probably just needed to make them a little longer as every oven is a little bit different. If you read the other reviews, the majority of people have had a fantastic success with this recipe. Again sorry this was a problem, I hate wasting good ingredients.
I have made many biscuit recipes and I thought this recipe was interesting. I made them tonight and OMG they were fantastic. They will now be my go to recipe. Thanks for sharing this recipe.
Awesome! Thanks for letting us know, Bob!
Truly ridiculously easy. They get better each time I make them. My family asks for them often. I even have future requests for these biscuits to be added to birthday dinners. They are fabulous! Thank you so much for sharing!
Wonderful! Thank you for letting us know, Angela!
Chris,
I need to make a lot of these because I am feeding my youth group at church. Can the recipe be double? tripled? or should I just make several small batches?
Thanks,
Terri
Hi Terri,
I think it would be fine to double the recipe! Hope the kids love them!
Thank you Chris. I'm sure they will! My husband and I did, and they are SO easy and delicious!
Just last night I tripled and a half because I had 3.5 cups of buttermilk I didn’t want to go to waste. As long as your math holds up it seems you can multiply as much as you wish, mine turned out just as good as when I made a single recipe. I baked 8 and froze the rest raw to bring to a holiday gathering. Phenomenal recipe I can’t believe how much of my life I wasted cutting butter in 😁
That's great, Jules! Thank you for letting us know!
Chris, these are ahhh- mazing! I’ve made biscuits several times and can’t believe the melted butter into super cold buttermilk method! I’ve already used your recipe and technique for three batches that have turned out great every time. I prefer making a square and cutting with a bench scraper vs. biscuit cutters so I’m not handling the dough as much. Cannot thank you enough!
Wonderful! Thank you for letting us know, Allison!
I'm eating one of these amazing biscuits while I'm writing this review. Thank you so much! I've never been able to make a great biscuit following other recipes. They always turn out like bricks and I end up buying the canned ones out of defeat. These are so easy and amazing.
That's great, Kelly! Thank you for letting us know!
I love the technique you mentioned about adding melted butter to the cold buttermilk instead of cutting it in. I'm curious if you've used this for scones or other recipes that say to cut in butter?
Yes! We have many recipes for scones and biscuits that use this technique. Check out some of our other recipes here- https://thecafesucrefarine.com/hello-fall-scone-and-muffin-recipes-to-celebrate-the-season/ and here- https://thecafesucrefarine.com/ridiculously-easy-ridiculously-delicious-buttermilk-biscuit-recipes/
Thank you! I have scones on my meal plan for this week but always dread it because I hate cutting the butter. I'll definitely be trying this method for the scones.
I know what you mean!
First time making homemade biscuits and I can’t believe my luck at finding your recipe for my first try! They are perfect, light, delicious and couldn’t be easier to make.
Wonderful! Thanks for letting us know, Loni!
GREAT recipe! Easy to follow and the biscuits came out absolutely perfect. Made a double batch so there would be some to share.
Awesome! Thanks, Carla!
Hi Chris,
After making my old family biscuit recipe last week,
I decided to try your recipe. The recipes were very similar except mine used oil instead of butter and that made all the difference! Your recipe was the best Buttermilk biscuit I have ever tasted! I had also, made two batches of the freezer strawberry jam that was so easy and served the biscuits with the strawberry jam. Thank you so much for sharing your skills! Sincerely, Verna
That's awesome, Verna! Thanks so much for letting us know 🙂
Wow - this is a fantastic recipe and the best biscuits I’ve personally ever made! Very easy and the dough came together so quickly and was a dream to work with. This one is a keeper for me.
Awesome! Thanks for letting us know, Ginnie!
I have made this recipe several times now and is my go to for biscuits. My husband wants me to make some for his hunting trip next month. Which way do you recommend best for freezing, baked or unbaked? He will be staying in a camper that has an oven and microwave. Thank you.
That's great, Teresa! Either way works great!
I’ve tried countless recipes for biscuits, failed every time. Hallelujah I found this one that actually worked not just a fluke made more than once perfect every time! Deleted all other recipes. Thank you, thank you, thank you!
Awesome! Thanks so much for letting us know, Tina!
Finally! A biscuit recipe that I can make. I’ve never been able to make them but this was easy. I can’t wait until supper tonight. Thank you.
Yay! Thanks, Charlotte!
Well I just spent the day making your freezer strawberry jam and biscuits, I must say these little puffs of joy with that jam is just heaven. I picked the strawberries this morning out of my garden and a little bit of rhubarb and made your freezer jam. Then just by chance I have a little bit of jam left over after I filled the jars, so I thought let’s try your biscuit recipe well I just ate two biscuits with the left over jam and I highly recommend both these recipes. It was just delicious. I’ll have a couple more biscuits with my dinner tonight and I’m sure the rest will be eaten by the time I go to bed tonight. Thank you so very much for these two lovely recipes.
That's awesome, RockinRic! Thanks so much for letting us know 🙂
Hi, just wondering if it would be ok to add vinegar to milk as I don't have buttermilk.
Hi Donna, yes, that works!
Oh my goodness! I made these as a thank you gift along with your strawberry feezer jam for our neighbor, as she tended our flowers while we were away.....it is a good thing that I had to give some away, as yes, my husband and I would have eaten them all...and I don't even like biscuits! But these...little puffs of heaven..crowned with your fabulous straberry freezer jam..an exceptional recipe! ( Well...they both are!)
Thank you so much!
That's great, Jan! Thank you for letting us know!
Thank you! These were so, so yummy!! Mine were ugly but delicious! I had to add a significant amount of additional flour, so not sure how that happened. I think it still could have been made a stiffer dough because shaping and cutting was an embarrassing mess. 😂 But they were oh so tender, flaky, and buttery!! We ate them until we could eat no more!
If anyone has weighed the flour for this recipe successfully, I would be so appreciative to know that weight measurement!
Hi Julie, so happy you enjoyed these biscuits. The metric measurements are available if you look at the recipe, right above the word "Instructions" You can toggle from cups and tablespoons to Metric measurements on most of our recipes.
I made your buttermilk biscuits today and they were wonderful. The texture was light and fluffy and were delicious but they were also so easy to make. My husband also raved about how good they are. Thank you for the great recipe.
Awesome! Thanks for letting us know, Carol!
Cannot wait to try these! I just made the ridiculously easy blueberry lemon scones that were fabulous! Do you have a pdf like you did for the scones? I would it if you do as I do volunteer work with lasagna love (check it out) and having labels for the extras I made would be a good thing. Thank you so much!!
I'm so glad you enjoyed the scones, Andrea! We do not have a label for these biscuits at this time.
I made these biscuits for super tonight for granddaughters and husband, the best and easiest biscuits I have ever made. Absolutely delicious!!! We had made freezer strawberry jam from your recipe a couple of days ago (also delicious) I honestly think we would have been happy with the biscuits and jam as our dinner. LOL
Thank you so much for sharing.
I love that, Nancy! Thanks for letting us know!
This recipe is a GAME CHANGER!!! I love Joanna Gaine's buttermilk biscuit recipe but is so laborious grating frozen butter (or cutting it in). I cannot say how incredible easy this recipe is but more importantly how Flaky & Tasty these biscuits are!!! Will never make them any other way. Also made your Strawberry Freezer Jam to enjoy with them and the whole flavor takes me back to breakfast in my Grandma's kitchen in Southern Indiana with a little bowl of freshly picked raspberries from the garden. Thanks so much for sharing this recipe! Cheers!
I love that, Jeanne! Thanks for leaving a review.
When I read your melt butter method my interest was immediately piqued. Worked beautifully. I had just made butter and had my buttermilk ready for something new- was going to do pancakes but saw your post and changed my mind. My son is not fond of eating carbs but he couldn’t resist! The dough was easy to work- I just kneaded and patted and cut. Used a small juice glass to cut and got 10 1/2 biscuits. I wasn’t wasting any of this! Thanks for sharing 🥰
Thank you for letting us know, Donna! So glad you enjoyed these 🙂
Wowwie wow wow! OMG, these little babies are better than Bob Evans! Yumm-mee
So glad you enjoyed them, Shirley!
I didnt think rollimg them out amd measured height and all that wasnt ridiculously easy. At all. But.. Theu were delicious
Haha, they are actually much easier than the regular way. Happy you enjoyed them!
What a great "hack!" I"m definitely going to use this one again. I made them for supper and they were delicious and easier by far than "the old way." Thanks for sharing!
Awesome! Thank you for taking the time to leave a comment and let us know, Miranda!
After looking at this recipe for the longest time, I finally made them for breakfast this morning. What a perfectly simple biscuit recipe and the most delicious biscuits EVER!
Yay! So glad you gave it a try, Bev!
I have made these buscuits and they are so easy and the best buscuits I have made. Thanks for the recipe. Made a couple batches for friends coming over and they loved them as well. Put homemade honey butter on them and they were delicious.
That's great, Wendy! Thank you for letting us know!
I don't have the energy to roll out and cut biscuits today. Will this still work as a drop-biscuit recipe? It sounds soooo good!
Yes, it will! I have that issue too at times.🥰 It works great!
OK-- never mind! My reading comprehension skills are a little lacking today. I did flour my cutting board and I formed a disc. Then I cut the disc into 8 triangles. DELICIOUS!!!! Served with pot roast. My family is so happy right now!
Awesome! Thanks for letting us know, Gretchen!
.y absolute favorite biscuit recipe / method. I have definitely learned the two essential steps are to "freeze" the buttermilk at least until ice has started on the edges...and even across the top is okay; and the melted butter MUST cool for at least 6 or 7 minutes prior to mixing. Mixing it too soon and then trying to re-freeze didn't completely fail, but they weren't as good. Oh...and pastry flour ends up in a dense & doughy biscuit. 😋. This is a super easy, fun, and fast recipe. Thank you.
Thanks for your review, Melisse! Glad you enjoyed these 🙂
Ooh these are just perfection! I whipped them up on a cold snowy Wisconsin afternoon with some good music playing and the ease of the preparation plus the warm aromas that filled the kitchen… just blissful. Of course I grabbed a somewhat misshapen one right out of the oven for a taster. Can’t beat ‘em. Saving this excellent recipe for a stock-in-trade “go to” for dinners anytime of the year! Thanks for sharing this nugget with us!
Awesome! Thanks for your review, Pete!
This is the first time I've commented on a recipe. These are the most AMAZING biscuits I've ever made or tasted. The fact that the job of tediously cutting in the butter is eliminated and the microwave and freezer do all the work make me very happy. Just for a little more interest I placed a layer of blueberries all over the top, not mixing them in so they didn't get all wet and juicy (they were frozen) and baked them as per the recipe. Soooo good! My new go-to for buttermilk biscuits. Thank you.
Awesome! Thanks for letting us know, Wendy!
These are SO EASY that I couldn’t believe it. Our dinner guests raved about the flavor and lightness. I made the cut biscuits ahead of time (the day before baking and serving) and froze the dough” pucks” on a flat baking sheet (on parchment paper). When they were frozen solid I stored them in the freezer in a zip-top baggie. I baked the biscuits (right out of the freezer) on parchment paper in a 425F. Oven for about 15 minutes (until light golden on top).
That's great, Sharon! Thanks for your review!
I was looking for a easy biscuit recipe. I came across your recipe. I will be baking these today for our family dinner. I scrolled down to see any other details and I seen the bible verse. I want to Thank you for the bible verse you shared. I read it aloud and felt peace and strength for this day. It couldn't have came at a more perfect time. So excited to try your biscuit recipe. Thanks so much
I love that, Jackie!
Just made these and they came out wonderful. I’ve never made biscuits before because baking always seems so precise. I had leftover buttermilk and came across this recipe. Your SEO is top notch! I love Cook’s Illustrated and Test Kitchen as well and as another reviewer said the science makes so much sense you wonder why no one ever thought of it before. Next time I will definitely use parchment paper because the bottoms started to brown a little too fast on the sprayed baking sheet, and like someone else commented, I had to add a bit more flour to make sure the dough wasn’t wet. Thankfully your description about wet dough was helpful and I realized I needed more dry ingredients. All in all a fun easy recipe that made me feel like a real grownup cook!
Thanks for sharing your review, Amaya!
Hi! You should seriously think about publishing a cook book…one for your Ridiculously Easy Recipes and one for the rest. Your recipes always turn out just as you say and very delicious! I don’t think a week passes where I am not making at least one of your recipes. Thank you for the great recipes and the amazing eats!
Thanks for the encouragement, Gina! So glad you are enjoying the recipes!
I made these buttermilk biscuits this morning. OMG! Try were solo good. I can't wait to try the other recipes.
Yay! Thanks for letting us know, Sparki!
Okay Chris, my first recipe review ever. I consider myself a fairly good cook and have not had problems with baking and making hard candies, meringue, pie crusts and even scones. The exception has always been biscuits, that is until I tried these. I am glad I did not give up. They were delicious and your buttermilk/butter technique is genius. I have tried many of your other recipes and have never been disappointed. Thank you, thank you, thank you.
Yay! Thanks so for letting us know, Phyllis!
Delicious and easy, thank you! It took me a few tries to get the consistency of the batter right but, by George, I think I’ve got it! I wasn’t letting the butter cool enough before adding buttermilk for the proper globules to form. My batter was too sticky — biscuits tasted fine, just not fluffy. I also found that a bit more flour (235 gr) gives better results. Next I’ll try reducing butter because while I love these, my waistline will not!! 😉
Thanks for letting us know, Kaydubb!
These are amazing! Made these today because I had leftover buttermilk.. Fantastic! Couldn’t believe how perfect they came out even when I messed up the step of not mixing the butter with the buttermilk. I just added both separately and mixed it. Next time I will do it right, but they were still great! Husband loved them!
Awesome! Thanks so much for letting us know, Cathy!
Hi. Can this recipe be doubled?
Yes, you can do that, Dlevy.
I love these! I found this recipe awhile back. I usually buy store bought biscuits in a can but for some reason, I felt like trying to make some myself so we could have biscuits and gravy for whatever reason. This was SO easy and tastes great! I will never buy store bought biscuits again! I make these so much that I almost know the recipe by heart. I make them for breakfast, sometimes supper and sometimes just because I want some. Everyone in my house loves them! They even rave about them to our family and friends. I don't use buttermilk usually so I never keep it in my house. So, I put 1 tbsp of vinegar in the milk to make it. These are absolutely delicious! Thank you so much for the recipe!🥰
Awesome! Thanks for your review, Melissa!
These, as well as the cheddar biscuits, come out flaky, light and utterly delicious every time. Thank you!
Awesome! Thanks, Tamara!
This technique is genius. It makes biscuit making easy as can be. After trying this recipe and seeing that there is no reason not to serve delicious, home-made bread I'm looking so forward to trying all the varieties. Thank you, Chris.
Thank you for your review, Martha!
AMAZING !! Perfect every time !! I always use 4 Tbsp of butter per 1 c cold buttermilk so that is what we did with this recipe. It make perfect biscuits every single time !!! We also pat out the dough to a rectangle then letter fold gently pat out again and letter fold pat out and cut in 6 squares with a very sharp knife. We will never go back to cutting in the butter.
As an aside I got to thinking why can't this work for pie crust ??? So next time I am making it I am going to melt the lard that I use instead of butter and get the flour very cold and toss together. I also use buttermilk in my pie crust instead of water. Will let you know how it goes. Thank you for sharing this !! c
Thanks so much for your review, Caroline!
My mother, who went to a job every day, still gave us biscuits for breakfast at least once a week. I’m always searching for a biscuits as good and as easy as hers. Bless you, I have found it. I no longer have a family to feed so I share with the neighbors who all proclaimed the results of this recipe to be top notch.
I'm so glad, Kathryn! Thanks for letting us know 🙂
Chris, I LOVE YOUR RECIPES I made these biscuits for my husband because he wanted sausage gravy and biscuits. Wonderful easy recipe and delicious!, While I was in the kitchen doing this I also made your pumpkin jam…….I think I am in biscuit jam heaven…… thanks for the time you put into doing this. You have made me a better cook and baker…I refer your site to my friends all the time when they ask where I get my recipes from.
Thank you for letting us know, Carrie! I'm so glad you enjoyed these recipes!
Really looking forward to making these! Just wondering if I should salted or unsalted butter?
Thx!
Hi Stepha, I use salted, but either will work. Enjoy!
These biscuits were the absolutely most delicious and easy
biscuits I’ve ever made or eaten. I followed the recipe exactly
as written. The recipe was easy to follow. I shared them with three
children, aged seven, twelve and sixteen, and they all loved them. The youngest said that they were rated “1,000 out of 1,000.” Thank you for posting this recipe.
Thanks so much for letting us know, Lorna!
I had a lot of buttermilk left over from a recipe and my husband requested buttermilk biscuits. I had never made biscuits in my life -- it's too much of an art form -- you have to knead it just right -- not too much but not too little -- the butter needs to be cut into it just right -- not too much but not too little -- and if things aren't just right, they are heavy as lead and terrible. Too much pressure for me -- I'll just buy the frozen ones and call it good. But my husband doesn't ask for much -- he eats anything I put in front of him and never complains. So I decided to just try it and started looking for a recipe I thought I could manage. I ran across this one and as I read it, all I could think of was "this makes so much sense!" AND it looked easy! Plus Cook's Illustrated has provided me with so many tips and tricks, I just had to try them. So I made one batch as a test. Easy as can be and so good! You could see how the butter blended perfectly in the dough and the "feel" of the dough was like it was talking to me -- it was soft and pliant and you could SEE the butter in it and could FEEL it when the butter started melting so I knew I needed to get on with it before it melted too far. I ended up making a total of 5 batches! Lol! We have biscuits for months, but I'm just going to freeze them! Thank you! This recipe will be in my bag of tricks forever!
That's so awesome, Shari! You may get famous for your biscuits now!
Hello!
I like to substitute whole wheat pastry flour for AP flour in most recipes. Do you think that would work for this recipe?
Thanks!
Hi Cindy, I would start with half WW and half AP and go from there.
Thank you so much! Can't wait to try these!!
I want to try these but I used all of my real butter on a biscuit recipe that I tried this morning which I wasn't impressed with at all! I have Country Crock butter in a tub though. Can I use that?
No, wait till you get some real butter. You will not be impressed with Country Crock but will LOVE them with the real deal 🥰
I will make these biscuits tomorrow. However I did make your freezer blackberry jam it’s terrific. Can you use the same portions with different fruits? Dee Philippe
Hi Dee, hope you enjoy the biscuits!
Regarding your question, you can't just sub other fruits for the blackberries as each fruit and sugar proportion is a little different when making jam. It's best to go with a recipe that is specifically designed for whatever type of fruit you have. If you check our jams and jellies category, you find lots of recipes but each is a little different. My goal, eventually is to have recipes for every commonly found fruit.
Delicious! Ridiculously easy! Need I say more?
Thanks so much, Joy!
Can I use self rising flour?
Hi Sherry, I would not use self-rising flour for this recipe as the proportions of flour to leavening agents would be off.
So ridiculously easy!!! Tender, tasty, and quick. This made much like the scones that I make all the time. Both the scones and biscuits are keeper recipes. Thank you
Awesome! Thanks so much for letting us know, Jan!
I've used this recipe before and love it!! I was wondering if you think it would be possible to freeze raw, cut biscuits for later use? What would be the best procedure for doing that, and then how should they be baked from frozen?
Thank you!
Yes, you can do that, Kelsey! I would freeze them on a sheet pan and then once they were frozen transfer them to a freezer bag or container. Then just bake like normal, adding a few minutes.
’ve had quite a few happy taste-testers since then, and everyone is shocked when they hear how easy these wonderful buttermilk biscuits are to make. In fact check out the video below, to see for yourself!
I don't see a video!
Hi Robin, not sure why you can't see the video. I just checked and it is there. It might be your browser???
After years of baking a variety of biscuits using many recipes, these biscuits are absolutely the very best ever! So tender, so flaky and incredibly delicious. Thank you for all your wonderful recipes which are so well presented and always taste amazing.
Thanks so much, Julie, for sharing your results. That makes me happy that you've enjoyed our recipes 🥰
Hi! I am planning to make these for a bridal shower (probably a mini version, so I know I will need to watch them carefully).
However, I am wondering--have you had any luck making them a day ahead? Do they hold up well? Would they be best stored in the fridge or room temperature in a sealed container?
I appreciate your help!
Hi Katlin, I love to make them way ahead and then freeze them before baking. On the day you want to serve them, just pull them out of the freezer and bake right away, don't thaw. They will take just a bit longer but will be fresh and delicious!
Best Buttermilk biscuits I ever made. Your recipe is going to the head of my recipes…I’ll be eating these all the time.
So easy and delicious I won’t be afraid to make biscuits any more!! Thank you!
I love that, Jan! Thanks for sharing your review!
Hello Cris,
I'm Dutch and biscuits and scones aren't available and known here in the Netherlands...I knew about them from the movies and I was always curious though how they would taste.
I tried to make them ones from a traditional recipe from an English cookbook and never tried it again since they didn't really rise and were hardly edible.
When I read your recipe and comment in the middle of the night (I enjoy reading about food ánd eating it) I jumped up right up and baked them, since I happened to have al the ingredients including buttermilk. I made them ánd ate them (almost all) afterwards since it was almost morning anyway... They were fantastic! I didn't make pictures but I should have, so tall and flaky as the were.. no one saw them because I ate the last ones for breakfast later in the morning.. I don't really watch my calories, haha. I made them often ever since.
But now my reason for writing again: I always wondered if a pie crust couldn't be made the same way (I sometimes make an american lemon merinque pie for a birthday) and I finally tried it! I used your exact recipe for the scones with a little less buttermilk, and pressed the dough into a pie dish, pre-baked the crust blind. It was simply wonderful! I'd like to know if you or any of the readers ever tried that?
Thank you so much for taking the time to leave a comment, Yvette! I'm so glad you enjoyed this recipe. I have not tried this method for pie crust, but yours sounds delicious!
I'm not crazy about biscuits but I had some buttermilk that needed to be used up. I researched recipes and found a buttermilk cake but also saw these "Ridiculously Easy Biscuits" I didn't have any eggs so I opted for the biscuit recipe. I'm not much of a cook and after I mixed everything together, I discovered I couldn't find my rolling pin and I didn't want to dump everything out on the counter and make a bit mess either. So, I didn't even knead these. I grabbed a large ice cream scoop, sprayed it with oil and scooped out 8 biscuits, thinking I'd probably wasted a lot of butter and time. They turned out GREAT!!! I couldn't contain myself and immediately ate one straight out of the overn and then had a second! I'm a believer! Really, really good - I'm going to freeze the rest and hope I forget about them before I eat them all!
Hahaha! You made me laugh right out loud, Ann when I read your comment. SO happy these turned out well for you. Who knows, you might become famous for making biscuits in your circle of family and friends. 💕
Lol you sound like me!! I'm going to make these biscuits today. I'm so very excited!!
I hope you enjoy them, Beverly!
I too just made these with an ice cream scoop. Next time I will roll them out as they did not hold together very well, but my oh my do they taste delicious! I didn't have any buttermilk so had to "make" some with milk and cream. Baked at 425 degrees for 14 minutes in my oven.
Looks like you are having a wonderful trip Chris!!
Thanks, Tommie!
I made your Rosemary Parmesan Biscuits earlier in the month and my husband loved them. Today I tried these. His reaction was the same! 42 years of marriage and I've only attempted biscuits once before, not very successfully. These are so good and so easy! Thank you much for sharing your method!
Yay! Thanks for letting us know, Cindy!
Tried for years to make decent biscuits, but reading your recipe gives me hope again. One question, though. Anyone try these without the addition of sugar?
Give them a try, Richard!
Love these! Have made several times and frozen then uncooked. Then just defrost or pop in the oven frozen - can't tell the difference. This way I have them ready whenever anyone wants just one (or 2 or 3!).
I've not had much luck with biscuit making, but your recipe ended the flat, dense run of the last several years. Added bonus...my husband & son, who typically aren't fans of biscuits (unless laden in my bacon gravy), LOVED these w/ just butter and jelly. This will definitely be my go-to recipe!
I'm so glad, Tamara! Thanks for letting us know!
I love this recipe. I moved to New Zealand about 10 years back and miss biscuits like crazy. Scones just don't cut it. Is Americans love this easy method. Minus the chilling of the milk, I can have these ready in just a few minutes. Also an excellent substitute for recipes like monkey bread and such that call for refrigerator biscuits. We don't have those here either. As a mom of 2 littles, I'm desperate for easy shortcuts!
I'm so glad to hear that, Lauren! Thanks for letting us know!
Chris, thank you for taking the time to put this easy recipe for buttermilk biscuits on the internet. After a few tries I'm getting better after each attempt. I took to a batch over to mom and dads for the taste test. Moms not able to stand and make biscuits anymore. She said there's nothing wrong with these biscuits. Thank you for taking the time to post this recipe. Now I can make biscuits for my parents. Thank you for sharing and making this possible.
Haha! I love this so much, Zane! Thanks for sharing your story 🥰 Only if you've lived in the south would you understand if an older person says "there's nothing wrong with these biscuits" that it's a great compliment! So happy you've all enjoyed these and that you've become the "little family biscuit maker". 💕
If you don’t have buttermilk, can you use milk and vinegar? Real buttermilk is so much thicker and creamier and I’m afraid the biscuits won’t turn out as good.
Hi Yvette, you can definitely use the milk and vinegar trick. I've tried it and, although I prefer the real deal, there's not a ton of difference.
You’re right, simply brilliant!!! I have come across this recipe on your site for quiet some time now. Never tried it because it just seems more simple to continue doing things as usual. Although your recipes never disappoint. I made them this morning & will probably never go back to the old way of cutting in the butter. Thank you so much for sharing this simple technique.
What a brainchild! I personally don't enjoy the butter-cutting-in step, and this makes it so much easier. Clever, clever you! Thanks for the fantastic recipe!
Thanks, Amy!
I made the recipe today using almond milk (adding TBSP of vinegar to create buttermilk). Used a plant based butter. I did this because of milk allergy our son has. They turned out so amazing! Such great flavor & texture. Today was practice run for Easter meal. Thank you! Delish!
Awesome! Thanks so much for sharing your results, Anita. I know other readers will find this helpful!
Hi Chris, these were wonderful! First time in my life ( and that is a long time) that I made homemade biscuits. I think they intimated me before . These were just wonderful and so easy... and didn't take much time at all! I used a medium size cookie scoop and just dropped them on the cookie sheet... Thank you for such a wonderful recipe
I'm so glad you had success with these, Bernice! Thanks for letting us know!
Hi again, Chris!
Sorry for not leaving a star rating - please click 5 stars from me! Thank you for sharing your wonderful recipes!
Thanks!
Hi Chris,
My family loves your biscuits. I have made them many times and they are so delicious! I am enjoying exploring all of your Cafe recipes and always learning from your helpful tips. My two teenage boys are interested in getting in the kitchen and I hope to guide them with some help from your easy-to-follow recipes!
I love that! Thanks so much, Anne-Marie!
Deliscious and super easy! I hate cutting butter into flour for recipes and this technique works great. Very ingenious of you!
Thanks, Carole!
Hi Chris, These sound wonderful... How would I reheat these if necessary? Thanks...
Hi Bernice, I just pop them back in a 325˚F oven until warmed through, 5-10 minutes.
This is the second time I have made these delicious biscuits! I love this recipe for eliminating the "cut the butter into the flour mixture" part. My only question is judging when they are done. Mine look kind of - dusty - and not golden brown like the pics. Am I using too much flour when I knead and cut them out? No kneading them enough? Should I give them a light egg wash on the tops before baking? I want them to look as delicious as they taste!
If you can use a little less flour, that would be great. Also leave them in the oven a little longer. Sometimes I brush them with a little melted butter to enhance the flavor and golden color.
Do you use salted butter or unsalted ?
Hi Audrey, I'm in agreement with Christopher Kimbal who started Cook's Illustrated. I always use salted butter. https://www.177milkstreet.com/discussion/discussion/73/salted-vs-unsalted-butter
I loved these biscuits! I've had trouble in the past getting my biscuits to rise, but these rose beautifully. We enjoyed them with sausage gravy. To note, I used a 2" biscuit cutter and got 9 biscuits out of the dough. Well, I did eat a FEW scraps of the dough. Bread dough is my weakness!
I'm so happy you enjoyed them, Virginia!
I have been looking for a go-to biscuit recipe for years but never found one I loved. These are hands down the easiest and best biscuits I have ever made! I am so glad I stumbled upon this recipe. The freezing fro 10 minutes of the buttermilk is genius. Thank you!
Yay! I'm so glad, Jocelyn!
I’ve made these a couple of times. So good and love how easy they are to make. I made a different recipe before which did not come out well. My family was expecting their Grandmother’s biscuits, who whipped them up with ease. That’s not what they got. But when I found this recipe my husband said they were pretty close, so I’ll take it! However, I try to watch my calories so how many calories per biscuit?
Thanks, Dee! It's 252 calories per biscuit. You can always find that information at the bottom of the recipe card.
Thank you!
OH.MY.GOODNESS - Melt in your mouth deliciousness. S-o-o-o much quicker than traditional biscuit recipe. I hate cutting butter into dry, never seems like I get it right. But these are just so WOW!
Thank you
Thanks, Debra! So glad you enjoyed them!
Hello! I am so happy to have found this recipe! I have been searching for what in my mind is the best biscuit. Great news is that this is the one! Mine rose perfectly and they were wonderful on the inside...so tender and fluffy!
Thanks so much, Martha!
Could I make ahead and refrigerate just prior to baking?
Hi Jen, these are fine to refrigerate for a few hours before baking. If it's going to be longer than that, it's better to freeze them. You can bake them right from the freezer, just give them a few extra minutes.
I just made these and they are delicious! They reminded me of the ones from McDonalds, which I love! No shame here. They are not flaky, but tender, which is what I was hoping for. One thing is that mine didn't rise very much. Can you clarify how high the dough should be before cutting the biscuits? The recipe says "It should be a 1/2-2-inches in height," but that looks like a typo. Should it be 1 and 1/2 inches to 2 inches?
Thanks again for a great and easy recipe!
Hi Stephanie, yes the dough should be 1½-2 inches in height. Thanks for noticing that typo. I have corrected it. They biscuits should rise up nicely. Don't handle the dough too much and be sure your biscuits are still cold and the oven is hot for maximum rising.
How thick are you rolling the dough out to?
Hi Brian, I roll the dough about 1½ inches thick.
Do you think this recipe would work w self rising flour and then using the cold buttermilk and melted butter as in the recipe? Trying this one tonite.
Hi Linda, I cannot guarantee success with using SR flour for this recipe as the leavening agents' proportions will be off. That being said, I did have a reader report using SR flour with good results. If that's all you have, it's worth trying although the biscuits may have a little different texture.
I’ve used this recipe twice and both times they were so delicious! I doubled the recipe the second time and ended up with 15 big biscuits. So easy and so yummy! Tastes great alone and with sausage gravy!
So happy you enjoyed them, Dawn!
Does the recipe cause for regular butter or unsalted?
Hi Ch’rista, I use salted butter.
Awesome and super easy!
Yay! Thanks, Abi.
Hi, could I use kefir instead of buttermilk? I typically have kefir in the fridge and use it successfully in other buttermilk-based recipes, particularly pancakes and waffles. Thanks!
Hi Ally, that should work fine!
These biscuits are wonderful!!! Easy and quick. I've been using the same recipe for years, this one is now my "go to" biscuit recipe.
Thank you
Thanks so much, Debra! So happy you've been enjoying this recipe 💕
Wow! I made these for NY day breakfast for my husband. First time ever making biscuits. The melted butter in the freezer-cold buttermilk is GENIUS. Totally worked! These were super flaky and delicious. My husband declares this recipe a "keeper". I concur. Extremely well written and easy to follow. Thanks so much-I am so happy my first time wasn't a disaster.
Yay! So happy you enjoyed them, Lucy! Thanks so much for sharing your results! Now you're the resident biscuit-maker!
These biscuits...heaven. The butter into cold milk is genius! I made one batch yesterday with cow’s milk (using the vinegar method) raisins and they turned out beautifully. I had to add quite a bit more flour to get to the consistency for cutting and baked them for 13 minutes. Today, I made a double batch using plant based milk (macadamia), orange zest and dried cranberries. Beautiful. Wishing you all the best for 2021 Chris, and thank you so very much for bringing so much sweetness and joy into the lives of so many tummies!
Thanks, Rose! Yes, it's a pretty cool trick! So happy you enjoyed them. And I love that you tried plant based milk with good success! Happy New Year!
Yes, I’m a vegetarian, Chris, so I often sub tofu, beans or faux meat in your recipes. And your recipes are so great that they hold up to the swap! So if there are any other veg heads out there, or in the circle of people you love to cook for, I’d encourage you to take a good look at some of Chris’ recipes that seem meat centric and change it up with a substitute. You’ll be surprised at how delicious it turns out!
Thanks for your confidence and encouragement, Rose. This is great as it will be so helpful to others! I might have to add you to my team 💕
Amazing biscuits and so easy
Thanks, Kathleen!
Hi Chris...Enjoy your blog and all your recipes... I tried these biscuits and they took way longer than 15 minutes kept checking after 8 minutes..I did them on convection ..thinking I should have just done them on bake!,
Sad to say they where a dud!! I ‘m an avid baker and bread maker..but nobody’s perfect all the time..
Will try again on conventional bake.. thanks again...Happy New Yeae to you and Sxott!
Hi Rose, sorry you had trouble with these. I would definitely try again as they are so good!
Hi Chris, I never grew up eating biscuits, though I remember hearing my grandmother liked to make them. Do you mainly make them for a snack or in what other instances do people eat them? When would you typically make them?
Thanks,
Suzelle
Hi Suzelle, biscuits are wonderful any time of the day. They're great for breakfast, served warm with butter and jam or sliced horizontally for an egg or bacon and egg or ham breakfast sandwich. They're also wonderful with soups and salads and are a nice alternative to rolls for dinner.
I can't wait to make these biscuits. I have to use gluten-free flour, so wish me luck. I was like you in the past - my biscuits never came out to my satisfaction, but this method looks like it will work!
Let us know how they come out with the GF flour! Hope you have great results!
Oh, my goodness, these are fantastic! Best I've ever made. Everyone loves them.
👏🙌👏 Thanks so much for sharing your results, Diane! So happy you enjoyed them!
Thanks for this super-easy biscuit recipe! I will make these again! Mine were not as fluffy as I would like, but were still delicious. I haven't made homemade biscuits in a long time, and was glad to have an easy recipe to get back into it.
Thanks, Tara!
Oh my oh my... So easy yet so delicious! Thanks so very much for sharing . Light and fluffy with a nice crust top and bottom. I cooked on silpat but used your wonderful instructions.
You don't say salted or unsalted butter I used salted which is unusual for me but what was on hand. They weren't too salty.
Yay! That's so great to hear, Amy! Thanks for taking the time to share your results.
Regarding the butter, I am a bit of a rebel when it comes to butter. I have always used salted butter and totally agree with Christopher Kimbal (the creator of Cook's Illustrated and now Milk Street). https://www.177milkstreet.com/discussion/discussion/73/salted-vs-unsalted-butter
Would this work with self rising flour?
Hi Heather, I wouldn't make these with SR flour as the proportions of leavening and flour would be incorrect.
I just made this recipe today with self-rising flour and omitted the baking powder and baking soda, and it worked fine. I also modified the flour to make it more like cake flour (like White Lily flour, a staple for biscuits in the south) - I substituted 2 tablespoons of corn starch in each cup of flour. This lowers the protein content of the flour which means less gluten develops and you get a lighter biscuit that's not cakey. Worked for me!
Thanks, Dina! I don't recommend switching SR flour for the all-purpose as the leavening agents amounts will be different but I'm happy this worked well for you!
P.S. Forgot - Since I really like the tang of the buttermilk, next time I will omit the sugar, or lower it to 1 teaspoon.
I make new buttermilk biscuits all the time, looking for that "perfect biscuit." And I finally found it. What an ingenious method!!! I really dislike having to cut butter in with a pastry cutter or my hands. I did do one thing different. When the dough came together, it was a little shaggy, so I turned it out onto plastic wrap and brought the opposite edges together to squish and unify the dough, Then, using the plastic wrap, kneaded it by turning it over on itself several times which gives it lots of layers. Still in plastic, I patted it into a square and cut it into 9 tall squares using the bench scraper. They were so good, I ate 3 of them! Thank you so much for sharing!!!
Haha, I totally get what you mean, Crabby. I don't think I even told anyone how many I ate the first time I made them 😂 Thanks so much for sharing your review and helpful tips!
This technique was amazing! Worked perfectly! Whenever I think of making biscuits, I usually pass because of the hassle of cutting in the butter.
It was a game changer for me too, Mary! Thanks for leaving your review!
Haven’t made biscuits from scratch in years. These are delicious and my family loved them. I especially appreciated that there isn’t shortening in this recipe. Thank you for sharing.
Merry Christmas!
You may become the family biscuit-maker now, Daniell@
This technique was amazing! I often want to make biscuits but don't want to go to the trouble of cutting in the butter. This method was so easy and yielded fluffy flaky biscuits. Thanks! Will make these often.
the absolute best ( i use the drop method) and I now use the same technique with making butter milk pancakes.
This was a real find, thank you!
You're welcome, Carly! We love this technique too!
I've made these biscuits several times, and they are beyond delicious! I made two dozen for my son's Friendsgiving, and they were devoured! Such a great and easy recipe!!
I love this recipe it is absolutely delicious
But I have always needed more flour than the recipe calls for
THANK YOU SO MUCH FOR THIS RECIPE,
Thanks, Abrianna!
The name says it all. This is my first time to bake biscuits. They turned out so gorgeous. My neighbor thought it was an old family recipe.
I love it! Thanks for sharing your results, Penny! 💕
Super good and they are ridiculously easy.
Yay! So happy you enjoyed them, Tami! 💕
I went through every single emotion you mentioned in your intro to these biscuits! Brilliant...simply brilliant technique. I like biscuits but never made them because I absolutely hate cutting in the fat to the dry ingredients (in ANY recipe). When I saw your recipe I couldn't wait to try it...on my!
So, I'm wondering...would the same technique work for pie dough?
Hi Cindy, I love that you love this recipe and technique.
Sadly it wouldn't work with pie crust because there's not enough liquid to work with and achieve the little butter globules.
Hey Cindy -
To add to what Chris said ...
Like she said, it won’t work due to the lack of liquid. HOWEVER! I’m also one who absolutely dislikes cutting any fat into dry ingredients, but I found it’s truly not hard to FREEZE the butter, then GRATE it! It’s easy to do, and all you then do is blend it with your flour mixture (And liquid, of course). Or you could use your food processor to blend it in with the dry ingredients, it’s just more of a pain to drag out the processor, plus more cleanup. Lol
A lot of bakers pre-grate butter, and keep it in the freezer for a quick add in. Just make sure you Mark the bag with the quantity.
Good luck, and Happy Baking!
Thanks, Beverly!
This recipe is genius!! The biscuits came out tender, flaky and golden brown without the laborious task of cutting in the butter or grating the butter like I have tried before. This is the one and only biscuit recipe for me from now on....Many thanks!!
Thanks so much, Paula. I really appreciate you sharing your results! 💕
Tried the recipe and it turned out great!
Used a trick I use when I make scones -Freeze the butter!
Freeze your butter and then use a cheese grater and grate it right into the dry ingredients, mix, then add the butter milk-will turn out perfect doing it this way!
Thanks Mama! I'm so happy you enjoyed these biscits. I used to make biscuits that way but I've found it's easier to make these scones the way this recipe directs and you don't have to grate all that butter. The biscuits come out just as flaky and delicious!
This is not my first time making these biscuits. They are just fabulous with little work. Making them today to put on top of a chicken pot pie. My recipe had their own biscuit recipe and then thinking what am I thinking I'll use Chris's recipe! I think will bake them and then just put on the pot pie. Sometimes they can get soggy when baking them on top of the pie. Am glad I remembered your recipe!
What a great idea, Kathleen! I bet that wil be one delicious chicken pot pie. You're making my mouth water 😂
All I can say is "WOW!" I made these this morning for breakfast and they did not disappoint! Incredibly delicious! They just melt in your mouth. I now have a go-to biscuit recipe. Thank you so much for this perfect recipe.
That's awesome, Cendi! So happy you enjoyed these biscuits. Thanks for taking the time to share your results!
This has become my go to recipe for biscuits! I always feared making them but your recipe guarantees success every time!
Thanks, Keeley! I used to be the same way about biscuits, I never could get them right either. I appreciate you sharing your results!
These are amazing! Wonderful recipe and so easy to make. I just baked them this evening for an early morning get together with my bible study gals. Should they be refrigerated overnight or can I wrap them and leave them on the counter overnight? Thank you in advance!
You can either leave them on the counter or pop them in the freezer, then thaw first thing in the morning. Either way, warm them briefly in the oven before serving. ENJOY! 💕
Thank you so much!
Absolutely delicious! I will bake these again and again. Wonderful recipe.
Thanks, so much, Cheryl! I'm so happy you enjoyed these biscuits and appreciate you taking the time to leave your review! 💕
This was really easy and tasty. I watched until the tops were brown like the recipe said.
Fun fact: I put a grass-fed beef hot dog piece in each one, without altering any of the rest of the recipe. Turned out yummy! I might try stuffing them with other things like cheese or honey.
I'm so happy you enjoyed them, Sai and I love your rendition of the recipe with the gourmet hot dogs, sounds so fun!
I am ready to bake your recipe but I noticed you already have a salt in the recipe so do I still need to use more salt because I am using unsalted butter? Thanks
Yes, use the salt. There's not enough salt in the butter.
So I roll/pat my dough out to a rough 8x8 shape and use my pizza cutter to cut into 9 equal biscuits, then put them into an 8xi greased and, touching yes I know, then bake. No waste and still absolutely perfect!
Great idea, Larry! Thanks so much for sharing!
I Googled “easy buttermilk biscuits” because I have a gallon of buttermilk and a 5 week old baby. I also don’t have a pastry blender, and that’s why I chose this recipe. This recipe was so easy and fast to throw together, and the results were amazing!! The biscuits came out buttery and in flaky layers - I couldn’t believe it was so easy. So much time was saved not having to cut in the butter, I was done making these from start to finish in about 30 mins, just enough time for my new babe to get in a quick snooze!
I love this, Tessa! Welcome to The Café!
I'm so happy you enjoyed these biscuits. I remember the days of having young babies and how precious the time is, bravo to you for making biscuits in between naps!
I have tried and failed with a zillion biscuit recipes until I came upon this one! So simple and easy that I now have a freezer full to pull out whenever I want. They really are no fail!!
That's so awesome, Patti! Thanks for taking the tie to leave a comment 💕
We just moved to London from the US and since we have started to miss some of our favorite foods, I decided to give these a whirl. I was worried when my melted butter mixed perfectly into the cold buttermilk, leaving no yellow globs, but I carried on and the final result are delicious, buttery-rich yet light and fluffy with a crispy top. Thanks so much, these will now be our go-to biscuits!
Hi Cate, lucky you! We love London and I know you will find some wonderful culinary delights while you're living there. Our daughter lived in London for 7 years and we visited frequently. We miss it so much!
Regarding the biscuits, I'm so happy you enjoyed them! Just a note for next time. If your buttermilk/butter mixture didn't form the "globs", your buttermilk was probably not quite cold enough. Leave it in the freezer a little longer and make sure the butter has cooled down a bit after being melted.
I baked these this morning 2day and, WOW! they REALLY ARE SO RIDICULOUSLY EASY! thanks so much for this recipe. I'm a believer.
Thanks, San! So happy you enjoyed them 💕
Wonderful! I'm so happy you enjoyed them San!
Do you use salted or unsalted butter?
Hi Kim, I use salted butter.
I'd call, the scones, not biscuits. What I call biscuits, you call cookies. That doesn't mean that aren't good eating!
Cheers,
Ian (in Australia)
😂 I think we came into all this a little later in the game, Ian! That might be why we're a little confused. But you're right, whatever you call them, they're definitely delicious!
So quick and easy to make, delicious!!!!
Thanks so much, Diane!
Indeed ridiculously easy, light, and fluffy. Only the knowledge that I had just put 9 TBSP of butter in them held me back from eating them all in one go hot from the oven.
Haha! I totally get what you're saying, Alison! 😂💕
So I just made these and froze all of them in. How do I prepare them when I am ready to bake? Can't wait to try them!
Hi Mirjam, just pop them in the hot oven as directed. Don't thaw. They'll need at least 5 minutes extra time. Bake them until they're nice and golden.
So are you saying you can freeze the biscuits uncooked then take the frozen uncooked biscuits and bake? Or cook them first?
You can acutally do both of those, Joan. But for freshly baked biscuits, freeze the biscuits, unbaked, then pop them in the oven frozen and bake. Give them a few extra minutes if they're frozen.
Thank you Chris!
Tried the frozen unbaked method worked great and they were delicious !
These were fantastic! The dough was easy to work with. They didn't take long. Great flavor. I did need to add a little more flour to stiffen the dough(which it says to do). Definitely making again! Great with homemade jam. FANTASTIC!!!
Yay! Thanks for sharing your review, Laurie!
Thumbs up! They were easy and awesome!
Awesome! Thanks for sharing your results, Larry!
Very easy to make, even for someone who doesn't like to bake. My husband LOVED these. We received Georgia Peach Butter as a gift and made these to enjoy together. I am trying them tomorrow with fresh rosemary.
You may end up becoming the little biscuit maker of the family, Tracy! I'm so happy you enjoyed them. Love your ideas of using fresh rosemary and pairing them with peach butter.
These are ridiculously easy! My husband loves biscuits, me - not so much. But I made these for Father's Day today and even I loved them! LOL! I am a baker, so even with my more expanded knowledge - these are super to easy to make! I did not have the biscuit cutter or even a cookie cutter big enough, so I just used my pizza cutter and made 6 square biscuits. And they ended up in my oven for about 13 minutes, so very good advice about starting to check them at 8 minutes!
That's so awesome, Mavis. I'm so happy you and your husband enjoyed them 💕 Thanks so much for sharing your results. Happy Father's Day!
I've been wanting to make biscuits for the longest time! I found your recipe and tried it this morning! Delicious! Ridiculously easy! My son is in Heaven, he loves them so much!
That's awesome, Tami! Thanks for reporting back your results! Biscuit heaven is a nice place to be 😂💕
Has anyone tried these with gluten free flour mix? I would love to have a biscuit.
Hi Karen, I haven't but perhaps some other GF readers can chime in!
I generally use powdered buttermilk as I find it much easier to keep on hand than the other. Could it be mixed into the dry ingredients and the butter poured into ice cold water, then blended with the dry ingredients?
Hi Julia, I honestly don't know how this would work. I have used the buttermilk powder in the past but not with this recipe. Let us know if you try it.
My dough was a sticky, shaggy mess. I added nearly 1/4 cup more flour and it was still wet and sticky. I finally dumped the sticky mess onto a well floured board and with great difficult cut out the biscuits. Surprisingly enough, the biscuits turned out really good. Any advice on why my dough was so wet and sticky?
These taste delicious. Love the ease in making. But mine weren't flaky. Any thoughts of why? THanks
Hi Heidi, I'm glad you enjoyed them.
The dough might have gotten too warm before baking. It's the cold butter globules that release steam in the oven to create the flaky layers. You can always refridgerate the cut biscuits for a bit before baking to chill the butter.
Thank you, I think I did that but will try again. Either way, they are Delicious!!! Just trying to get a bit of flaky layers
:o)
These biscuits were delicious and just as easy to make as you promised.
Yay! Thanks for taking the time to share your results, Donna!
Hi , I'm going to make these today. Probably for dinner. I only have unsalted butter. Do you think I need to add extra salt or just go with the what the recipe calls for? Just wondering....
Unsalted butter will work just fine! Just add ½ teaspoon extra salt. Enjoy!
Christchurch New Zealand here, trying American style biscuits for the first time : Wow, I'm in solo lockdown here so halved recipe and it worked perfectly. Amazing with this summer's raspberry jam. Next time I'll go all American and try with gravy....Yee Ha!!!
Hi James, greetings all the way to New Zealand! That raspberry jam sounds might fine to me! I'm so happy you conquered the American biscuit! Thanks for sharing your results!
This recipe is amazing. It is simple and quick. The best biscuits I have ever made. Thank you so much for the recipe.
Thanks so much, Debbie, for taking the time to leave a comment. Love that you love these biscuits as much as we do!
I made these biscuits this evening, and they were light, fluffy, buttery and moist. My family loved them so I will be adding this recipe to my family recipe box for the future. They were very easy to make, the only thing that I learned is that when I added the buttermilk it is a very short time when the butter changes from small globules of butter mixed in the buttermilk to when the butter became a large globule. It may be the butter I used (Kerrygold), it may be that I left the buttermilk in the freezer too long (I didn't time it, I estimated 10 min, it could have been 15min or a bit more). The biscuits turned out great none the less.
Thanks, Kimberly for sharing your results and observations. If your buttermilk gets a little too cold and a large glob forms you can always stir a little more and it will break up again. I love Kerrygold butter! Such great flavor!
I made these biscuits today, and I was shocked by how good they are! Absolutely perfect, and so simple to make.
These went perfect with sausage gravy.
I’ve tried replicating the biscuits my grandmother use to make, but never could get them quite right, these are on par with those delicious biscuits that I haven’t had in years.
This will be my go to biscuit recipe from now on.
Thanks!!
I absolutely love it when readers compare these biscuits to "grandma's". That to me is the ultimate compliment 💕 Thanks so much for taking the time to share your results, John!
These were so easy to make and taste amazing! Crispy edges with a fluffy, buttery inside. This recipe is definitely a keeper.
Thanks, Angie! I'm so happy you enjoyed them!
I have read about the differences in brands of flour. I use two brands of flour for my baking. “All purpose” King Arthur’s for cakes, cookies, muffins and a southern flour, “self-rising” White Lily for biscuits. Which Brand do you use for these biscuits? Thank you
Hi Jennie, I use all-purpose flour for these biscuits, often King Arthur but I have used other brands of AP flour as well. You wouldn't want to use self-rising flour as the baking powder is not the correct proportion.
Can we use the yogurt drink that we get in stores for buttermilk? It usually tastes a little salty.
Hi Nivi,
I haven't ever had the yogurt drink but it should work fine. You might want to cut back just a bit on the salt in the recipe if the drink is salty.
Salt or unsalted butter?
Hi Kim, I always use salted butter.
Ridiculously Easy and Ridiculously GOOD! The only thing I did (and not sure if it made a difference) was let the dough rest in the fridge for 20 minutes to let the gluten relax and the butter firm up. Will be making again and again and again.....
Wonderful! Thanks so much, Carol, for sharing your results!
Are you saying they freeze well baked or unbaked? Also, how then do you bake or reheat? Thank you.
Both! I have frozen them baked and simply thawed them and reheated for 5-6 minutes in the oven. I've also frozen them unbaked, then popped them right in the oven without thawing. They come out beautiful but just need a 4-5 minutes extra baking time.
Holy cow what amazing biscuits these are! Not only are they EASY but truly delicious. I will NEVER pop open a can of biscuits again!
Haha! Agreed! Thanks, Larry for sharing your results. So happy you enjoyed them!
Excellent - my husband stated "these are on par with my grandmothers biscuits" and her tried and true recipe is over 100 years old. I liked that it made 6, just enough for us and for hubby to have biscuits and gravy for breakfast the next day. When a northerner imported to the south gets 2 thumbs up on her biscuits you know 2 things: they're delicious and hard to mess up!!
Now THAT is a super compliment - grandma's biscuits are the BEST. Thanks so much, Julie, for taking the time to share your results 💕
These are really good and easy. I am just teaching myself to make bread things, it isNot my strong suite. These were just a little heavy for me. Any suggestions?
Hi Judy, to get the optimum rise, you want to bake these biscuits while the butter is still nice and cold. If your biscuits are heavy, you might want to pop the unbaked biscuits into the refrigerator for 30 minutes or so, before baking to chill the butter again.
How can the butter be nice and cold. Wouldn't it be room temperature after microwaving and setting aside? Or, should it be refrigerated for a bit? Please advise. Thank you.
Hi Sally, the butter gets cold in the ice-cold buttermilk. You just don't want it to warm too much.
I thought for sure I'd fail because I've struggled making biscuits the traditional way, but this method is foolproof! The biscuits were delicious and so easy to make!
Yay! That's just awesome, Katie!
I'm so glad I stumbled across your website. I've struggled over the years with making biscuits. I could never get them right. These were easy and delicious. I loved not having to cut the butter into the flour mixture. Thank you.
Thanks for sharing your results, Karen and welcome to The Café! 💕
Brilliant, simply brilliant!
Haha! Thanks, Sue!
Its hard to find all purpose flour these days. Can I substitute self rising flour?
It won't be exactly the same, Heather, but I think it will work. Each cup of self-rising flour has 1½ teaspoons of baking powder so your biscuits will have 3 teaspoons of baking powder instead of two. That shouldn't make too much difference. You'll still want to add the baking soda but just 1/4 teaspoon of salt. Enjoy!
This recipe intrigued me and I have been dying to try it out. I love biscuits but I could never get a that light and fluffy consistency when I made them myself until now! OMG! They are delightful, melt in your mouth and super simple to make. It's very convenient that you don't need any special tools like a pastry cutter or grater to turn these out. Additionally, I did not even need a biscuit cutter or drinking glass as I just cut them into small 1 x 1.5 inch rectangles and baked them about 1/2 inch apart in my toaster oven; it's ok that they touch when baking (I got 18 mini biscuits this way). My kids devoured them...they were slightly crispy on the outside and moist and light on the inside. So simple and delicious. Definitely a keeper! These will become one of my favorite recipes!
Thanks, so much, Eva, for sharing your review. I'm so happy you and your family enjoyed them!
amazing easy biscuits to make. Did and experiment with 3 different recipes (including my grandma's recipe) this was perfect, amazing best one of the 3. and I am not a baker. You will impress yourself!!!
Oh my goodness! Better than grandma's? Now that's a real compliment! Thanks so much for taking the time to share your results, Julie 💕
Let me just say I have tried soooo many different recipes and nothing turned out right AT all! These were amazing and so easy. This is getting added to the top of my favorite recipes!!
Yay! Thanks, Donnita. I'm so happy you enjoyed these as much as we have!
Thank you for sharing this recipe. They were delicious. Tender, flaky, flavorful and SO easy to assemble. I was prepared to tackle a complicated recipe...no need!
Haha! I love that there's no need to get complicated yet the results are so delicious. Thanks so much for sharing your review, Erin!
Brilliant! What she's done is found an ingenious way to avoid having to shave the frozen butter as is done in many recipes. Which is a pain literally by the way 🙂
These were soooo easy and came out beautiful in 11 minutes. Delicious and I will never ask my mom to make buttermilk biscuits again because these were BETTER and EASIER - and my kitchen didn’t get trashed in the process.
Thank you from a serious southerner-these met and surpassed the mark. Wow.
Haha! I love it, Brette! We won't tell your mom that she lost her job 🙂 Thanks for taking the time to share your result (and to make me laugh).
Just made these as I had buttermilk that needed to be used. I baked one to try and froze the remainder. Cooked perfectly and tasted fabulous.
Yay, so happy you have already enjoyed this recipe. I know you'll love having a stash of them in the freezer!
These biscuits are the best I’ve ever made. They are light, tender & fluffy but hold together well. I’ve never tried the technique of melted butter & cold buttermilk but it worked perfectly & is so easy! This will be my go to for biscuits from now on! Thanks for another fabulous recipe.
Thanks so much, Kathy, for sharing your results! I'm so happy you enjoyed them!
Tried these biscuits and they are so simple and delicious. Easiest recipe I’ve found. I have a question about freezing them. Do you freeze them before you bake them? If so does the baking time differ?
Thanks
Thanks for sharing your results, Christina! I'm so happy you enjoyed them!
I have the same question.
Thanks for asking that question, Lori, I had somehow missed that part of Christina's comment. I answered the question above. Hope you enjoy the biscuits!
You can freeze them before you bake them. Just pop them right in the oven frozen. They will take a few extra minutes to bake but come out really nice and fresh. I've also frozen them after baking and just warmed them slightly and they were great that way too.
I don't normally like biscuits because they are always hard and heavy on my stomach, but my husband wanted biscuits for Sunday breakfast. I found your pin. I made these but instead of butter I used rendered lard I get from local farm. Oh. My. Gawd! These wonderful biscuits came out light, flaky and so good. we absolutely loved them. Thank you for posting your recipe.
You're welcome, Andrea! Thanks for sharing your results 🙂
OMG!
This is the best biscuit recipe ever!
Thank you so much for sharing, they turned out phenomenal.
My hubby totally enjoyed them, and I served them with a compound vanilla bean honey butter .
Yum! That sounds wonderful. Thanks so much for sharing your results, Charlotte 💕
I just love these biscuits! I use 1/2 cups flour & 1/2 cup oatbran or ground oats. I have also made them using half butter & half olive oil. Today I cut out the sugar as we always put jam on top. They always turn out for me! Love your website , instagram and all your recipes! Hapoy Thanksgiving from Canadas west coast.
Let me preface this comment by saying that I am an old lady that has been making all kinds of biscuits and bread for eons. I come from a long line of southern cooks that swear that buttermilk biscuits are the best kind of biscuit. Usually, I make buttermilk biscuits with shortening but this recipe is absolutely genius. I can't believe that this method never even occurred to me but I am just happy to have found your recipe. My children and grandchildren request these biscuits a couple of times a week. Thank you so much for posting it.
Hi Lisa, your comment made me laugh! I love that your children and grandchildren are requesting these! Such a compliment for a true Southern cook!
I love the idea of putting the melted fat into the cold buttermilk. I am wondering if Crisco can be used and, is the sugar necessary? Does the sugar make for sweet biscuits?
Thank you! I can't wait to try these.
Can you make the dough the night before, refrigerate, then roll out and bake the next morning?
This recipe is AWESOME. I've been making biscuits for years - and this is by far the easiest way to go. They produce a perfect crumb. My family loved them. This is now my go to.
I love it! Thanks for taking the time to share your results!
Best. Biscuits. Ever. I’ve made them several times, and they always come out perfect. So glad to have found this amazingly easy and delicious biscuit recipe. Thank you!!!
Thanks so much, Amy! I'm happy you've enjoyed these bisicuits!
I made these last night as part of a breakfast-for supper deal. These were SIMPLY AMAZING! Very easy to make. I agree with other posters.....do NOT skip placing the buttermilk into the freezer. I followed the recipe exactly except I doubled it. These biscuits were so very good! I have been telling my coworkers about them today and sharing the recipe. This was just placed into my Do-Over folder.....and not many recipes get there lol. Thank you for this recipe!
Awesome! Thanks so much, Robin. We appreciate you taking the time to leave a review!
What an absolutely brilliant hack for biscuits! I still made a mess (what can I say, I am a messy.cook) but the biscuits turned out so light and fluffy! I cut my dough into 8 instead of 6 since we were having them with pot roast and veggies. Thanks so much for a great recipe!!?
Yay! I'm so happy these turned out well for you. You may just become known the expert biscuit maker in the family 🙂
Thank you so much for this recipe, it’s god sent for me! I have been meaning to say thank you for a while. I came across this recipe when I was 37 weeks pregnant and craving for a good biscuit but needed an easy recipe. They were exactly what I needed and I have made them many times since. I always freeze large batches of them and I also make the cheddar and chives version. Thanks again for this ridiculously easy recipe which makes the perfect biscuit every time.
Hello,
What all do you do to freeze them for cooking later?
Hi Patti, I just put them on a pan a freeze them (just make sure they do not touch each other). Once they're frozen, I just throw them in a ziplock bag.
I've had this recipe bookmarked for a while; finally made them earlier this week. I didn't have liquid buttermilk in the house, but I did have Saco buttermilk powder and water. While I don't have issues with cutting fat into flour, I was intrigued with your method of melting and drizzling into the cold liquid. I do not know what I did wrong (was the liquid not cold enough? was the butter too hot?), but instead of lovely little dots of butter, I ended up with a giant lump of sludge in the middle of my measuring cup. *gasp* Still, I pressed on and finished off mixing, kneading, patting, and talking sweetly to the lump of dough. Instead of cutting into rounds, I simply used my bench scraper and cut the dough flat into six squares. They looked good when they came out of the oven. They tasted even better when they went into our mouths! In spite of challenges, they turned out terrifically. I guess you can now add "idiot proof" to their name. 😉 I did up the sugar to a scant 2 Tbsp since I made them for strawberry shortcakes. However, they were not too sweet to not go nicely with our bowls of chicken-barley stew we had last night. Thank you for such a tasty, fail-safe recipe. Dare I say they will be on regular rotation?
Haha! That's wonderful, that despite the "issues", they turned out great! It may have been that the water doesn't work like buttermilk would as far as forming the little globules. If you ever have the chance, try it with buttermilk and see if you have different results. Nevertheless, I'm glad it all worked out deliciously in the end! Thanks for taking the time to leave a comment, Mary Jo!
Hi Guys, another amazing recipe I've added to my collection. Thank you.
Can I ask if it is 100% necessary to use buttermilk?? We live off the beaten track and I use powdered milk for that reason. We don't get to town often. I don't know if adding vinegar to powdered milk is a great buttermilk option.
I made these for the first time this week. I didn't have liquid buttermilk on hand, but I do keep a container of Saco powdered buttermilk in the fridge. I used Saco Buttermilk Powder, mixing it into the rest of the dry ingredients, and used water as the liquid. They turned out wonderfully! BTW, if your location is near Amish Country, you can find dry buttermilk powder at most of the Amish bulk food stores.
These really are ridiculously easy to make! I’ve been testing out different recipes, most of which require the cutting in of the butter. While that’s the traditional way to make biscuits, I knew after reading through the directions I was going to have to try my hand at these. Let’s just say, stick me with a fork ‘cause I am done searching! I’ve made these several times now, even put some up in the freezer to take to my in-laws - along with some sawmill gravy - so we could visit without having to go out to eat. I impressed my father-in-law! Oh, and I have to double the recipe every time to make sure there’s leftovers! Well, unless the grands grab one, or two. Ha. They love “Gigi’s biscuits” with some homemade apple butter slathered on them.
Haha! I love it, Gigi (that's me too). I'm so happy you're done searching for the perfect biscuit and thanks so much for taking the time to leave a review.
I just finished baking a triple batch this time. I'm going out of town, taking a few biscuits with me with some sausage stuffed in them, for my cousin and I, and leaving the rest for my poor, defenseless hubby. I know he'll just hate it. Ha.
These came out measuring between two to three inches high - of course, I only pressed them to about 3/4" to an inch before cutting them. Lol I absolutely LOVE these biscuits!!
Thanks again for sharing your recipe!
Gigis ROCK!
Thanks, Beverly! At least your husband can have a special treat to make up for you being gone. Have a wonderful trip!
“These are the best biscuits you’ve ever made” says my husband who loves biscuits and is a southern at heart. ☺️. This is my go to recipe from now on. Thank you for sharing Chris!
Haha! I love it, what a wonderful compliment to the recipe!
Wow! I was looking for a recipe to use up a cup of buttermilk and these were divine. I managed to get ten, tall, 2-1/2 inch biscuits though. Not complaining 🙂 Thank you for sharing this. I will be trying more of your recipes from now on.
That's awesome, Lisa! Thanks for sharing your results. Welcome to The Café!
Can you use anything but butter have problems with cholesterol?
Hi Ronnie, I haven't tried these biscuits with anything other than butter so I don't want to say. Let us know your results if you do!
These biscuits are amazing! I would like to make them in large batches and freeze them to hand out to family and friends.
Do your bake them at the same temperature when they are frozen?
Hi Michele, yes you do bake them at the same temp. Just give them a little extra time.
I made these this morning, and just as you said, it came together fast! I LOVE, LOVE, LOVE the buttermilk in the freezer trick. I used a two cup, glass measuring cup to allow room for the extra liquid from the melted butter, then used the same fork I blended the milk and butter with to mix everything together. I used my hands to fold, and flatten the dough to about 1” thick, then used a 3” ring to cut out my biscuits. There were 8 regular size, and one more folded, and shaped into a small biscuit. They rose very well, too!
One trick I learned from previous test batches of other recipes is, if you place your cut biscuits on the pan JUST touching the next one, they have a better tendency of rising higher. When biscuits don’t have room to spread a little while baking, they rise up instead. Oh, and as someone else mentioned, cut straight down, and DO NOT TWIST the cutter.
These get a TWO THUMBS UP 👍🏻👍🏻 for ease, taste, and texture!! I’ll be making a larger batch for the freezer!
Thank y’all for sharing this recipe!
Thanks so much, Beverly for your great review and for your added tips! So happy you enjoyed them!
Absolutely delish!!! My now go too biscuit recipe!!! Thank you soo much 🍯
Thanks for taking the time to leave a comment, Marie. So happy you enjoyed them. These biscuits are on our favorite list too!
My first time making buttermilk biscuits. My family loved them. I had to limit myself to two biscuits. I definitely wanted to eat a couple more. Thanks for sharing.
Haha! I totally get it! Thanks for taking the time to share your opinion, Mondy.
This is now my go to recipe and since I need to make so many for my large family, a quick question, can I freeze before baking?
Hi Patricia, yes, you definitely can. Just pop them in the oven frozen. You may need to bake them just a bit longer.
This is now my go to biscuit recipe my husband LOVES them says their better than his moms!! Thanks for sharing!
Wow! Better than moms? That's a wonderful compliment 🙂
The best biscuits that I have ever made. Made a batch for tonight's dinner of Chicken and Biscuits. Then, had another half biscuit with honey for dessert!!! Mine only needed about 9 1/2 minutes and they were perfect.
I did a taste test! I made 1 batch of biscuits and then used this recipe for a batch of buttermilk biscuits . Both made very good biscuits, but the buttermilk biscuit was a prettier biscuit, flakey and tender with the bottom crust offering a very pleasing bite, without being crumbly or too dry. My family voted for the buttermilk biscuits. Thank you for sharing this recipe.
Awesome! Thanks for sharing these results. I love that you went through all of this!
These are incredibly delicious and incredibly easy to make! Thank you sharing the recipe!
You're welcome, Jennifer! I love that you love them!
Oh my goodness these are the best biscuits ever!!!! After reading comments, I just want to verify that you could prepare the biscuit and freeze them unbaked, then remove from freezer and bake accordingly as needed? If that is the case, I would never buy another frozen biscuit again!
Hi Kathy, Thanks so much! Yes, you can freeze these biscuits unbaked and go right from the freezer to the oven. They will take a little longer to bake.
Probably my best attempt at biscuits. Wish mine had the height yours had, I think next time I'll pop the cut biscuits in the freezer for a little bit. Taste was very good!
That's awesome, Maria! If the dough gets too warm they won't be as tall so freezing for a bit would be a good idea.
A good sharp cutter can make a big difference in height too.
So true! Along with not twisting the cutter. Thanks, Maria!
This is my “go to” biscuit recipe.
Question - how long can I wait to bake the biscuits? For instance, can I prepare them and not bake for a couple hours? Worried about all that chemistry going on during the delay. 😉
Yes, you can prepare them several hours in advance. Just store them in the refrigerator, covered with plastic wrap (to keep them from drying out). I often make them early in the morning and pop them in the fridge until we're ready for deliciousness. It's good for them to chill a bit.
Love these biscuits! Can I safely double the recipe?
Yes, I've done it many times! Enjoy!!
Hi Chris - here in Australia and love your food blog! Can I just ask how you measure your flour? I just mixed up a batch of these biscuits and my dough was pretty sticky. Do you scoop the flour or spoon into the measuring cup and level? Just want to know for future reference so I can get these and other recipes to turn out as good as yours! Thank you!
Greetings all the way to Australia! Thanks so much, Jessica for your kind words.
I stir my flour then scoop. This dough is a bit sticky until you turn it out onto the counter. That being said, I did notice when my daughter lived in England that with the flour there, I had to use a bit more. Not sure what the difference is but I did add a little extra. Hope that helps!
Great recipe I now have a biscuit recipe that works. Love the butter trick. They turned out perfect. I had to eat one with my coffee the next day and they were still perfect.
Haha! I love it!
hello. made these tonight to go with a big pot of soup. replaced whole milk with heavy cream to make my buttermilk. ohGoodness!!! best biscuits EVER! thanks so much for the recipe!!!
Sounds like a wonderful dinner! Thanks so much for sharing your results, Annalea (love your name!).
OMG, this was the easiest way to make biscuits ever! I made mine with almond milk because I’m lactose intolerant, and the dough was a bit wet. I think almond milk isn’t as thick as buttermilk, so next time I’ll just reduce the amount a bit. But this time, I just added a bit more flour and they were perfect! I cut the dough into 8 rectangles so as not to waste any, and froze them for quicker morning prep. The frozen biscuits took about 18-20 mins to cook. They were absolutely delicious - light and flaky/crumbly! Thank you for sharing this recipe.
I love that you made these with almond milk Christa! Thanks for taking the time to share your results. I'm sure it will be helpful to other readers with lactose intolerances.
I made these tonight and they were easy and yummy! I’m wondering if this recipe could be adapted to make sweet biscuits like for strawberrry shortcake?
Hi Danielle, yes definitely. I would just add about 1/4 cup of sugar and then sprinkle the tops with sugar.
wow, and i thought grating frozen butter was the coolest biscuit trick.. this is amazingly easy & quick!! hubbs is very happy as i can make biscuits everyday, haha 😂
but really, love love love!! thank you 🙏 ☺️
Haha! So true!
These are the BEST biscuits I've ever put in my mouth! They are really easy and are so delish with chocolate gravy! And tons of butter melting on top of the gravy! Yummy....😋 Thank you for sharing this recipe.
Sounds like you had a feast, Christy!
Wonderful and so easy! Everyone in my family loved them!
Thanks for sharing your results, Sherry. We're so happy you enjoyed them! We are seriously addicted to these biscuits 🙂
I love these biscuits! To rush making the buttermilk cold, I measure just under the 1 cup and add ice while melting the butter. In a few minutes I scoop out the ice, pour in the warm butter and it gets the "cut in" effect!
Great idea! Thanks, Wendy!
Hi, I made these this morning and decided to use the White Lily self-rising flour that I save for making biscuits, so I added baking soda but not the salt and baking powder. The dough was lovely and soft, but they didn't rise high enough to cut in half. They were very delicious, soft and tender, though. Do you think I should add a little baking powder the next time I make them using the self-rising flour?
Hi Rebecca,
I haven't tried these biscuits using self-rising flour. I think it's better to use all-purpose flour, as it does have more baking powder than the ratio of baking powder to flour in self-rising flour.
Have you ever tried this butter/milk method with pie crust? Thanks
I haven't Bettye because pie crust doesn't have enough liquid to suspend the butter as particles.
Hello! Can the dough be prepped before and put in the fridge?
Definitely! Just cover with plastic wrap to keep them from drying out. I've even frozen the unbaked biscuits and they were great when baked.
Did you bake them frozen or did you thaw them before baking?
Hi Dee, I baked them right from the freezer!
Ive made these several times and LOVE THEM! I am making them this weekend for a very large group and need to quadruple the recipe. Have you ever made the dough the night before and just refrigerated until morning? Wondering if I can do this to save myself some of the morning prep.
OMG! These are absolutely wonderful. I am making again in a few weeks to serve with several salads at a luncheon. Thank you for sharing.
Thanks so much, Dianne, I'm so happy you have enjoyed them as much as we do!
These were wonderful and very easy, I love this new technique. Very effective. One question, did you cook yours on the top or middle rack of the oven? I did the middle rack for 10 minutes and then the top rack for 1 minute (we are at 6000' here).
Hi Lynn, I use the middle rack. I know cooking at high altitude requires different baking techniques - sounds like you adapted the recipe well!
I just now tried this recipe, and I really iked it! I used soured milk, as buttermilk is not available where I live. I like the technique used, and will most definitely makw these again. Thank you or sharing the recipe and the link. 🙂
Thanks for sharing your results, Ana. Sour milk is a great substitute for buttermilk.
Absolutely delicious! My go to biscuit recipe now! Thanks for sharing.
You're welcome, Mandy! I'm so happy you enjoyed these biscuits 🙂
Hi! These are in the oven now and look great! Have you ever had any “fall over” while baking? I have a few that have fallen to the side! Ha!
Hi Michaela, yes occasionally one or two will fall over. They will still be incredibly delicious. Enjoy! Wish I was at your house 🙂
If making these as drop biscuits would you still have to knead the dough before spooning onto prepared baking pan? I love the ease of drop biscuits and I can't wait to make these, thank you for posting!
No, don't knead the dough if making drop biscuits.
Made these again this morning. This has become my go-to biscuit recipe. I make my own yogurt so I use the whey instead of buttermilk. These are honestly so easy and tasty. Thanks for sharing!
Thanks, Meg! We love them too!
Amazing biscuits......thank you for posting it. why didn't I think of this <3
Haha! I know, I feel the same way! 🙂
Great Recipe,
Brought me back to my Grandmothers kitchen!
She cooked on a stove with wood! Recipe is identical except she used processed lard! Mine turned out great ! I just finished two with some bacon and two boiled eggs!
Great Memories!
Thanks
JIM LARIMORE
Kentucky
That is so cool! I love how recipes can evoke wonderful memories 🙂 So happy you enjoyed them!
Making these for the 2nd time right now and they already look perfect. This is my go to morning biscuits for my family. Thank you for this recipe.
Awesome!
I am so excited to try these. I saw your original post back when my oven was not working. We updated the kitchen and as of today I have a new oven and can't wait to try these! Possibly as early as tomorrow. I need to pick up some buttermilk.
Thank you for this one! Sounds like a genius recipe! : )
Enjoy!
I made these biscuits this morning for breakfast and the name is true, they are ridiculously easy. They are delicious. Thanks so much for the recipe.
You're welcome Evelyn, thanks for letting us know!
If you were going to do these as drop biscuits what would you do?
Just spoon or scoop the batter onto a sheet pan and bake. Enjoy!
Made these today - thank you so much for posting this! It's the first time my biscuits didn't resemble hockey pucks!! I'm going to make a triple batch next time and freeze some so they're on hand when I'm short on time! Again, thanks!!!
Thanks for letting us know, Julie. You can just call yourself a little southern biscuit maker now 🙂
Best and easiest biscuits I have ever made. Thanks for sharing your recipe. I have made these many times. We love them!
That makes me happy Palma, thinking of you and your family enjoying these biscuits!
Hi Chris,
I made these for breakfast this morning and the name is exactly right - Ridiculously Easy!! The came out perfectly!
One question though - how deep is your biscuit cutter and is it an open-topped cutter? Mine was not deep enough for the height of the dough. Is that question as clear as mud? Haha
Hi Chris, I'm so happy you enjoyed them! I use a 3 1/4-inch high cutter and it is open-ended. I really like this set: https://amzn.to/2pC5PaC
Thanks so much Chris for the info on the biscuit cutters. Makes sense now! Love your recipes! Haven’t made one I didn’t like!
Can you freeze the dough and follow normal cooking instructions once thawed? Or do you recommend cooking then freezing?
I usually bake them and then freeze but I have had readers share that they froze the dough with good results.
Thank you for this easy to follow recipe. I have never made biscuits before and they were beautiful. I am probably more proud of myself than I should be! They were fun to make and tasted great as well.
No, you should be proud of yourself. Mastering biscuits is a major accomplishment!
Hi! Thanks so much for the recipe! These turn out perfect every time 🙂 my only question, we froze some and want to eat them now. How do you heat/cook them?
Hi Nikki, I usually just let them thaw for a bit then pop them in the oven at 275 for about 5 minutes. Enjoy!
Since everyone measures flour different, would you give the flour in ounces or grams for us that use a scale. More accurate. 😊❤😊
Hi Barbara, if you look at the recipe there is a little button you an click for metric measurements. I'm working on that for all my recipes although it's taking a while as there are over 1,000 recipes 🙂
Ack...I tried, but they turned out a doughy mess. Why won't they cook through??? Maybe my oven didn't get hot enough? Ugh. Just have to throw them away.
Hi Patricia, so sorry you had problems with these. It's hard to say what went wrong since I wasn't with you in the kitchen. It is important to have a really hot oven to get the proper rise.
I made these last night and they were AMAZING! I can't believe how easy and delicious. Thank you for sharing! I was thinking of trying adding some lemon zest and blueberries - will let you know if I do and how it turns out! I will keep my eyes peeled for your cheese and scallion version 🙂
That's wonderful Samantha, thanks for sharing your results. I did actually publish the cheese and scallion version I was dreaming up but I changed the scallions to chives, so good! https://thecafesucrefarine.com/easy-cheddar-chive-biscuits/
Do you think these would bake well in a cast iron skillet? Or do you recommend a nonstick baking sheet, perhaps parchment paper?
Hi Amy, I think they would come out wonderful in a cast iron skillet!
Hi Chris. I made these biscuits for Christmas and we had them with pork roast, sauce and veggies. Absolutely amazing! We have never had anything like this before, I had imagine them to be a bit like the regular German rolls, but no, they are really something different, different taste and different texture. I made too many (again thinking about regular rolls, one can have two of those at a time), but due to the butter probably, nobody managed more than one. I loved the leftovers for breakfast the next day! 🙂
Thanks for sharing your results, Adina! Yes, they are totally different than brötchen although I dearly love your little German rolls too. I discovered them many years ago in Germany and fell in love!
These turned out so great! (And if anyone is like me and out of baking powder, it works awesome with self-rising flour, too- just add an extra 2-3 tablespoons). I am always a miserable biscuit failure who makes hard hockey pucks and these came out fluffy and delicious.
Thanks for the tip Amy, so happy you enjoyed them!
I have been searching, saving and trying various biscuit recipes for years!!! I have finally found my biscuit recipe. Absolutely tender, amazing and delicious. Thank you, thank you, thank you. Now to delete all the other biscuit recipes I’ve saved!
I love this recipe! It is my go to biscuit recipe because they are delicious, and I love the milk and butter trick! I have a question about freezing the biscuits. Do you think I could freeze the dough after I've cut it into biscuits so that I can bake them fresh. I saw where I could freeze after I've cooked the, but I'm wondering if freezing raw and baking at a later time would work. Any suggestions?
I haven't tried that yet but I think you could.
I have frozen the dough , for later . it works great . Straight from freezer to oven .
Thanks Randell!
These are amazing !! So tender and butter. I'll keep this recipe forever !!
Thanks Lori!
These biscuits are genius!!!! I have tried making biscuits twice in the past (using other recipes) and they have not risen at all...more like hockey pucks than biscuits and I followed the recipes exactly.
However, when I tried your recipe today, the biscuits turned out fantastic! Your instructions regarding the dough not being too wet really helped me gauge what the texture of the dough should be. I have two questions I am hoping you can answer:
Question: Do you measure flour by spooning the flour into the measuring cup, or do you mix up the flour in the bag (to 'loosen' it) and then use the measuring cup to scoop out the flour?
Question: I would like to put these biscuits in my child's schoolbag for an afternoon snack - therefore, I'd like them to have some nutritional value. I was thinking of making them with some grated cheddar cheese inside and/or using whole wheat flour - any advice on how to do this without ruining the height and flakiness of the biscuits?
Thanks!
Ann
Hi Ann, so happy you had such great success with these biscuits. We love them too! I think cheese would work well and I'm actually planning to do a recipe with cheddar cheese and scallions coming up. Not sure about the whole wheat flour as I haven't tried that. I'd start out with maybe 1/4 ww flour and see how it goes and then try to increase if the results are good.
Thanks Chris. Looking forward to the cheese biscuits recipe. Any advice on the best method for measuring flour?
Ann
Hi Ann, I just "loosen" my flour by stirring it with a whisk or even a fork, then I scoop it up and level. I find this to be the easiest yet most accurate way to measure flour.
I have replaced all purpose completely with whole wheat pastry flour and the results have been amazing! I look forward to trying out this recipe and I'm sure they will turn out well. WHole wheat pastry flour is amazing!
That's awesome, Bella! Let us know how they come out!
In my family, I am the biscuit baker. Everyone asks me to bring biscuits to family events. I tried your recipe yesterday for Thanksgiving - oh, my! I have a new recipe. You are the Queen! What a hit!
Haha! Thanks so much Linda Jean, I love it!
Been looking for an easy and great biscuit recipe for Thanksgiving and you popped up on my email! I'll be making them Thursday - thanks. I'll give it 5 stars without trying them!
I have made these a few times and I am amazed at how much easier the buttermilk and butter method is compared to cutting in butter which I never really liked doing. Definitely the easiest recipe for biscuits I ever used, excellent!!
Thanks Dwight for taking the time to leave a review!
I’m new to biscuit making so could you explain the freezing part. Do you freeze them after they’ve baked or when raw?
They’re baking this minute, I can’t wait to taste them 😋
Hi Kathy,
Sorry that wasn't clear. If you can keep yourself from eating them all, once they are cool, you can freeze them. I usually just put them in a pan or on a plate, uncovered for about an hour, till they are pretty frozen. Then you can throw them in a zip lock bag and they won't get squished in the freezer. Enjoy!!
I made these tonight and they were absolutely the best biscuits I've ever tasted. That is really saying something considering I'm someone who likes biscuits but has never made them before. I was really surprised that they almost doubled in size when baking. I used the convection setting on my oven and baked until golden brown. WOW!!!!
Thanks Susan, it's not even 6 in the morning here but you've made me want to run to the kitchen, crank up the oven and make biscuits! 🙂
Do you think this same technique would work for pie crust?
I don't think this would work for a pie crust because there's not enough liquid in a pie crust to combine with the melted butter. I think a food processor is probably the quickest and easiest way to make pie crust.
Made these this morning, and man oh man! Delicious! Very easy and hassle free. It took me about 10 minutes from start to oven. Thanks for a new staple!
I'm wishing I had enjoyed breakfast at your house this morning, Jenn! Yes, and I'm with you - I love how quickly they come together. Thanks for letting us know!:)
I made these biscuits and they were so good. I had to stop my self from eating all of them.my family will love these biscuits
Haha Willie! I totally get it! Been there, done that 🙂 Thanks for taking the time to leave a review!
I made the6buttermilk biscuits and let me tell you they were the best i ever made I have tried so many recipes and this one was a hit thank you so much.
Thanks for letting us know Sarah, so happy you finally conquered your quest! 🙂 I was the same way!
These are by far my favorite biscuits I've ever made. This thing you've done with the butter should be front page news. It works perfectly! Do you think the same method would work when making pie dough?
Haha, I love it! Thanks so much although I can't take the credit, the Cook's Illustrated people are the smart ones 🙂 I don't think this would work with pie crust because the amount of liquid (usually ice water) is so small and the amount of butter so large.
I can't wait to make these. They sound so awesome! I plan on making them ahead of time and then baking them for Thanksgiving. (I'm from Ontario, Canada). My question is: Could you thaw them before baking?
Yes, although I wouldn't let them get too warm.
Made them tonight. So good! I will definitely make them again.
Yay!Thanks for letting us know 🙂
Chris, thank you for all your good recipes. These biscuits are delicious! Mine came out more browned on the bottom than I would like, though the tops were nice and golden. Any suggestions? Also, my biscuits were more dome shaped than cylindrical. What might have caused this shape?
Blessings to you and yours!
Betsy
So happy you enjoyed them Betsy! Regarding the browning on the bottom, did you bake them on the middle rack? That's what I would suggest as the lower rack will make the bottom more brown. If you did use the middle rack, perhaps your lower oven is a little too hot. Try using another sheet pan underneath the one you're baking the biscuits on. This will create a layer of insulation which will prevent them from getting too brown. If you don't have a second sheet pan, just line the pan on the underside with a double layer of heavy duty foil. That should do the same thing.
Regarding the dome shape, these biscuits aren't perfectly shaped but if you're careful not to twist the cutter too much when your cutting the dough it will help them to be more cylindrical.
Hope that helps!
These were fantastic! I made them with a "breakfast for dinner" meal and loved the taste! I followed the recipe pretty exactly, except that I didn't roll out the dough; I just made drop biscuits. I kneaded the dough until combined well, and then broke off round pieces and dropped onto my parchment paper. They turned out incredibly well! I will definitely make these again. Thank you for the recipe!
Thanks so much Kailey and thanks for sharing your drop biscuit results too!
I made this today and they are awesome!
That's awesome Sandra!
Sorry for being a pest!!! I looked at this recipe http://www.kingarthurflour.com/recipes/strawberry-shortcake-recipe, and the only thing extra they have in them is an egg, what is your thoughts on adding a egg?
Edee
I don't think you need the egg. These would be wonderful without an egg 🙂
I keep thinking about this recipe if you wanted to convert it to shortcake biscuits what would you change? Increase just the sugar?
Thanks
Edee
Hi Edee, this would make wonderful shortcakes. I would probably increase the sugar to 3 tablespoons.
Why wouldn't this work with cream instead of buttermilk?
Hi Edee, you could use cream but there's something quite magical about buttermilk in baking. The lactic acid helps to make a light and tender texture. It also gives a slightly tangy flavor which is wonderful.
I feel so lucky to have found this astounding recipe! I'm from the south US so I know all about biscuits...alas living in NYC means restaurants rarely have them on the menu. But making them was so fussy, I got butter everywhere and they didn't turn out.
I've made these 4 times so far and they are always wonderful! A little less sugar a touch more salt and they're perfect.
FYI a half recipe makes 4 perfect biscuits, which is ideal for a couple of people.
Thanks again, and love the blog!
Just to note, this recipe is so easy. Other biscuit recipes are the ones that were fussy and hard to make. These are magically easy!
Yay! Bring the south to NYC, the easy (ridiculously easy) way!
I was having a small tea party today and I decided to make the buttermilk biscuits. I made them exactly as written and then I cut them into a scone shape. They were delicious served with clotted cream and red currant jelly. I will definitely be making them again and the bonus s they are simple to make. Thanks.
That's so funny Elizabeth. I made them today too, but for a dinner party. I added sharp cheddar and jalapeño and cut them into little triangles, like scones. They were so good!
So happy you enjoyed them, I love the idea of serving them with clotted cream and jam,YUM!!
Just made these and I will say that they are the easiest, best tasting biscuits I've ever made. I think they're better than the restaurant biscuits I've tasted too. This will be my go to biscuit recipe from now on. Thank you for yet another amazing recipe!
Same Here!
I have tried MANY different biscuit recipes, and this I think is my favorite! BOTH for taste and ease of making (SO EASY I almost feel guilty!)
The only thing I did differently was make square biscuits (pat into a square and made 4 sandwich-style biscuits) .... Yum! I might have to make more right now! LOL
Now you've got me wanting to make them Rachel!
Just tried these buttermilk biscuits and they were easy to make and delicious. Next on my list to try is the artisan bread and microwave caramel
So happy you enjoyed them Claire!
Hi Chris! I made these yesterday and they were so tasty! I was quite intrigued when I mixed the buttermilk with that melted butter and all those little butter globs formed. Biscuits were yummy and sure didn't require any extra butter. I may cut back the next time in the amount of butter I put in. They seemed heavily, laden with it (good tho!) just seemed like almost too
much butter to me. I will for sure make them again. Everyone loved them. Oh yes..I also grated some Gouda cheese and sprinkled it on top when I took them out of the oven and then put them back for a minute , just to allow it to melt. Mmm..😋
I'm not a Cooks Illustrated fan. But these biscuits are amazing. I make a double batch and freeze them unbaked so that I can have tasty biscuits on the weekend without the hassle of making them every weekend.
I never write recipe reviews--ever! But...this one is AMAZING!! I've made these delicious, fluffy biscuits 3 times in the past 5 days. It's so easy. I can pull the dough together and have the biscuits cut and on the cookie sheet waiting before the oven is finished preheating. Thanks so much for sharing...these are my new guilty pleasure!!
That's awesome Katie! I'm so happy you enjoyed them, they are definitely a guilty pleasure worth the calories!
Hello Chris,
I did the same thing you did; I got up and ran to the kitchen after reading your recepy/method!
With one difference: I'm Dutch, live in the Netherlands and it happened to be 4 a çlock in the night and I couldn't sleep... So I had an early breakfast... Thank you thank you for sharing this recepy. Here in holland people are not familiar with biscuits and we don't eat bread with our supper unless we eat chili or soup... but I after eating them ones in the States AND watching "the Waltons" a lot I always wanted to make them. They Always turn out tough or dry! I altered your recepy a little..I only put in one teaspoon of Sugar and perhaps a little extra buttermilk because it seemed to dry at first. And I was afraid of kneading it to much, so I just picked up the dough, put it on some flour and formed a disk and cut them out. They are fantastic! never ate anything like it! Such a crispy thin crust and almost cake-like on the inside... Now I know what was meant when someone said to Olivia Walton: these biscuits melt in the mouth!! Best wishes from Christine
Oh, I love your story Cristine! It sounds like we are very similar despite living in other countries. I'm always so determined to figure out how to re-create something delicious that I've tried. I too, tried lots of different biscuit recipes without much success till this one came along. Now I have to discipline myself to only make them for special occasions 🙂 So nice to hear from you, all the way from the Netherlands!
This recipe is pure genius! Made these last night and could not believe how easy it was -- but better than that is how yummy they taste. This is definitely a "keeper" recipe. Thanks so much!
I pinned these a long time ago and finally tried them this morning to make breakfast sandwiches with. They turned out amazing and came together very quickly, thank you!
Yum! What a delicious way to start 2017, thanks for letting us know Marie! Happy New Year 🙂
This was my first time making buttermilk biscuits and they are turned out beautifully.
Tellement délicieux!
Wonderful!
Hi,
If I make these ahead of time and freeze them, what is the cooking time for the frozen biscuits? I wasn't sure if there was much of a time difference from making them fresh. Thanks.
I bake these frozen all of the time. I check them after 18 mins. It usually takes 22.
The recipe says "Melt remaining tablespoon of butter in microwave". Does that mean I should combine the buttermilk with only 7 of the 8 tablespoons of butter that the recipe calls for?
Thanks Amy, for pointing this out. You actually use 9 tablespoons, total. I've clarified this in the recipe!
Hello! These look divine! Grew up eating my grandmothers homemade biscuits, which I did not get the gene for making. LOL Can't wait to try these. One question, I never saw her put sugar in her biscuits. Can I just leave that out of the recipe?
Hi Amy,
They biscuits don't really taste sweet, though I'm pretty sure they'd be fine without the sugar. Enjoy!
OMG!! Just finished trying this recipe and they turned out better than I could of ever expected them to. Super easy recipe. Thank you so much (:
So happy you enjoyed them!
Thanks for the amazingly simple recipe! I'm new to baking and am always looking for simple - I can't wait to try it. One question though: I noticed your recipe calls for 1 tablespoon of sugar, while the original Cook's Illustrated recipe calls for 1 teaspoon. Is one better than the other??
Hi Noelle, hope you enjoy the biscuits! To answer your question, when I experimented with these muffins I found that we liked just a bit of sweetness. 1 tablespoon doesn't add much but 1 teaspoon doesn't really add any.
I made these over the weekend and they were the best!! Loved how easy they were. When you want to freeze them, do you freeze them before you bake them? I'm thinking yes, but want to be sure. Thanks again for the great recipe!!
Actually Julia, you can do before or after; I've done both!
These are the best, easiest, lightest, fluffiest, yummiest biscuits ever. I was in the mood for biscuits and gravy this morning, but I didn't want to hassle with cutting in the fat. The fact that it uses butter instead of lard and comes out so well is remarkable.I'm keeping this recipe and using it forever. It's genius!
Thanks Jocelyn! So glad you enjoyed them!
These biscuits have been a hit every time I make them. Delicious hot or cold. I save time by making up batches of dry ingredients and store in a zip lock bag.
So happy to hear you have enjoyed them. They are ridiculously delicious! What a great tip too, thanks!
Making them shortly and I know they'll be great as I've never had a fail with your recipes. Thank you for putting the butter in grams as it makes it easier for those like me who live in other countries (Australia ). Cheers
Enjoy! And thanks for your kind words 🙂
Hi, I made your biscuits. they are great. Thanks for the recipe and for each step with pictures which made it easy and clear how to make them. Even the buttermilk substitute.Thank you so much.
So happy you enjoyed them!
I am always apprehensive about recipes from another continent. Measurements needs to be converted and not all ingredients are available and sometimes things get 'lost in translation'.
I still tried this recipe with great success. It is fantastic and delicious.
I used Amazi instead of buttermilk it is very similar and a good substitute.
Thank you for the recipe.
I'm thrilled that, even with substitutions, the recipe works. Thanks Denise for your encouraging post!
These are the ones to make! Thank you - I've been trying a few different recipes and they have all been just a little bit off. Couldn't have been easier. 9 minutes in a 200 degree c oven did it.
That's wonderful Jessica, so happy you had great results!
I cooked in my oven at 475 degrees and the tops were golden brown at 10 minutes. The taste was fine, but the middle was undercooked. Perhaps cooking at 450 would have done the trick OR settling for a smaller biscuit that is not so high, I don't know.
Hi Bill,
Every oven is so different. I would definitely try it at 450˚ next time and watch them carefully. You'll love them when they're baked to perfection!
Love the recipe, can't wait to try them. Any idea how long they can be frozen? I don't know what the timeframe is for breads and such for freezing.
Thanks for your comment Jennie. Probably about a month max for freezing, although they won't last two days around our house!
Made these this am and they were fantastic! By far the easiest and most perfect buttermilk biscuit ever!
So glad you enjoyed them Jill! Ever since we moved to the South over 35 years ago, I've been looking for a really "perfect" biscuit recipe. This is as close as you can get!
Excellent easy for sure! Thanks for sharing!
Thanks Robin!
I am sadly out of real butter, all I have is margarine, do you think that will work?
No, don't make these without the real deal. It will be worth the wait! 🙂
I am so excited to try these biscuits. I am going to make them tonight. They are for tomorrow's dinner for 15 people. Do you recommend I triple the recipe? If so, should I leave the buttermilk in the freezer longer? Thanks for the awesome recipe!
I would think tripling the recipe would be perfect. And yes make sure the buttermilk is good and cold. enjoy!
Easy and so fluffy! This is the second time I've made them...doubled the recipe!
So glad you enjoyed them Renee! They were a real winner at our house too!
Do these really bake at 475 degrees or was that a typo? Also, any guesses on cooking temperature/time for frozen, prebaked version?
That is correct Chad, just watch them carefully.
They turned out perfect! Thank you for sharing this recipe with us!
We love these Katherine, and so do our kids and grands!
We keep making them and they are delicious! I am wondering if this recipe could be adapted to make blueberry scones...do you have any thoughts on this? I love scones but making them can be a challenge...I am thinking the buttermilk and melted butter technique could be the way to go. It really does work for the biscuits.
Just made these tonight and oh my they are delicious. I had made biscuits once and you are right, a lot of work and they really didn't turn out that good. These are soft and flaky and oh so delicious. And I can't forget to mention that yes, they are very easy and quick to make. The freezer is a great option but I do not believe there will be any left overs to freeze....thank you for a great recipe!
So glad the recipe worked well for you Patty! There's always been a mystery about making really good buttermilk biscuits and these seem to solve it!
The Mr is the resident biscuit maker but I can't wait to make these. Maybe we'll have a Mr and Mrs biscuit cook-off. At the very least we'll probably have biscuits for dinner more often!
Chris thank you for sharing this easy recipe to try and I'm glad you had another fab visit with your family here in England xoxo
Mine were not as pretty..but I didmake 1/2 recipe today and yum:)
So glad you enjoyed them Monique!
THANK YOU Chris! This is a magic recipe, I can't wait to try this!! I've enjoyed your trip abroad, so much fun to travel with you!
Thanks Jenna! We love having you come along with us!
Chris, I was wondering why you took the extra step to flour a board, and cut out biscuits, when the CI recipe just drops them on the cooking sheet? Curious minds, you know!
Thanks for this recipe, can't wait to make it.
I just like the classic look of a round biscuit, Karen! You can just as easily do drop biscuits with this recipe as CI does.
Having a bit of bake-o-phobia, I think this recipe was made for me, lol. I'm not very good with the patient precision required to develop good baking skills so I generally avoid it but I would love to make these on a Saturday morning! I can imagine the wonderful aromas through the house.
Thanks for a great recipe, Chris! And welcome home. Looks like a fabulous time 🙂
They look scrumptious...just what I would love for my breakfast!
They are hard to beat Angie!
We are such a biscuit loving family. There is nothing like a wonderful breakfast with flaky, soft, buttery biscuits! I am a huge fan of Cooks Illustrated recipes - sounds like a good one! Thank you and welcome back!
Thanks Tricia! It's so funny, when we lived in Wisconsin for the first 30 years of our lives, we hardly ever had buttermilk biscuits. Then, when we moved to the South 35 years ago, that all changed!
That's what I love about the South.
Indeed!!
Well my mind is officially blown. That is a brilliant technique! Can't wait to try it 🙂
Enjoy, Jennifer!
Those photos are so great I feel like I just ate 5 biscuits --- in a good way!! I love biscuits this time of year, and these look nice and tall, just the way I like 'em 🙂
Thanks Sue! They were an easy subject because, from almost any angle, they looked delicious! Scott and I love photo shoots like that!
Gorgeous biscuits, these look just divine!
Thanks Laura!
Chris I love biscuits but never make them. I think it's because we've tried to limit eating breads, muffins, biscuits, cookies, etc. now that we're getting older and it hits the waistline quicker than we'd like. That said, there's a time and place for biscuits and this recipe looks perfect and easy. So I'm going to print it and save it so the next time I want to make a batch I'll have this one to refer to. Thanks for sharing it. My mouth is salivating just dreaming about eating one!
Mine too Vicki! Just thinking about these makes me hungry for them!
These sure look yummy that is for sure.
Hard to have around the house, Charlotte - VERY tempting!
Chris when I re-read the recipe you have buttermilk listed twice, is this a typo?
Thanks Madonna! We've corrected that.
I love a recipe that begins with RIDICULOUSLY EASY. And, I can't wait to make more of your freezer jam. It seems to disappear all to soon around here. 🙂
Ha Ha Madonna! We have the same "jam" dilemma around our house!
There is nothing more tasty than a biscuit fresh from the oven with a little dollop of jam! This recipe is a little different than my tried and true, but I am going to try it next time I have the urge for biscuits.
Give it a whirl Marigene! It's so simple and yet, so full of flavor!
This is pure genius. Must try. I keep powdered buttermilk in my pantry (Saco brand). Do you suppose this would work as well?
I'm not sure about that Susan. I haven't tried that and, with the whole process involved, I'm not confident that it would work. Better to stick with regular buttermilk.
I tried this recipe today with Hoosier Hill Farms Powdered Buttermilk and it worked out fine.
3 Tblsp. powder to 1 cup of water. Remove 1 Tblsp. of water from the cup and then mix.
In case anybody wondered. Hubby said they were amazing and the tip about the butter was outstanding.
Thanks for that.
So glad to hear the powdered buttermilk worked for you Carol! Enjoy!
This is the only blog post recipe I've ever read (6:30 am) and went straight to the kitchen and made! They were a big hit with everyone and just as described. Delish!!!
I love it Karen! Come back and visit us anytime! We're about 800 recipes deep, so there's lots to try!
Brilliant! I can't wait to try these!
They will become your "go-to" biscuit recipe Anne Marie - they're that good!
When you freeze the biscuits, are they baked or pre-baked? I would love to make biscuits and freeze them before I bake them so that I could just pull what I need out of the freezer and then bake them to have warm biscuits. I wondered which way you freeze them.
I froze them baked Julie, but you could probably also freeze them pre-baked. I just haven't tried them that way.
How do you recommend heating up the biscuits after being frozen?
I just let them thaw, then warm them briefly in the oven at 325˚F or sometimes even for a short time in the microwave on a low power if I'm in a big hurry.
Genius! I made a recipe for something else a short while ago where I accidentally added melted butter to cold milk and ended up with unwanted butter globules. Great to know I can harness it for good.
It's such an easy thing to do and, as you can see, turns out wonderful biscuits (or scones for that matter!)
How can I NOT want to make these?
Wow Scott..your photos are fab..and Chris' exepertise in la cuisine are a match made in heaven.
Do you shoot w/ a full frame camera?Curious minds want to know..we have no power at the moment ..since last night..but the generator keeps the fridge..and internet etc working.
He does shoot "full frame" Monique. He's got a Canon 6D - what he calls his "big boy" camera!
:):)