This post may contain affiliate links. For more information, see our privacy policy.
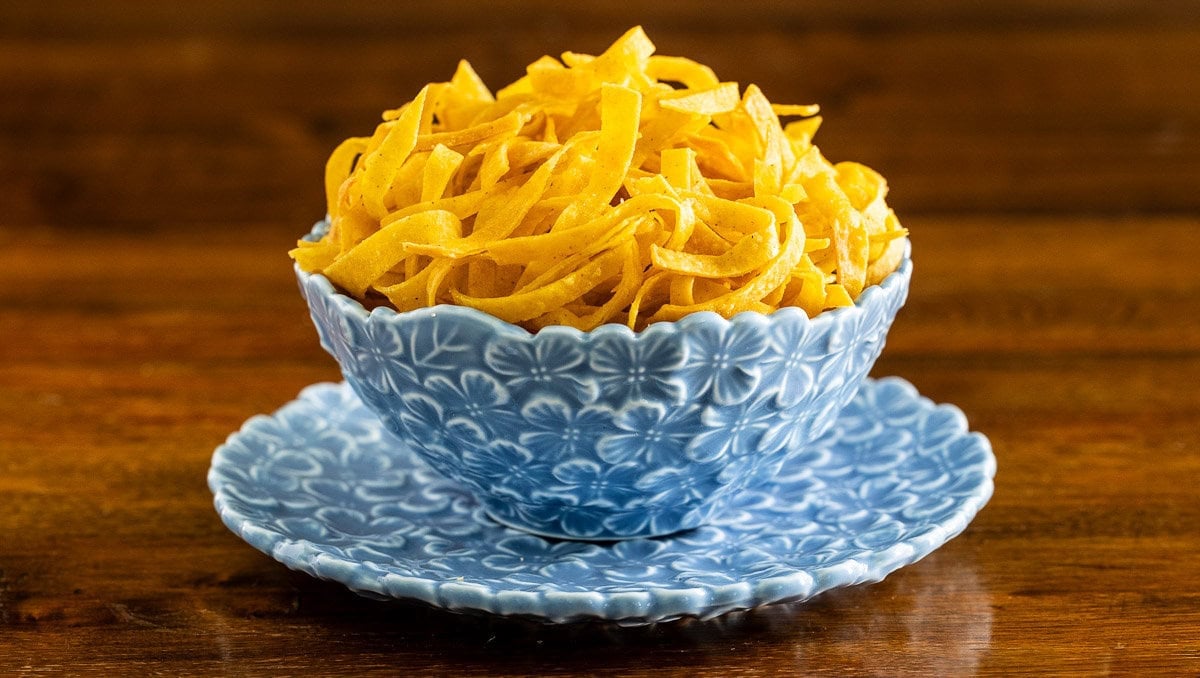
This Ridiculously Easy Oven-Baked Tortilla Strips recipe takes less than 20 minutes, start to finish! The results are crisp, delicious (actually ridiculously delicious) and WAY healthier than store-bought varieties!
I've been making these Oven-Baked Tortilla Strips for what seems like forever but I've never officially shared them on the blog. I've included the easy recipe as a side or a garnish on other posts like this Black Bean Chicken Tortilla Soup, this Chopped Mexican Salad (one of the most beloved readers recipes on our site), these Mexican Salmon Rice Bowls, this Mexican Street Corn Chicken Soup and so many more...
Salads, soups, chilies and snacks
These Oven-Baked Tortilla Strips add a nice crunchy texture to soups, chilies and salads and are delicious for snacking. Just a little warning, though-they're addictive! It's difficult to stop at one small handful - sometimes I hide them from myself so there will be some left to serve with whatever I'm making!
Healthy alternative
Most purchased tortilla strips are deep fried and, while delicious, they're not a healthy choice. This oven-baked tortilla recipe produces super tasty results without the additional fat. The recipe calls for a drizzle of olive oil (considered a healthy fat) before being baked which is a healthier choice than the "bath" of vegetable oil (a generic name for who knows what) that's used for most commercial chips.
I also love that you can adjust the sodium, according to your taste and health requirements. We try to stick with a lower-sodium diet which doesn't work well with most tortilla strips (or chips) that are premade.

Ridiculously Easy
Requiring just a few minutes of hands-on time, these Oven-Baked Tortilla Strips definitely fall into our Ridiculously Easy Collection, a popular category of recipes here at The Café. You can read all about our Ridiculously Easy recipes in this post and check out the whole array here but my condensed definition goes like this: "These are the recipes that make you look like a kitchen rock star with minimal effort on your part". See why the readers are crazy about these recipes?

How to make these Oven-Baked Tortilla Strips
Don't believe that these are ridiculously easy? Here are the simple steps:
- Make a stack with 12 6-inch corn tortillas.
- Cut the stack in half.
- Cut each stack into thin strips. I like to make mine about ⅛-inch thick but feel free to go as thin or thick as you'd like
- Spread out the strips on a sheet pan.
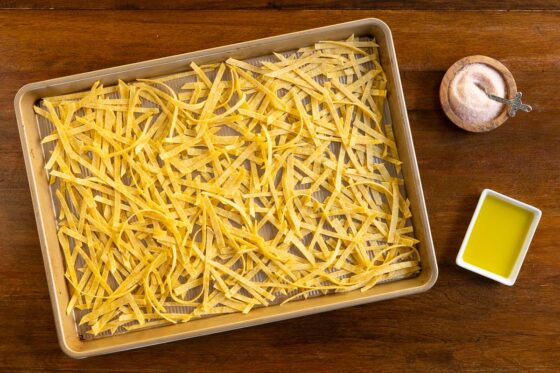
- Drizzle with oil and add a sprinkle of salt.
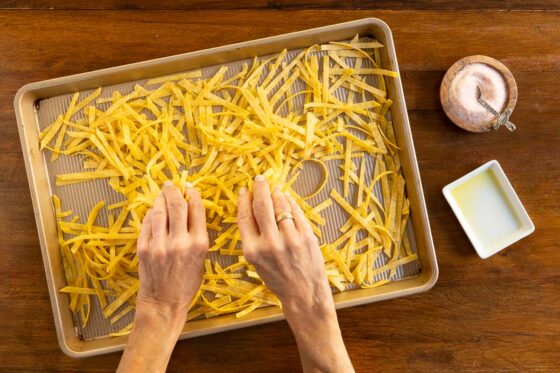
- Toss with your hands to coat.
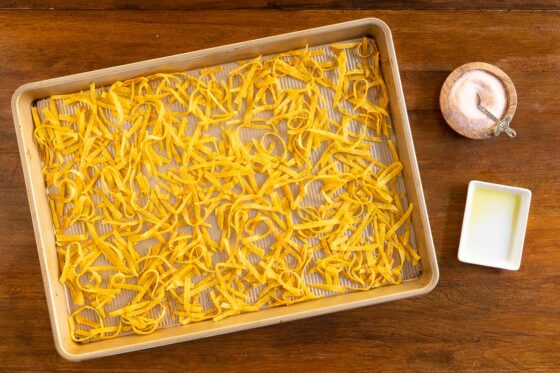
- Bake until crisp, fragrant and SO delicious!
- Oh, and one last thing - try to refrain from eating all of them before the company arrives!
A favorite salad
These oven-baked tortilla chips are a delicious (and gourmet) garnish for soups, chilies and salads. One of our favorite salads (pictured below) that we enjoy serving with Mexican or South-of-the-Border dishes is super simple. Choose your favorite greens (or whatever looks freshest at the market). Add sliced tomatoes, red onions (quick-pickled with a splash of lime juice and a pinch of sugar and salt) and fresh corn (seasonally). Cucumbers are good too.
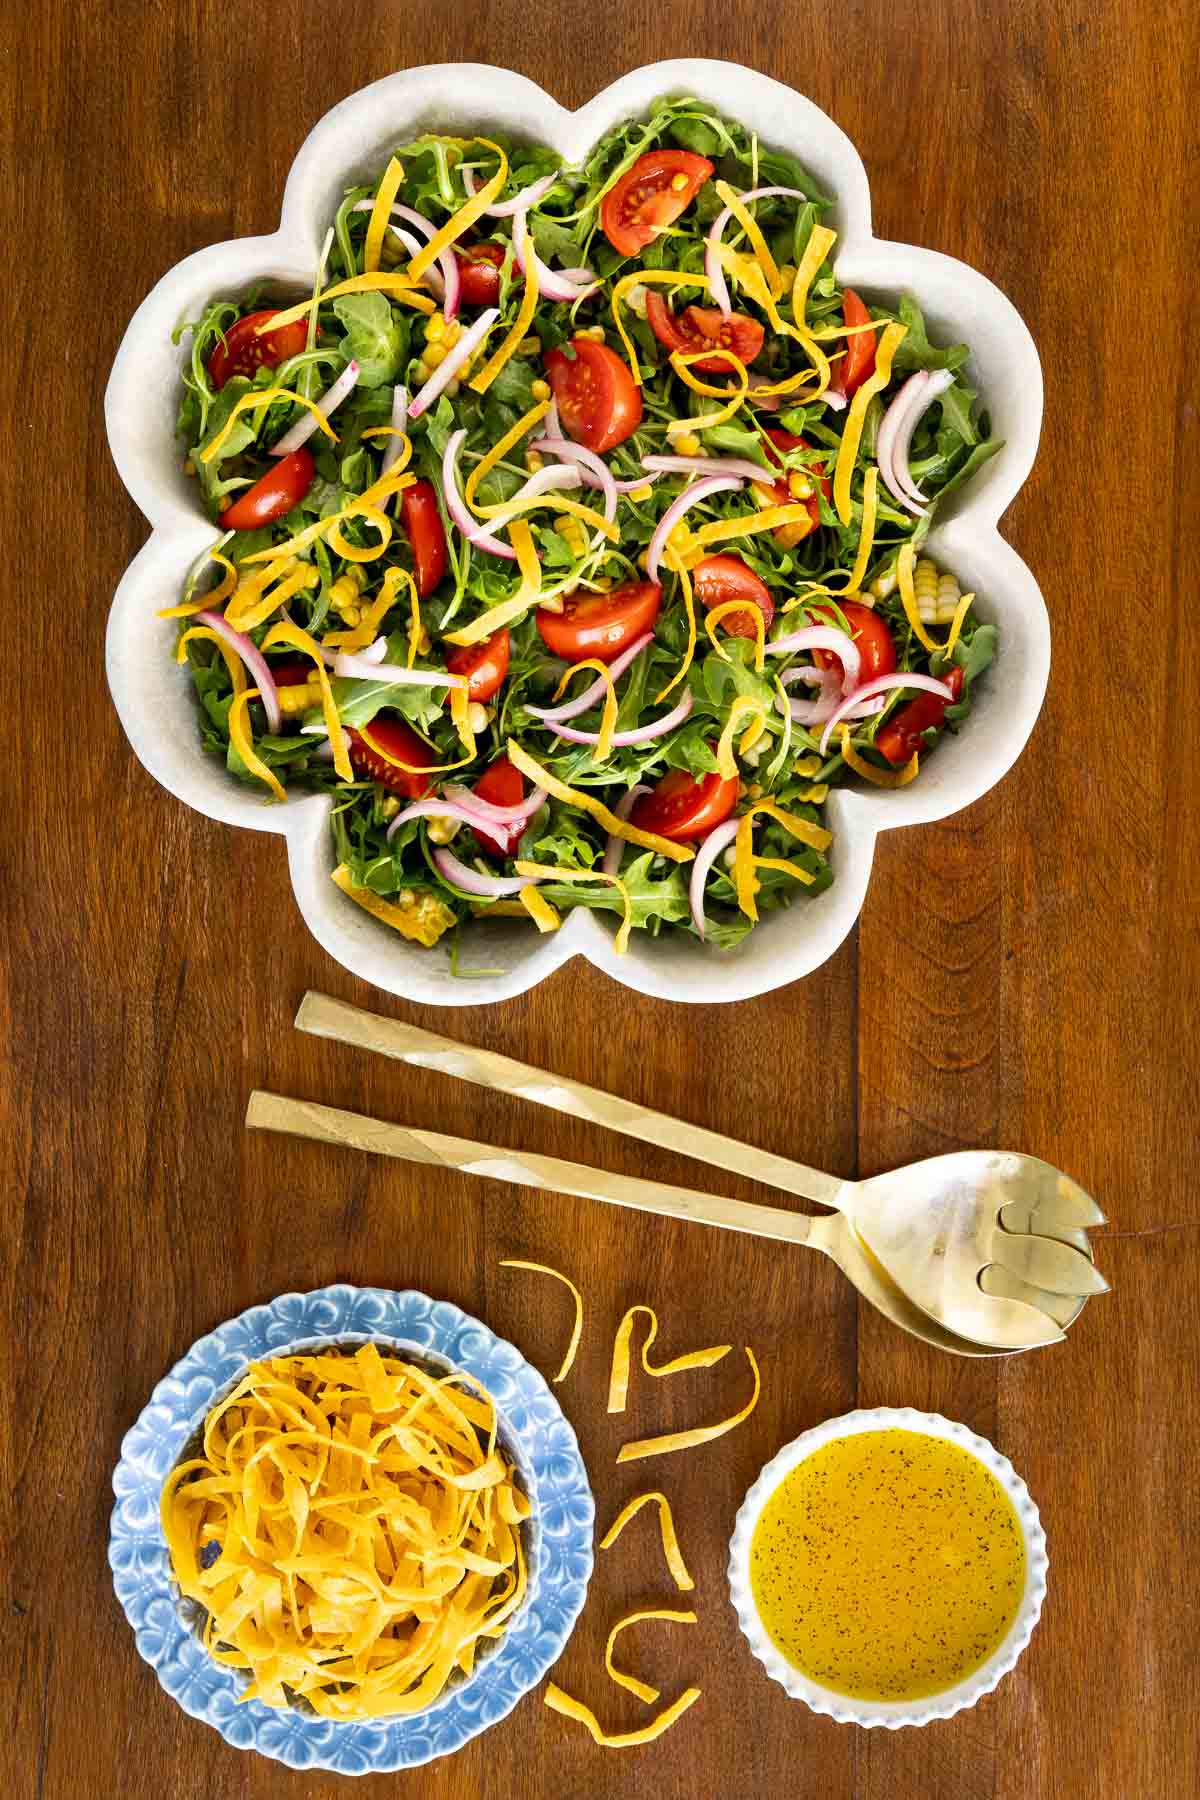
Make a super easy dressing with equal parts of fresh lime juice and olive oil. Add honey, salt and pepper, to taste, shake well tbefore drizzling the delicious dressing over the salad. The crowning glory? You know what I'm going to say, a generous sprinkle of these crunchy, crisp oven-baled tortilla strips!

This is one of those wonderful recipes you'll want to keep in your back pocket. Pin to your favorite board so it will easy to find when you're serving that Mexican soup, salad or pot of chili or just craving a fun, crunchy snack!

Cafe Tips for making these Ridiculously Easy Oven-Baked Tortilla Strips
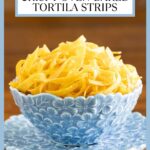
- Feel free to use yellow or white corn tortillas for this recipe. I prefer the yellow variety as they aren't as fragile.
- I like to slice my tortillas pretty thin as they tend to curl a bit more than if they're sliced thicker but. it's your choice!
- I like to gently toss the tortilla strips after 1 minute in the oven. They're flexible and soft at this point and will curl a bit which makes for a pretty presentation.
- These tortilla strips keep well for 5-7 days (or longer) stored in an airtight container.
- Although I use kosher salt for a lot of my cooking, I prefer a finer salt for these tortilla chips. I like really like this Pink Himalayan Salt. It's lower in sodium than regular table salt or kosher salt, has 80 additional minerals and electrolyes and it has a nice clean taste.
- You'll need a rimmed sheet pan for this recipe. I like these OXO Good Grip sheet pans. They're sturdy and have held up well after years of use.
- Every oven is different so watch the strips carefull during the last 3-5 minutes. Some ovens also have hot spots. If you notice the strips are browning more around the edges, just give them a good toss to redistribue and allow for more even browning.
- It's not necessary but I like to use a tongs to toss the strips during the baking time. A good tongs is a super versatile kitchen tool. I love this Rosle Lock and Release Tongs. I've had this one for over 15 years and it's like new!
Thought for the day:
Lift up your eyes on high
And see who has created these stars,
The One who leads forth their host by number,
He calls them all by name;
Because of the greatness of His might and the strength of His power,
Not one of them is missing.
Isaiah 40:26
What we're listening to for inspiration:

If you enjoy this recipe, please come back and leave a star rating and review! It's so helpful to other readers to hear your results, adaptations and ideas for variations.
Scroll Down for the Recipe - or Save It to Your Inbox
We'll email you the recipe so it's easy to save, print, or share.

Ridiculously Easy Crispy Oven-Baked Tortilla Strips
Ingredients
- 12 6-inch corn tortillas
- 2 tablespoons extra virgin olive oil
- ½ teaspoon fine sea salt or fine pink Himalayan salt, more to taste
Instructions
For the prep:
- Preheat the oven to 350˚F (177˚C). Line a sheet pan with foil, if desired, for easy clean up. Set aside.
For the crispy tortilla strips:
- Stack 12 corn tortillas. Cut the stack in half.
- Cut each half stack into strips. I like to cut them about ⅛-inch thick but go as thin or thick as you prefer. I also like to cut the tortillas on a angle for longer strips.
- Spread the tortilla strips out of the prepared sheet pan. Drizzle with the oil then sprinkle with the salt. Gently toss the tortilla strips to coat them with the oil.
- Bake for 2 minutes then remove the pan from the oven and toss gently. A tongs works well for this. The tossing will ensure that the tortillas are evenly coated with the oil.
- Return to the oven and bake for an addiitional 12-14 minutes, tossing again after 5 minutes, until crisp and light golden brown. Watch carefully during the last few minutes as every oven is a little different. If the strips seem to be getting browner around the edges before they are uniformly crisp, give them one more toss with a tongs to redistribute.
- Take a taste and, if you prefer, sprinkle with a little more salt.
- Allow the strips to cool completely on the pan then store in an airtight container.
Notes
Nutrition
Shop Our Café Loves
We’ve gathered our favorite kitchen tools, tableware, and entertaining treasures in one place, the Café Loves store. It’s a wonderful spot to find something special for yourself or the cooks and hosts you love!


Hi Chris
Could you cook wonton wrappers like this?
Lou
Hi Lou, yes! That also works!
These are good but I had to cook MUCH longer to get them crispy.
Thanks for letting us know, Nancy!
Rather than placing the cut strips directly on the baking sheet, I put them in a large stainless steel bowl, add the oil and salt, put the lid on and shake the bowl. This ensures that the strips are evenly coated.
Great recipe!
Thanks, Kelly!
I've used several of your recipes over the years and have enjoyed them...I also enjoy seeing your lovely dishes! That blue bowl and plate in today's recipe is stunning! Kudos, too, to your husband and his photos. Thanks to both of you.
Thank you for the kind and encouraging comment, Sue!