
This post may contain affiliate links. For more information, see our privacy policy.
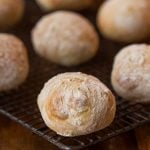
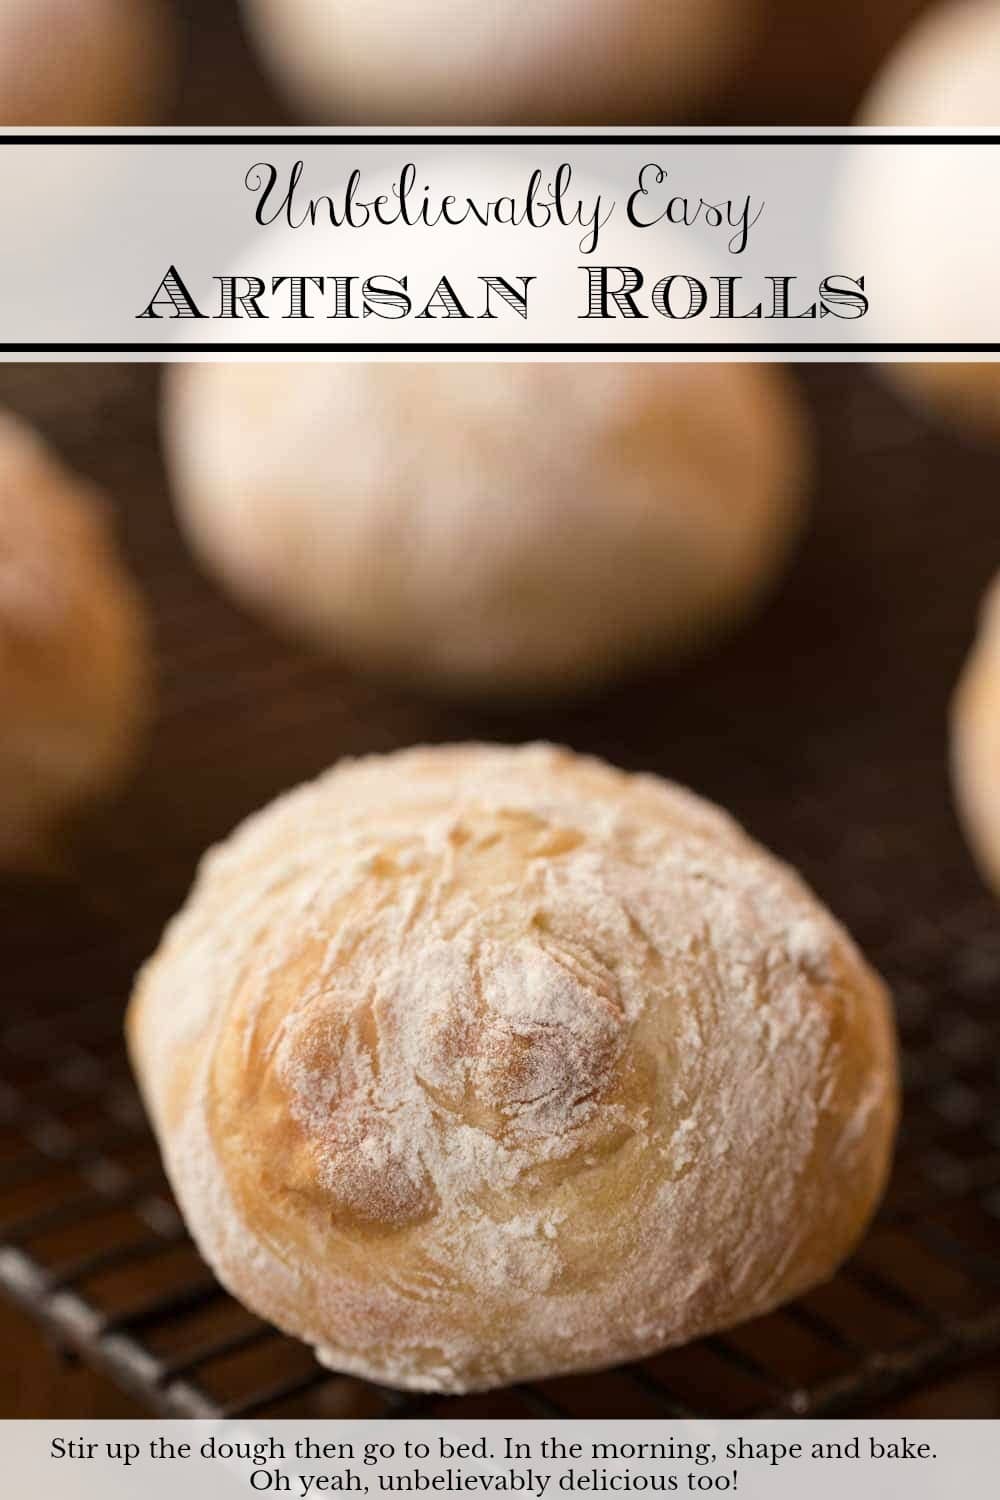
These Easy Artisan Rolls truly are ridiculously easy. Stir up the dough then go to bed. In the morning, shape and bake. Unbelievably delicious too!
When I first published this recipe 5 years ago, I called the rolls Unbelievably Easy Artisan Rolls. And it was true, they are unbelievably easy. But that was before the days of our Ridiculously Easy Recipes. Recently, when making a batch of this delicious bread, I realized that it truly deserve a place in our Ridiculously Easy collection. So, without further ado, let me re-introduce you to these fabulous, Ridiculously Easy Artisan Rolls.

What is Ridiculously Easy?
If you're new to The Café, you might not be familiar with our Ridiculously Easy recipes. They are super popular with our readers and I love them just as much! You can read more about these recipes in this post along with the specific criteria that these recipes have to follow but my nutshell definitely is "recipes that make you look like a kitchen rock star with minimal effort on your part". Like that? I sure do!
Can yeast rolls really be easy?
Let me explain how easy they are and you can decide for yourself. Ready? Combine flour, salt and yeast in a bowl. Grab a sturdy spatula. Add tap water (even cold tap water works!), and stir till combined. Cover, go to bed and have sweet dreams! When you wake in the morning, the yeast will have done its magic.
Sprinkle a work surface with flour and turn the dough a few times, to give it a nice white coat. Divide your dough into 12 pieces and shape the pieces into balls. Place the dough balls on a parchment-lined sheet pan and bake for 20 minutes. That's it! See what I mean? Easy, ridiculously easy!
Oh, one more thing; wipe that drool off your mouth, and please, try to wait till they've cooled just a bit before you start sampling.
I saw these beautiful rolls a few months ago on Pinterest. They originated on a beautiful blog called Alexandra's Kitchen. I did adapt the recipe slightly, but she's the genius who came up with the technique.

It's hard to find really good artisan bread unless you live in a big city where there are lots of bakers. Here in Asheville, NC, there are several high-quality bread shops, but they're few and far between. So what do you do if you're craving delicious, European-style bread? You know, the crusty exterior and chewy, richly-flavored-interior type of bread with those big irregular holes?
In the past all I could personally do was dream about it but now the answer is super simple, I just whip up a batch of these Ridiculously Easy Artisan Rolls.

I started to call them dinner rolls but changed my mind when I thought about how versatile they are. While they do make wonderful dinner rolls, I also love these rolls for sandwiches and as an accompaniment to soups and salads.
Four Ingredients
And, while my recipe today has just four ingredients; flour, yeast, salt and water, you can get really creative with herbs and spices. My favorites are rosemary and sea salt, but I was at Whole Foods for lunch recently and had a crusty dinner roll with Parmesan and fresh ground pepper. That just might be my next version!

Make ahead!
Do you know what might be even better than the simplicity of this Ridiculously Easy Artisan Rolls recipe? The fact that you can make a batch in advance and freeze them for several weeks. Just under-bake the rolls slightly, then pop them in the freezer after cooling. Pull the rolls out of the freezer a few hours in advance and warm them for 8-10 minutes before serving. They'll taste just like freshly baked!
Imagine a basketful of these fragrant rolls being passed around the table at your next dinner party. You'd be sure to see smiles of delight, as each guest peeks under the napkin. Be prepared for lots of compliments, as the warm rolls are savored by one and all. Only you will know that the total hands-on time for these rolls is less than 20 minutes!

Café Tips for Making these Ridiculously Easy Artisan Rolls
- Use plenty of flour on your work surface. This is what will keep the dough from sticking. You will need at least a ¼ cup, maybe more, depending on how wet your dough is. I also like to keep my hands well-floured while shaping the rolls.
- A metal bench scraper (aka a dough scraper) is a wonderful tool to have when making bread, rolls, etc. It will keep your hands from getting sticky as you can use it to move the dough and coat it with flour. Also turning the dough a couple of times on a well-floured surface with a bench scraper, will also keep the dough from sticking to the counter. And lastly, a bench scraper makes cleaning the counter a breeze as you can just scrape up any excess dough and flour.
- Do you have to let the dough rise for 10-12 hours? Nope! I've been in a pinch a number of times and have sped up the rising time by using warm water instead of room temperature water. The rolls still turn out and are delicious BUT the beautiful craggy interiors of these rolls are definitely improved with a long slow rise. There is also more depth of flavor - so if you have the time, by all means, go for the overnight l-o-n-g, s-l-o-w rise.
- This Ridiculously Easy Artisan Rolls recipe is a bit unusual in that you form the rolls by pulling the edges under, then pinch them together to form a smooth ball and place them on the baking pan with the pinched side UP. All other roll recipes that I've ever used direct you to place the rolls on a baking pan, smooth side up. Being a bit of a rebel, I decided to try baking them with the pinched side up and LOVED the beautiful artisan whimsical presentation when the rolls "rolled" out of the oven.
- I love these pre-cut sheets of parchment paper. They save a lot of time in the kitchen, as they're the perfect size for a half sheet pan.
- For regular parchment paper, I really like the Kirkland brand that Costco sells. The problem is, that they only carry it seasonally. I was happy to discover you can purchase it online with free shipping. A roll like this will last a long time and is way more economical than the typical size rolls that you often find.
P.S. If you love delicious, EASY bread recipes, be sure sure to check out our Ridiculously Easy Rosemary Bread. SO good and you won't believe the amazing aroma that will fill your house; AND how easy it is!
These Unbelievably Easy Artisan Rolls are super easy! Stir up the dough, then go enjoy a good sleep. In the morning, shape and bake. Unbelievably delicious too!
- 4 cups bread flour plus extra for shaping
- 2 teaspoons kosher salt
- 1 teaspoon active dry yeast (traditional)
- 2 cups room-temperature tap water
-
In a medium-large bowl, whisk together the bread flour, salt, and yeast. Make a well in the center and add the water. Mix with a sturdy rubber spatula until all flour is incorporated. Don’t worry, the dough will be wet and sticky, that’s how it should be. Cover the bowl with plastic wrap and leave to rise at room temperature for 10 to 12 hours.
-
The following morning (or after 10-12 hours), the dough will have risen, but it may still look shaggy and its surface will be covered with bubbles.
-
Line a sheet pan with parchment paper. Preheat the oven to 425ºF.
-
Spread a generous ¼ cup of flour on a work surface. Dump the dough out onto the floured surface and turn it several times to coat with flour. I like to use a bench scraper for this.
-
Divide the dough into 12-16 equal portions, turning each piece in the flour to coat. (The bench scraper is also great for cutting the dough). Shape each piece into a ball, pulling edges under and pinching together to make a smooth top. Invert balls and place on prepared pan, pinched side up. This will give you craggy, rustic textured rolls. If the dough is sticky as you’re shaping, just roll the piece in more of the flour. Let shaped rolls rise for 20 minutes.
-
The rolls may look a little deflated as they're rising and they won't rise a ton during the 20 minutes but a little magic happens when they hit the hot oven and you'll be shocked at how beautiful they look when baked.
-
Transfer the pan to the oven. Bake 15 minutes. Rotate pan. Bake 5 minutes more or until nicely golden. Transfer rolls to a cooling rack to cool completely.
-
If making in advance, remove from oven when pale golden brown (about 3-4 minutes less). Cool completely, then freeze on a baking sheet. Once frozen, transfer rolls to a large zip lock bag and store in the freezer. To serve, allow rolls to thaw, then heat for 10-12 minutes at 325˚F.
See Café Tips above in the post for more detailed instructions and tips to ensure success.
Donna says
These rolls were so easy and unbelievably delicious!!! Thanks so much for the recipe!!!
Chris Scheuer says
Yay! Thanks for letting us know, Donna!
Yang says
I just made the rolls and they turned out fine. I guess I did not shape the rolls appropriately so that the inside of the rolls looked more dense (no big bubbles) compared to the picture. I probably deflated the rolls to much in order to make them round. It would be very helpful if a video how-to can be posted. Thank you for sharing.
Chris Scheuer says
Hi Yang, it may have been that you dough didn't rise as much as it needed. We will put this on the list to make a video.
Donna L Dwulet says
I am just getting to put these in the oven. Can't wait to see how good they are! Thanks Chris.
Chris Scheuer says
Enjoy, Donna!
kathleen allen says
Hi Chris:
I made these rolls this morning and they turned out perfectly. I made artisan bread during the Covid shutdown so I wanted to try the rolls. We had sandwiches with them at lunch today. They were delicious. I love working with yeast. James Beard's book was my go-to in the old days. Thanks for this recipe and all the other great ones you share with us!
Kathy
Chris Scheuer says
I'm so glad, Kathy! Thanks for letting us know!
Swati says
Hi, in recipe there is a mention that you can add Parmesan cheese and fresh ground pepper . I'd you want add them when you add them at time of making dough or after overnight rise ? Thank you.
Chris Scheuer says
Hi Swati, you could add the pepper when you mix up the dough but I would wait until after the overnight rise to add the parmesan.
Dana says
Hi,
I’m Dana from Coventry in England 🙂
Thank you for sharing this amazing recipe! I’ve made it several times and the five of us love the bread. Makes super lunch rolls, anything roll really 🤩✨
Thanks again, Dx
Chris Scheuer says
I'm so glad, Dana! Thanks for letting us know!
Nancy Nielsen says
I made these this past weekend to go with a pot of Beef Barley soup. Perfection. Everyone loved the chewy rolls. I forgot to let them rise for 20 minutes after I shaped them and they were still fine. Next time I'll try following the instructions more closely. 😁
Chris Scheuer says
Thanks, Nancy! So glad you enjoyed them 🙂
Nancy says
Thank you for this recipe ~ I have found it is perfect for bread bowls!
Question: will it make any difference to use instant dry yeast? I am running out of the traditional, and instant is all I can find.
Thank you so much.
Chris Scheuer says
Hi Nancy, instant yeast will work fine!
Connie says
The rolls were very good, however I thought they were too hard on the outside. I am not a baker, I followed the recipe exactly, but have a gas oven which tends to be hot, should I lower the temp or the cook time ? Thank you so much for the recipe and advice.
Chris Scheuer says
Hi Connie, this is a European type roll which does have a nice crusty exterior. If you prefer something softer, you might want to go with something like our Brioche Dinner Rolls: Honey Maple Roasted Carrots
jk says
Hello Chris,
For years I have been trying to find the easiest dinner roll recipe to make for Thanksgiving, with results not to my satisfaction.
Last night I cut your recipe in half to try this method. It worked out great!
The texture was wonderful, thank you so much for this recipe.
My question is, could I add some sugar to the dough to give the roll a bit more flavor?
I do not care for herbs or cheese in my rolls as you had suggested, therefore that isn't an option for me.
Thanking you in advance for your help.
jk
Chris Scheuer says
Yay! So happy you enjoyed them, JK!
Regarding your question, you could definitely add some sugar. The rise time might be a little less as the sugar will grow the yeast quickly but the rolls will be delicious!
jk says
Thank you Chris, jk
jk says
Chris, here we are year later, and I was looking at my printed recipe, and I failed to mark down how much sugar I used.
I want to make these next week and freeze them for Thanksgiving. Would you say a 1/4 or 1/3 a cup of sugar in this recipe? Thank you Chris.
Chris Scheuer says
Hi jk, I would go with 3-4 tablespoons.
MaKenna says
The dough finished rising about 6 hours before we wanted to eat dinner (made the dough very late the night before). Should I still freeze them and finish baking right before dinner, or just partially bake them and keep them on a cooling rack to finish baking right before?
Chris Scheuer says
Hi MaKenna, I would go ahead and bake them. Just slightly undertake by 2-3 minutes, then rewarm later in a 325˚F oven for 10 minutes.
jk says
Chris, I would like to make these for Thanksgiving. If I make the dough on Wednesday evening and let it rise overnight, how long would I have to bake the rolls on Thursday morning with the consideration that I would want to heat them up right before serving them for dinner?
I would not want them to be dried out that's why I'm asking. Thanking you in advance for your help.
Chris Scheuer says
Hi jk, I would just bake them a few minutes less, probably about 18 minutes, then warm them in a 325˚F oven for about 10 minutes before serving.
Cindy says
Could you make a loaf instead of rolls?
Chris Scheuer says
Hi Cindy- check out this post if you are interested in a loaf- https://thecafesucrefarine.com/5-minute-artisan-bread/?swcfpc=1
Josie says
I made these this morning and they are awesome! I've added a couple notes to my recipe: 1. It would help to spray the plastic wrap lightly before putting it over the bowl at night. The dough can rise up to the top of the bowl and will stick otherwise. 2. I preheated my oven about 10 minutes into the last rise; that was plenty of time for it to get to temp. 3. Do make 16 rolls. I made 12 rolls and they are large and also take quite a bit longer to get done (at least 30 minutes overall). I think 16 rolls would produce exactly the right combination of outside crunch and inside soft bread. This is definitely a keeper! Most likely will be on the Thanksgiving table and many more tables beyond! Thank you, Chris, for yet another amazing recipe. When I want to make something, I check your site first.
Chris Scheuer says
Thanks for sharing your results, Josie!
Terry says
Hi Chris! I'm a whole wheat kinda girl. Could I sub half - ' or even more for the bread flour?
Thanks for what looks to be another stellar recipe - and your inspirational sayings & song links. I listen to the songs and email the link to my BFF so that he can enjoy them too.
Chris Scheuer says
Hi Terri, I think you could do half WW flour. Any more and I think you would need to go with some vital gluten so that wouldn't be super heavy.
So happy you've enjoyed the Scriptures and music. Love that you're sharing them 🥰
Sandra G Morin says
Just wondering whether these could be increased in size and used as bread soup bowls?
Chris Scheuer says
HI Sandra, you could definitely do that. I would crisp them up in the oven before adding the soup.
Paula Murzin says
I mixed these up last night before bed per instructions (I did have a whoopsie with too much yeast, so added more flour, salt & water accordingly.). Baked this morning (I got 16 rolls), and they are absolutely delicious! Crunchy, soft inside with big crags! Sprinkled with shredded Parmesan and coarse sea salt before baking. I’ll never to search for another dinner roll recipe!!
Chris Scheuer says
Thanks for letting us know, Paula!
Joyce says
I made these last weekend for Dinner & Game Night . Using a silicone mat on my counter top and bench knife to
1) turn the sticky dough (thanks very much for suggesting it) over a few times in the flour, and
2) cut the dough into 12 equal pieces dipping the metal edge into the flour each time (gosh, I love my bench knife!) ,
I made 12 rolls. Yeah, they were a little temperamentally sticky to shape into balls. They required 15 more minutes bake time because 12 rolls are larger than 16 rolls. I made gloriously chewy rolls with gorgeous interior holes (the better to hold homemade boursin) that were a perfect accompaniment to pasta e fagiole.
My husband absolutely LOVED these rolls and unabashedly ate the leftovers with peanut butter. He let me know MANY TIMES that he loved the chewiness...so he grinned happily this evening when I said I'd make another batch this weekend.
Thanks, Chris, for making me look good. Cheers from Maine!
Chris Scheuer says
I love that, Joyce! Thanks for taking the time to leave a review!
Candace says
Got up very early yesterday & prepared a batch of this dough. It was ready to bake by 5:30, just in time to cool for dinner. What a delightful treat. I must have made the rounds too big as I only got 11 rolls. Still came out perfectly. This shortcut method is so quick & easy. They were great this morning split, toasted & covered in jam. Thank you again !
Chris Scheuer says
Awesome! Thank you so much for letting us know, Candace!
Lishcia Keizer says
Hi Chris,
You mentioned that sometimes you add rosemary and sea salt. How much do you add for this recipe?
Thank you,
Lishcia
Chris Scheuer says
Hi Lishcia, I add a teaspoon of finely chopped fresh rosemary with the flour and brush the rolls lightly with melted butter before baking then sprinkle with sea salt.
Barb Wilkes says
Do you measure your flour by weight or scooped and levelled measuring cups?
Chris Scheuer says
Hi Barb, I generally spoon my flour into the measuring cup and level it.
Susie says
I followed the directions, but the rolls came out a bit under-baked. I put them back in at 350 degrees for an extra 10 - 15 min.
Chris Scheuer says
Thanks, Susie.
BRIAN STEWART says
How do you get the taste smell and especially the aroma of the Kirkland artisan Burger buns.
The ingredients are flour water salt yeast malted barley
Thanks Brian
Chris Scheuer says
Hi Brian, I've never tried the Kirkland burger buns so I'm not sure.
Tracy Carmen says
I made these rolls for the first time and they truly are amazing! These rolls will be on our Thanksgiving table for sure.
Thanks so much for sharing.
Chris Scheuer says
Awesome! Thanks, Tracy!
Lindaa says
Just wondering about leaving the dough on my kitchen counter overnight .......what temperature is it safe to leave the dough out for a long rise?
If my kitchen is too hot overnight, would the dough be unworkable?
Chris Scheuer says
Hi Linda, as long as you don't have eggs in the dough, it's fine to leave the dough out overnight. If your kitchen is super warm, you could refrigerate the dough and then let it come back up to room temperature for a few hours in the morning. Just give it plenty of time to rise after it's been chilled.
Heather says
Can I use all purpose flour instead of bread flour? Anybody tried this?
Chris Scheuer says
Hi Heather, you can definitely sub AP flour for the bread flour! Enjoy!