This post may contain affiliate links. For more information, see our privacy policy.
Love pizza, but not all the work and time it takes to make it yourself? This deep-dish pizza dough recipe is easy, quick and super delicious!
When I was tweaking and testing this Easy Deep Dish Pizza Dough recipe, it took a few weeks to get it right. My husband, Scott, didn't mind that one single bit and I'm pretty sure he'd be happy if this pizza was on the menu several times each week.
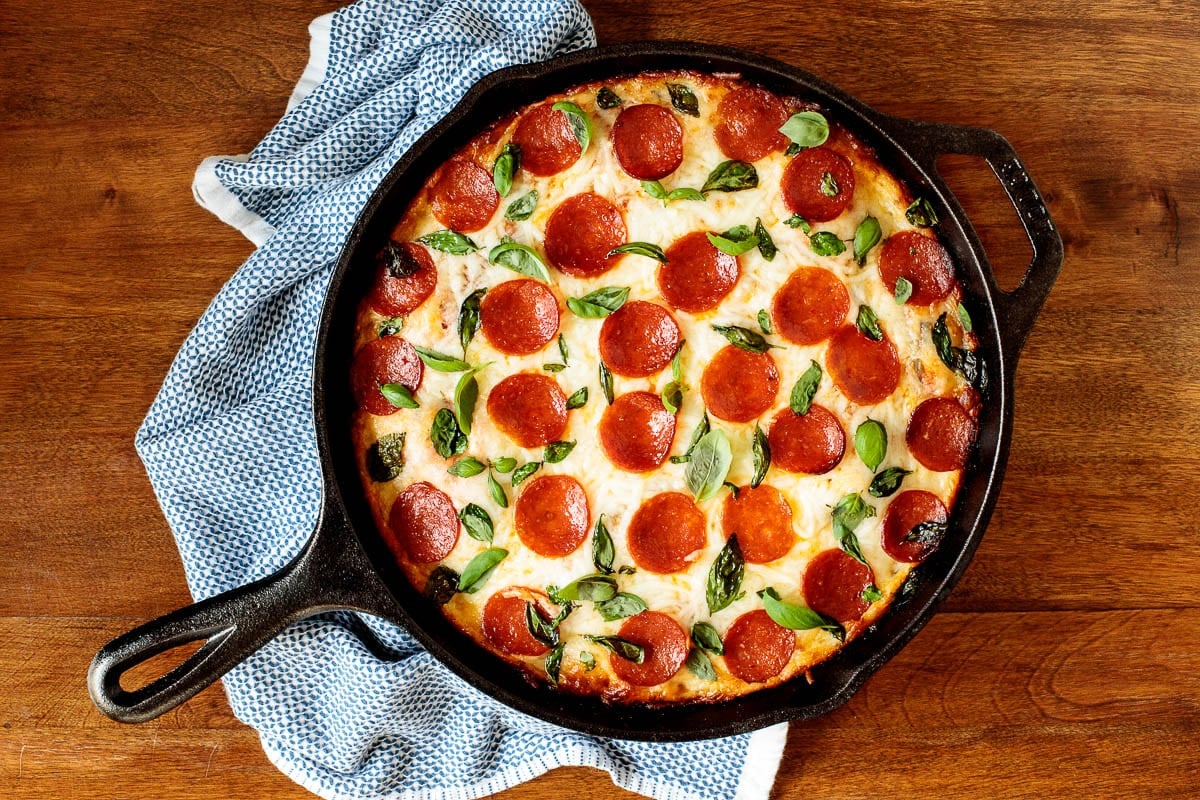
Every time I serve it, he takes one bite and immediately says the same thing, "Wow, this is so... good!" I've also made it for family and friends and the response has been overwhelmingly affirmative.

I don't share this with everyone (sometimes I like to have family and friends view me as a culinary whiz) but this deep dish pizza dough is SO easy to make that it's almost ridiculous.
The yeast problem
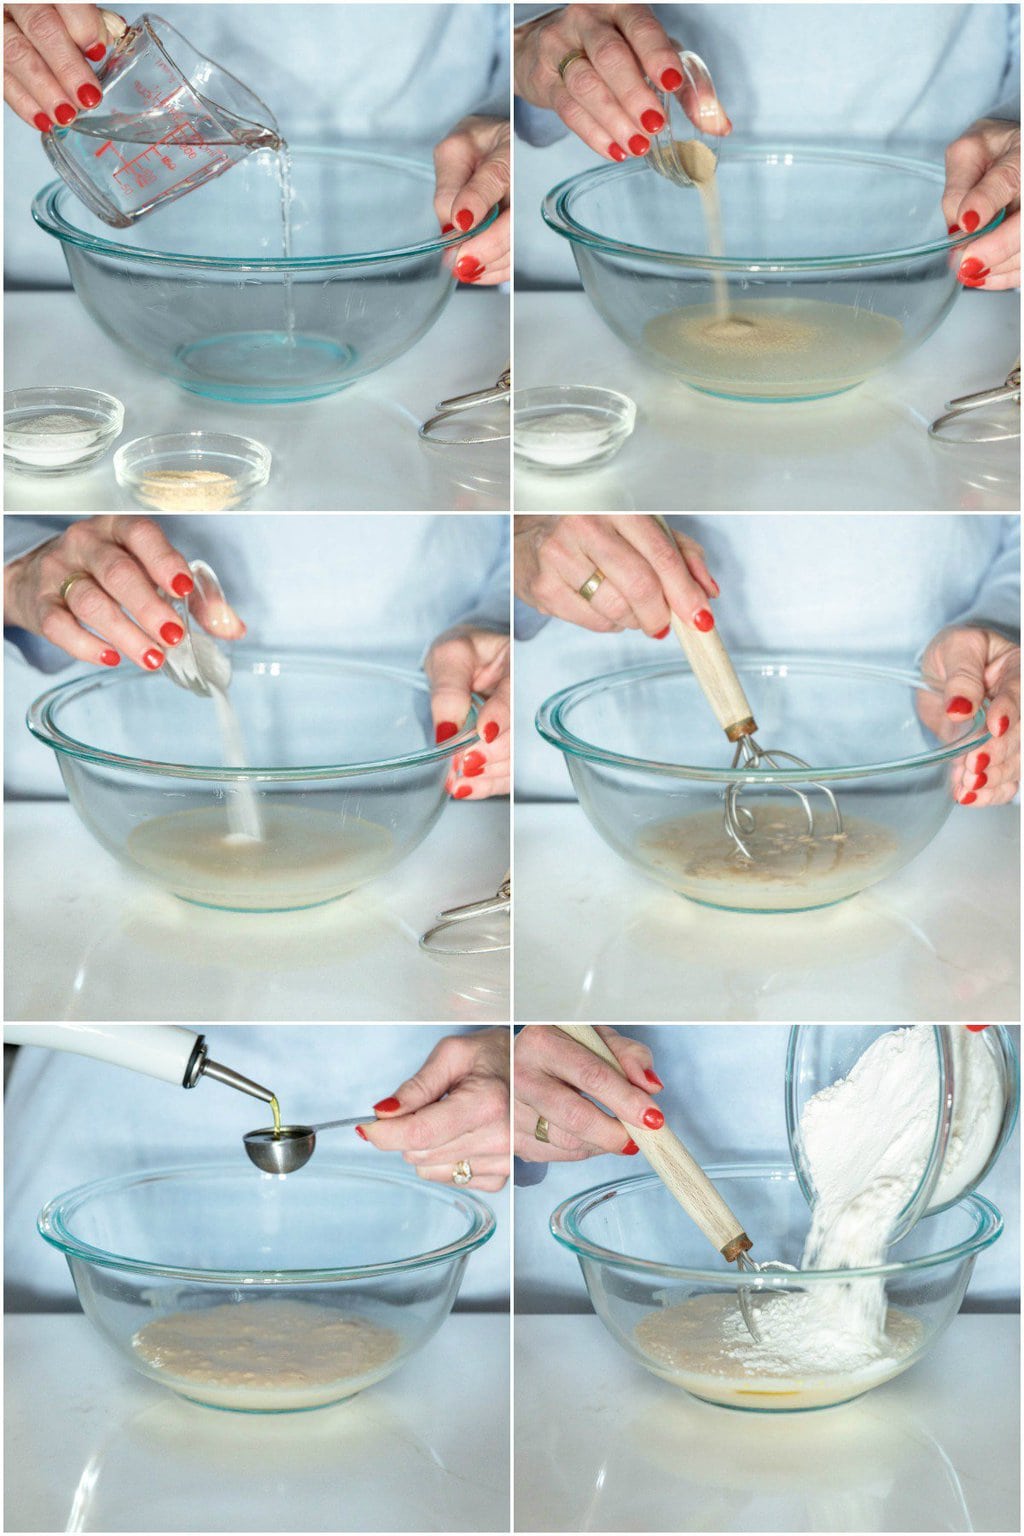
If you've had trouble with (or hesitated to make) homemade pizza dough in the past, this is the recipe for you! There are a few easy tricks I've included that help activate the yeast. Then the 4-ingredient dough will take about 5 minutes to stir together (including measuring the ingredients).
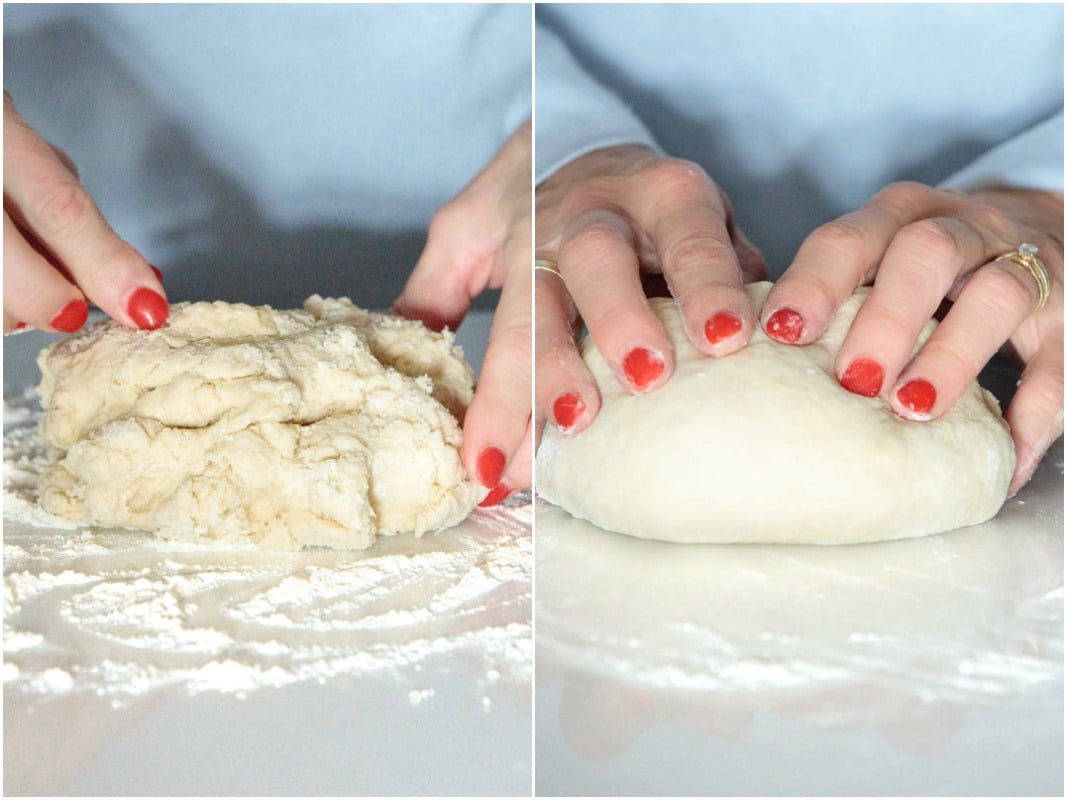
Then it's turned out onto the counter and kneaded for 1 minute. Now your work's pretty much done. See what I mean? So easy!
So if you feel like you and yeast don't get along, I understand. But our yeasty little tricks (see recipe and Café Tips below) will ensure good results. Check out the video below to see a demonstration of this easy deep dish pizza dough recipe:
After this, who knows? You and yeast may just decide to be BFFs!
Even easier!
I've also included instructions below in the recipe for using instant yeast, which makes things even easier! Instant yeast doesn't have to be activated in water as pictured above. Simply combine the dry ingredients in a bowl, add hot water and 1 tablespoon of olive oil and stir it all together. Then proceed to the kneading and remaining instructions.
Almost done!
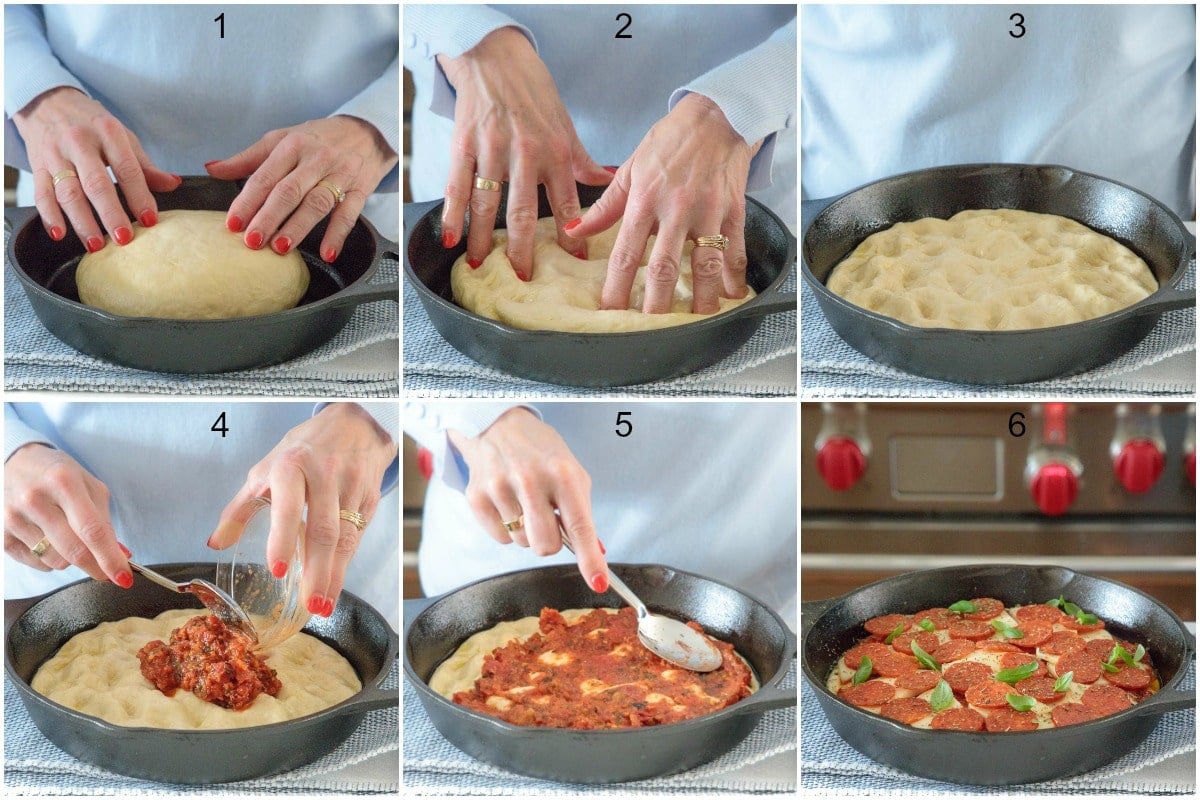
Plop the dough into an oiled pan, cover and walk away for 15 minutes. Come back and see how it's gotten all puffy and soft. Then just spread it out to fit the pan. Add the toppings and go ahead and preheat the oven. In the meantime, your deep dish pizza dough will do a bit more rising. When the oven's ready, the pizza will be too!
And now comes the best part - the tantalizing, delicious aroma of yeasty bread combined with your toppings of choice wafting through the house!
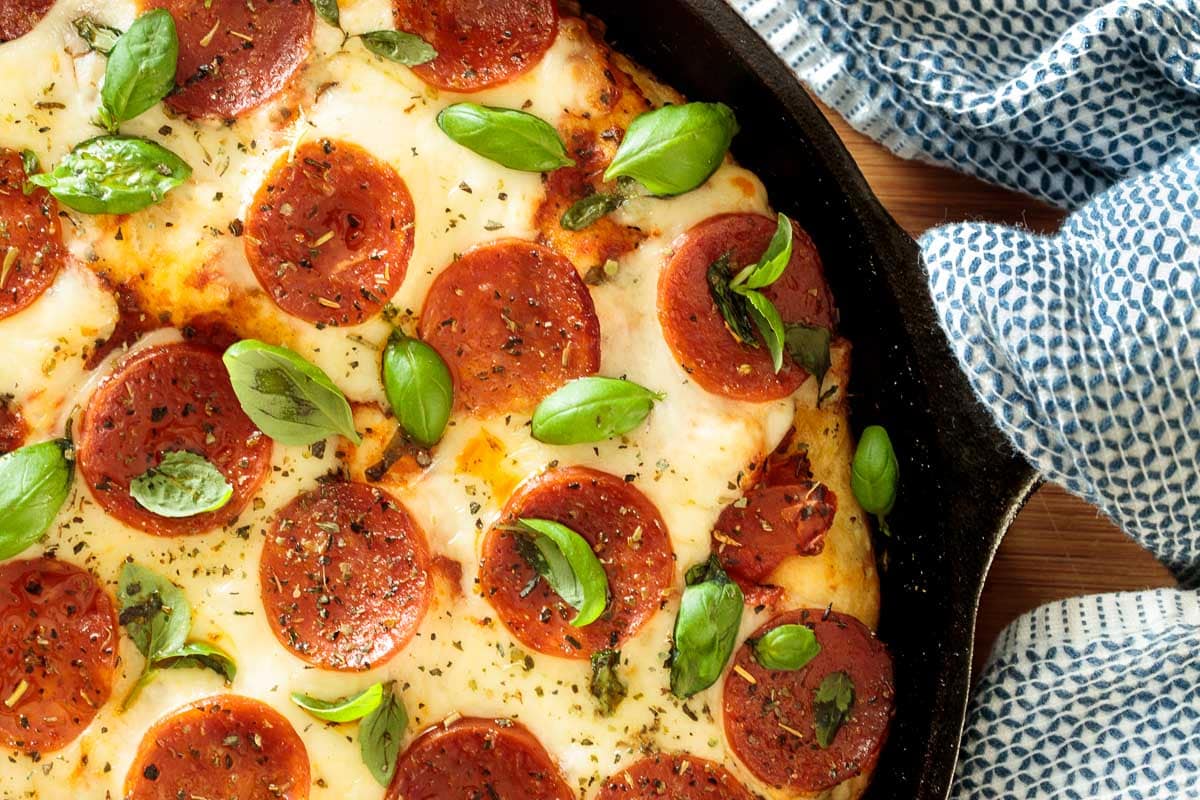
Company coming? Pop this deep dish pizza dough into the oven (topped with your favorite ingredients) just before they arrive. When the doorbell rings the wonderful aroma that greets them will be quite irresistible!
Do I need a cast iron pan to bake this deep dish pizza dough?
Nope! Although a cast iron pan is perfect (as well as inexpensive and a lifetime kitchen tool) for making this deep-dish pizza dough, you can also use a 9-inch cake pan with good results. Because cast iron conducts heat differently than steel or aluminized steel (the metal most cake pans are made of), you'll have to adjust the temperature of the oven and baking time a bit, but I've got you covered! I've included those adaptations in the recipe instructions.
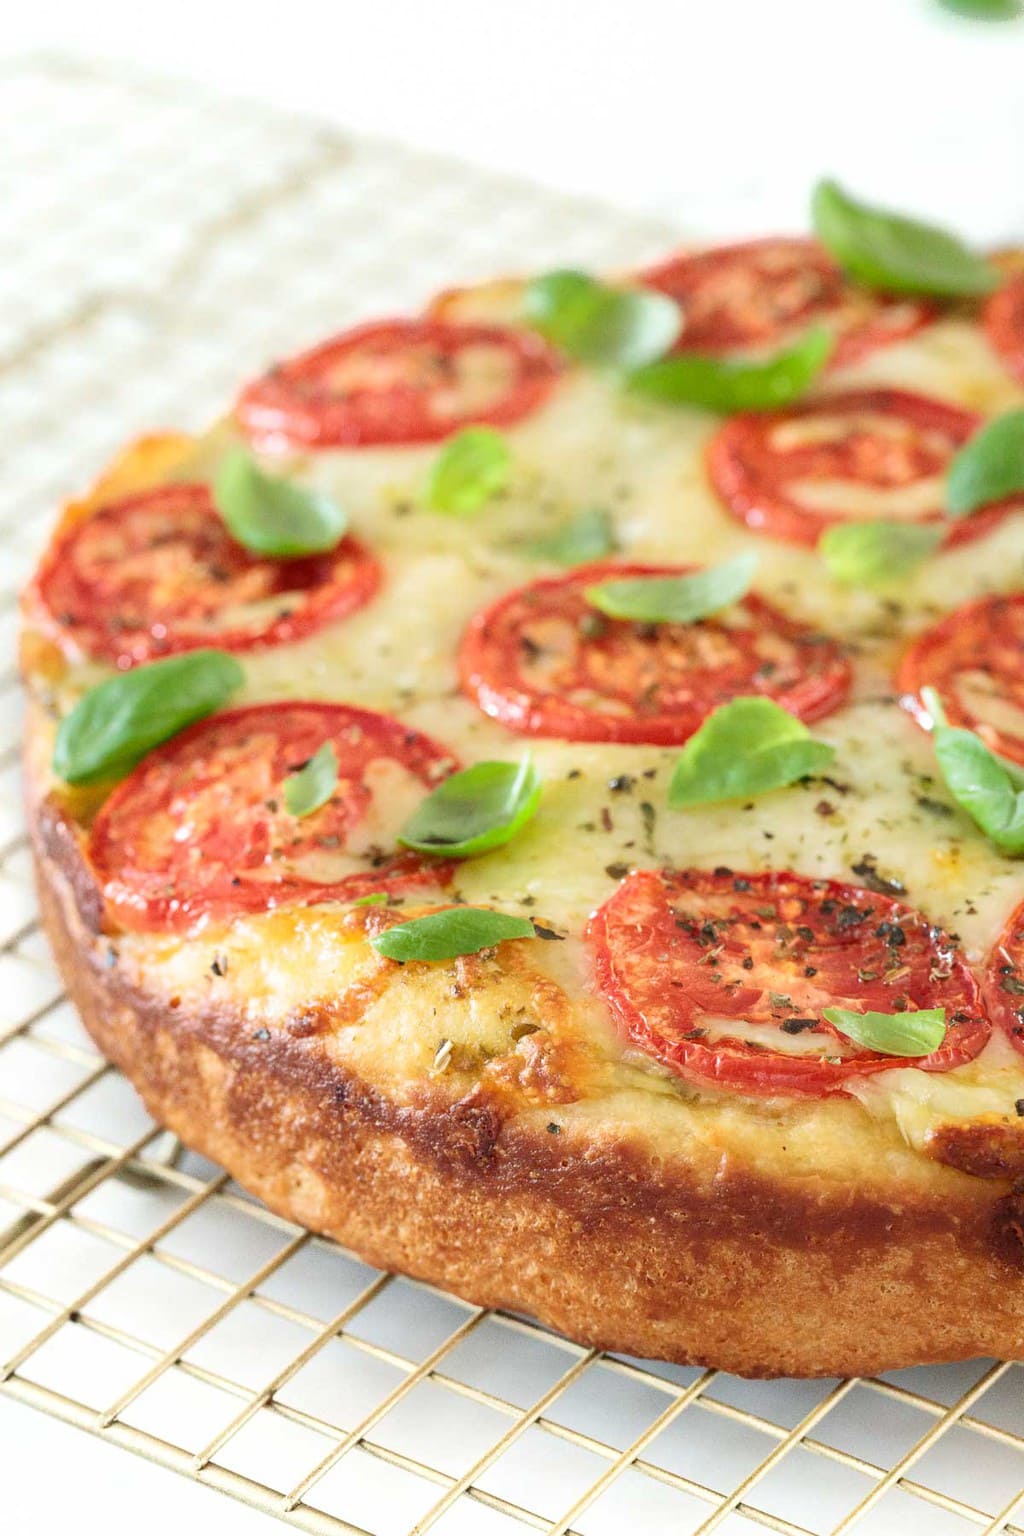
The Deep Dish Pizza Margherita pictured below was made in my 9-inch cake pan.
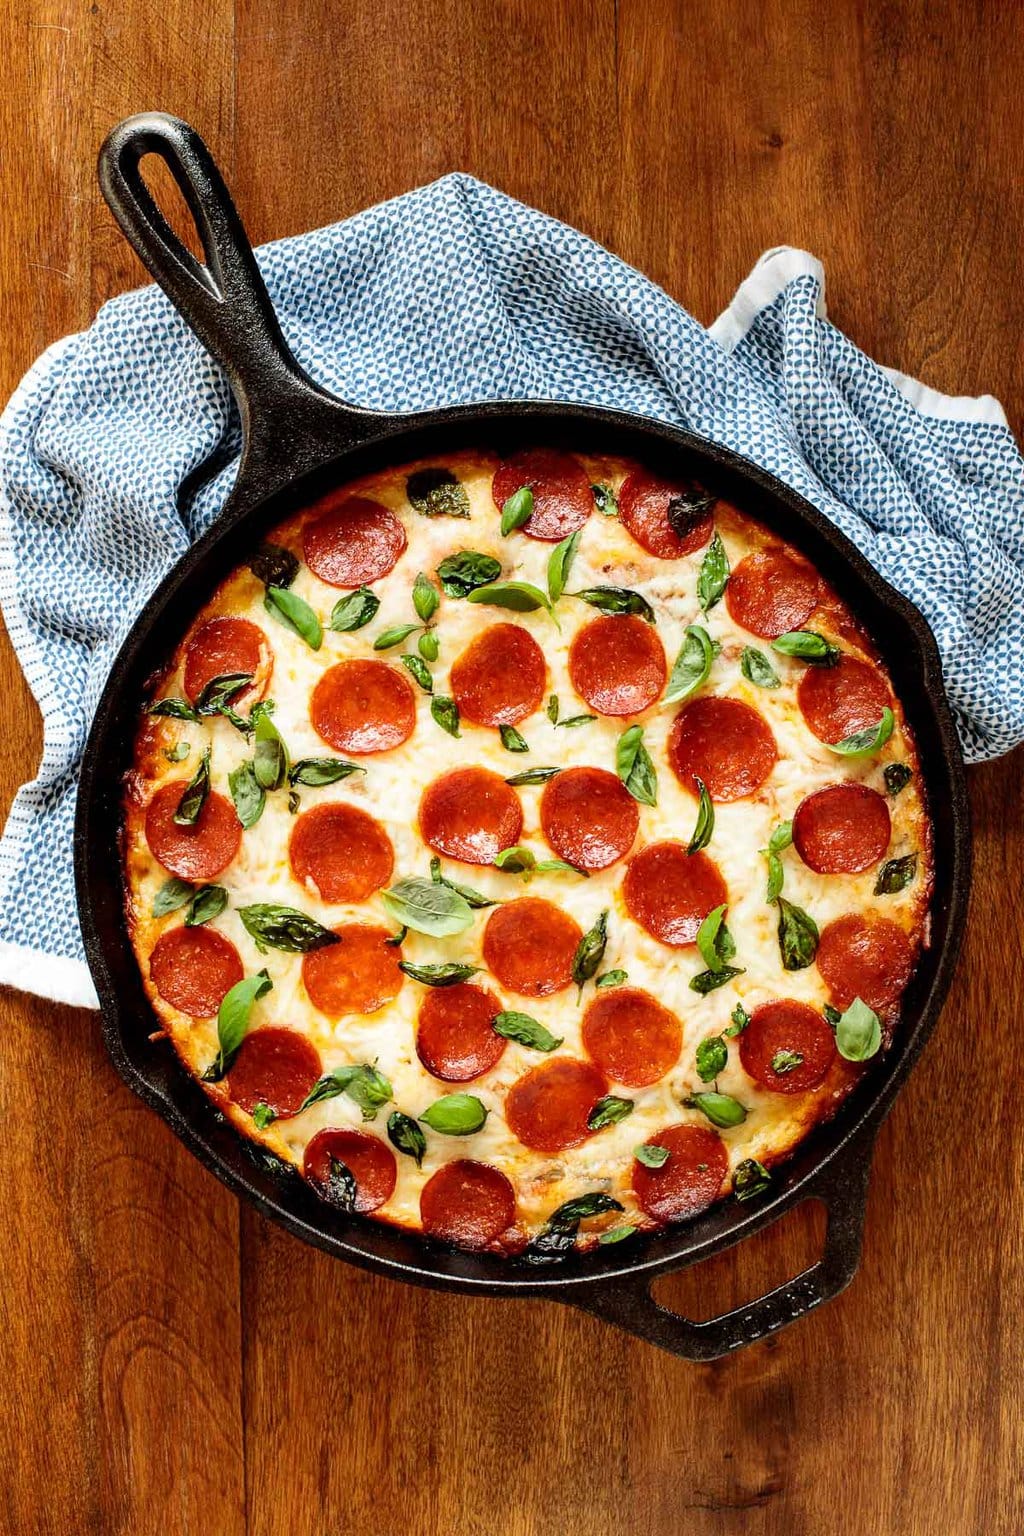
Wondering how to top this deep dish pizza dough? One suggestion is our Cast Iron Deep Dish Pepperoni Pizza. It's definitely one of our favorite dinners, ever! You can use your favorite store-bought pizza sauce but our Super Easy Pizza Sauce comes together quickly and is super economical in comparison to purchased sauces.
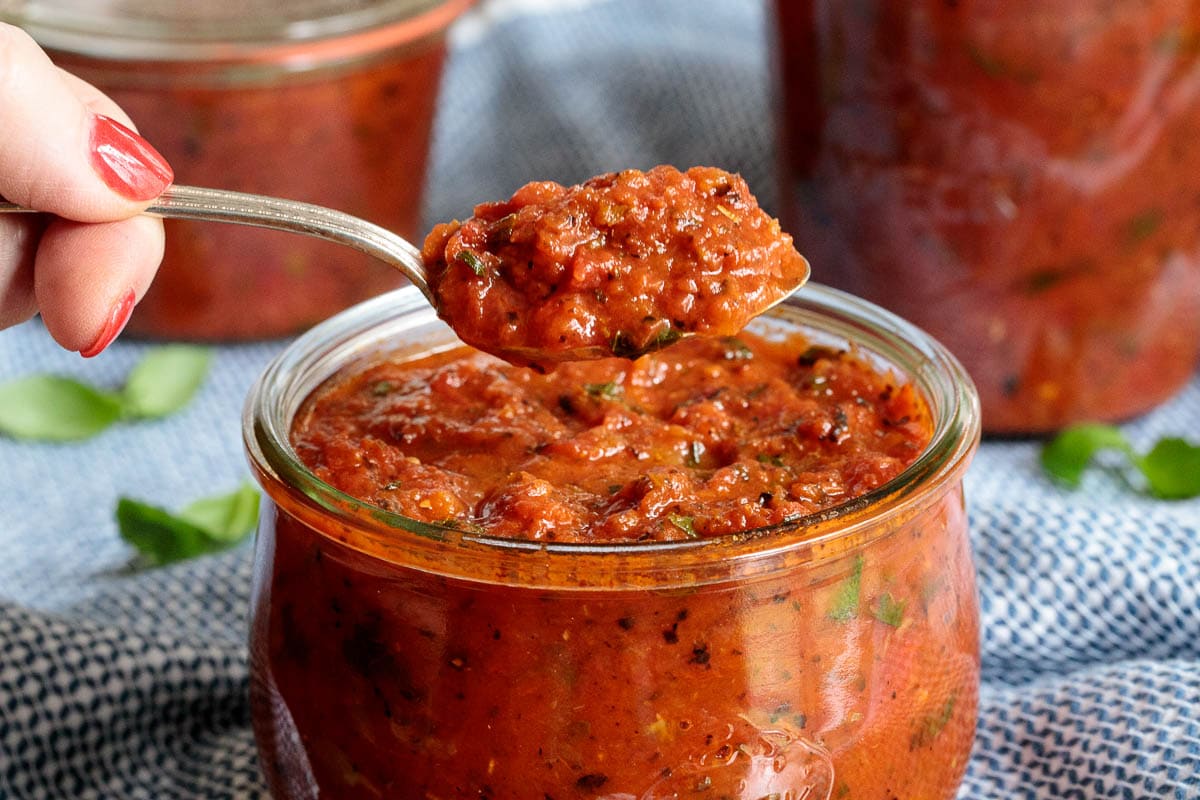
Again, we have a video to SHOW you, just how this sauce comes together super quickly:
There are lots of other ways to use this versatile sauce (suggestions in the post) but save about a generous half cup for this wonderful pizza.
Put PIZZA on your menu this coming week and give this Easy Deep Dish Pizza Dough recipe a try. I love to serve it with a big green salad for a complete meal. l promise it will be a universal hit!
Café Tips for making this Easy Deep Dish Pizza Dough
- Does anyone have "yeast phobia"? If you've got it, you're not alone. Lots of people are scared to death of working with yeast and it's usually because they've had one or more failed attempts with yeast dough(s). I think that many of these failures are due to trying to activate yeast in water that's not warm enough. Yeast loves a cozy warm atmosphere and most bread recipes' directions include activating the yeast in lukewarm water. If you look up the definition of lukewarm it's defined as "neither hot nor cold". "Tepid" and "room temperature" are also words included in the definition. I believe that's where the problem lies, the water often used to activate yeast is not warm enough. And even if it starts out warm enough, by the time it goes from a measuring cup to a cold bowl, the temperature has dropped enough for the yeast to protest activation.
- What to do for yeast phobia? I have a really simple little trick to make your little yeast granules amazingly happy and prolific. First of all, make sure the water you use is warm enough. It should be between 100 and 115˚F. That should feel fairly hot to the touch. Not so hot you have to pull your finger back but comfortably hot. The second trick is to warm your bowl before adding the water and yeast. This will only take about 2 minutes but will make all the difference in the world. Simply fill your bowl with hot tap water and let it sit for a few minutes. Then dump out the water and proceed with activation. Voila! Super happy, bubbly yeast!!!
- The above tips call for regular yeast but I've also included directions in the recipe for using instant yeast. That makes things even easier. The only trick is to use water that's hot enough to activate the yeast. You want hot tap water. If you want to measure, the temperature should be between 120˚F and 130˚F. That's fairly hot, if you stick your finger in the water it should feel nice and hot, not uncomfortably hot but definitely hot.
- I like to buy yeast in bulk. It comes in a 1-pound package and usually costs less than $5. A 3-pack of yeast in the grocery store generally costs about $1.50 (or more). That's ¾ of an ounce of yeast. Crazy expensive when you can buy a whole pound for less than $5! If you don't use yeast that frequently, no problem. It will keep in the refrigerator for months and you can also freeze it indefinitely. I keep a small jar of yeast in the refrigerator and then store the rest of the package in the freezer. In addition to being way... cheaper, it's also really good quality yeast. It makes a nice gift for a friend who loves to bake! Both regular (aka active dry yeast) and instant yeast can be bought in bulk.
- Recipes with yeast always instruct you to "let the dough rise in a warm place" (remember, yeast likes those cozy, warm places). That's not always so easy, especially in the cooler months of the year. Solution? A great place to let yeast doughs rise is in the microwave. You can either boil a cup of water to warm it up or just leave the light on. How do you leave the light on in a microwave? Just allow a small towel or several thicknesses of paper towel to hang out of the door when you close it. The light will stay on.
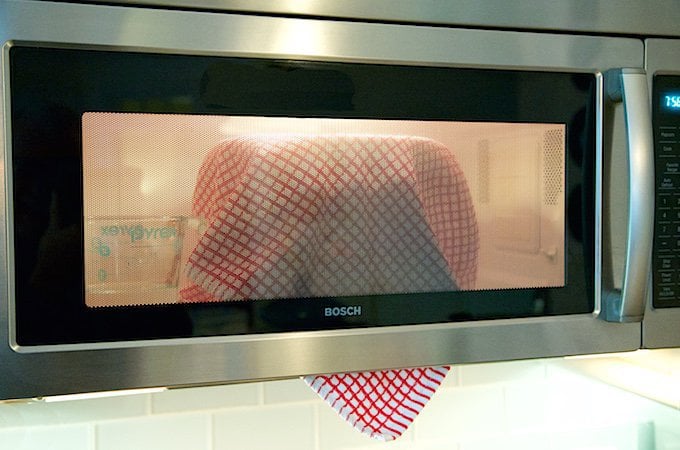
- Want to make this deep-dish pizza dough early in the day? Follow the directions in the recipe all the way through topping the pizza. Then just cover it with plastic wrap and pop the whole thing in the refrigerator. Bring it out about an hour before you want to bake, it so it can come up to room temperature. Bake as directed.
- The recipe instructions include covering the pan with foil for the first 15 minutes of baking. This ensures that the bottom gets nice and crisp and the top doesn't get too brown. I like to spray the foil with a little cooking spray before covering the pizza. That way the cheese on the top of the pizza doesn't have a chance of getting stuck to the foil.
- I mentioned above that the best way to make this deep dish pizza is in a cast iron pan. Cast iron is a wonderful, even conductor of heat and results in a beautiful, crisp crust. A cast iron pan will last a lifetime if properly cared for and they are quite inexpensive.
- That being said, you can also make this deep-dish pizza dough in a 9-inch cake pan. I love my OXO cake pans. They're super sturdy, hold up well (after lots of use!) and go through the dishwasher beautifully.
Thought for the day:
But if Christ is in you, then even though your body is subject to death because of sin,
the Spirit gives life because of righteousness.
And if the Spirit of him who raised Jesus from the dead is living in you,
He who raised Christ from the dead
will also give life to your mortal bodies because of[ his Spirit who lives in you.
Romans 8:10-11
What we're listening to for inspiration:
If you enjoy this recipe, please come back and leave a star rating and review! It’s so helpful to other readers to hear your results, adaptations and ideas for variations.

- 3 tablespoons olive oil divided
- 2¼ teaspoons (1 packet) dry active yeast
- ¾ cup hot tap water 105-115˚F
- 1-2 tablespoons granulated sugar this pizza has a slightly sweet crust -go with one tablespoon if you prefer
- 2 cups all-purpose flour
- 1½ teaspoons kosher salt
- 3 tablespoons extra virgin olive oil
- 2 cups flour
- 1-2 tablespoons granulated sugar this pizza has a slightly sweet crust -go with one tablespoon if you prefer
- 2¼ teaspoons (1 packet) instant yeast
- 1½ teaspoons kosher salt
- ¾ cup very hot tap water 120˚F and 130˚F - if you stick your finger in the water it should feel nice and hot, not uncomfortably hot but definitely hot.
-
Add 2 tablespoons of the olive oil to a 10-inch cast iron pan (or a heavy-duty 9-inch cake pan). Set aside.
-
Fill a medium-size bowl with hot tap water. Let sit for 2 minutes to warm up the bowl, then discard water. Add ¾ cup hot tap water), sugar and yeast to the bowl. Stir until the yeast is mostly dissolved (it’s okay if the mixture is a little lumpy). Allow to sit for 4-5 minutes, until mixture starts to bubble and foam (the bubbling and foaming means the yeast has been activated).
-
Once the yeast is activated add the remaining 1 tablespoon olive oil and stir to combine. Add flour and salt. Using a wooden spoon or sturdy spatula, stir until all flour is incorporated. At first, it might seem like too much flour. Just keep stirring and it turns into a shaggy dough.
-
Sprinkle a work surface lightly with flour. Transfer the dough to the floured surface and knead for about 1 minute, until a nice smooth ball forms.
-
Place the dough ball into the prepared cast iron pan and rub it around the pan to coat the bottom and sides with oil. Then turn the dough over so the oiled side is up. Cover tightly with plastic wrap and a kitchen towel. Allow to rest in a warm place for 15 minutes. (You can go longer at this point if you have more time. I've let it go for more than an hour.)
-
Remove the plastic wrap (don’t discard) and flatten the dough with your hand. Working with your fingers, dimple and push the dough to cover the bottom of the pan. Don’t push it up the sides.
-
Top with sauce, cheese and desired toppings to within a half inch of the edges. Cover again with the plastic wrap and a kitchen towel. Allow to sit in a warm spot for 20 minutes while the oven is preheating. (At this point you could refrigerate the pizza for several hours. Allow it to come to room temperature again before baking.)
-
If using a cast iron pan, preheat the oven to 450˚F with a rack on the lowest level. If using a cake pan preheat to 425˚F with a rack in the center of the oven.
-
When ready to bake, remove the plastic wrap, cover with foil (see Café Tips above) and bake for 15 minutes on the lowest rack of the oven (the middle rack if using the cake pan). Remove foil and bake another 7-10 minutes or until cheese is melty and edges are light golden brown. Run a knife around the edge of the crust and transfer the pizza to a cutting board with a metal spatula. Slice and enjoy! You can also serve it right from the pan if you prefer.
-
Add 2 tablespoons of the olive oil to a 10-inch cast iron pan (or a heavy-duty 9-inch cake pan). Set aside.
-
Combine flour, sugar, yeast and salt in a medium-large bowl. Stir well to combine.
-
Make a well in the center of the flour mixture. Add the hot water and the remaining 1 tablespoon of olive oil.
-
Using a wooden spoon or sturdy spatula, stir until all flour is incorporated. At first, it might seem like too much flour. Just keep stirring and it turns into a shaggy dough.
-
Sprinkle a work surface lightly with flour. Transfer the dough to the floured surface and knead for about 1 minute, until a nice smooth ball forms.
-
Place the dough ball into the prepared cast iron pan and rub it around the pan to coat the bottom and sides with oil. Then turn the dough over so the oiled side is up. Cover tightly with plastic wrap and a kitchen towel. Allow the dough to rest in a warm place for 15 minutes. (You can go longer at this point if you have more time. I've let it go for more than an hour.)
-
Remove the plastic wrap (don’t discard) and flatten the dough with your hand. Working with your fingers, dimple and push the dough to cover the bottom of the pan. Don’t push it up the sides.
-
Top with sauce, cheese and desired toppings to within a half inch of the edges. Cover again with the plastic wrap and a kitchen towel. Allow to sit in a warm spot for 20 minutes while the oven is preheating. (At this point you could refrigerate the pizza for several hours. Allow it to come to room temperature again before baking.)
-
If using a cast iron pan, preheat the oven to 450˚F with a rack on the lowest level. If using a cake pan preheat to 425˚F with a rack in the center of the oven.
-
When ready to bake, remove the plastic wrap, cover with foil (see Café Tips above) and bake for 15 minutes on the lowest rack of the oven. Remove foil and bake another 5-8 minutes or until cheese is melty and edges are golden brown. Run a knife around the edge of the crust and transfer the pizza to a cutting board with a metal spatula. Slice and enjoy! You can also serve it right from the pan, if you prefer.
See Café Tips above in the post for more detailed instructions and tips to ensure success.
If you prefer to use Metric measurements there is a button in each of our recipes, right above the word “Instructions”. Just click that button to toggle to grams, milliliters, etc. If you ever come across one of our recipes that doesn’t have the Metric conversion (some of the older recipes may not), feel free to leave a comment and I will add it.
NOTE: There are separate instructions depending on whether you're using dry active yeast or instant yeast. You'll notice the order of ingredients is different as well as the instructions.
The Café Sucre Farine is a participant in the Amazon Affiliate Program. The Amazon Affiliate Program is designed to provide a means for sites to earn advertising fees by advertising and linking to products on Amazon. The price you pay as a consumer does not change, but if you make a purchase through one of our links, we receive a small commission – and we continue delivering delicious recipes to you!


Rhonalynn says
I made 2 pizzas with 1 cup all purpose flour and 1 cup whole wheat flour and I baked them in 9 in glass pie pans because I only have 1 cast iron pan and didn't want to wait for one at a time. I baked at the 425 for 15 min covered with foil then 10 min uncovered. This pizza crust was amazing. I probably could have made the 2 pie pans with just 1 batch because one batch in a 9 in pie pan was pretty thick. I loved the crunch it had it wasn't the hard crust like most thanks to the olive oil it was a flakes crunch. Thank you for this recipe and for the recipe and bless you and your family.
Lindsay @ The Café Sucre Farine says
Thanks for your review, Rhonalynn! So glad you enjoyed this!
John says
I make a lot of Neapolitan style pizza in our wood fired oven. But, it is not always fun going outside to cook in the Midwest in January. So, I made deep dish one cold Sunday evening The first time I used the King Arthur Flour deep dish recipe. It was good. The next time I made deep dish I used this recipe. It was light, tasty and easy to make. I've made this several more times and have not tried anything else. Thank you for posting it.
Lindsay @ The Café Sucre Farine says
Thanks for your review, John! So glad to hear you enjoyed this!
Ryan Johnson says
This recipe is not worth making. Clearly, they do not allow any 4-star or less ratings with the control of their website. I took a screenshot to prove it. This was a waste of ingredients and 5-star ratings mixed with the bible verses should have been a sign. I am very disappointed in the lack of integrity.
Chris Scheuer says
Thanks for your thoughtful comment., Ryan. Kindness does make the world a better place.
I'm really sorry you're having a bad day.
El Blanco says
This is my go-to recipe for thick crust pan pizza. I prefer Neapolitan but sometimes don't want to spend the time making the dough. This one is perfect and pretty easy to make.
Dame Friandise says
Hi Chris,
As my go-to recipe website for all things delicious, I currently have a batch of your best ever chocolate chip cookie dough in the refrigerator waiting to get baked and transformed into sweet utopia!
In the meantime, I'm trying your deep dish pepperoni pizza, but I'm somewhat confused with the measurements for the yeast. I will be using instant yeast. Your directions for using active dry yeast calls for: 2¼ teaspoons (1 packet) dry active yeast or 2 teaspoons instant yeast; however, your directions for using instant yeast calls for: 2¼ teaspoons (1 packet) instant yeast.
Hoping you will clarify this for me. I'm assuming it's 2 tsp of instant yeast, but want to be sure.
Have a wonderful day!
Chris Scheuer says
Hi Dame, so happy you have enjoyed our recipes!
Regarding your question, I have clarified that in the recipe. I originally wrote this recipe for regular yeast but then added the instant version later.
The recipe now reads 2¼ teaspoons (which is 1 packet) but if you make it with 2 teaspoons, it will turn out fine. A quarter teaspoon of yeast one way or the other won't make a difference.
Cat says
Hi Chris... you might want to clarify the water temperatures as well in the directions. I'm assuming when you use the instant yeast, it's the temperature in the ingredients list, not the lower temperature in the directions that we are to use? Thanks!
Cat
Chris Scheuer says
Hi Cat, I'm sorry if that was confusing. I have listed the water temperatures in the ingredient lists, for both types of yeast. It depends if you're using regular dry active or instant yeast as that does make a difference.
Jenn says
Hi! I've made this recipe a lot and it's always great! But, we now have to be gluten free- and I was wondering if anyone has made this with gluten free flour and if so, what kind and how did it turn out? Thanks for the help!
Chris Scheuer says
Hi Jenn, I haven't tried this recipe with GF flour but maybe one of our readers will chime in.
Also, my nephew has a website that specializes in GF recipes: https://cakesandcoriander.com
Lynn says
Yes I have tried this using gluten free flour. I needed to add more water . Just added a little at a time until the dough came together nicely . We all thought of turned out great .
Chris Scheuer says
Thanks so much, Lynn! This will be very helpful to other readers!
Melody says
This is the best deep dish I have ever come across! Behaved exactly as you said it would. I did it in a 10” cast iron pan and it was deliciously crispy on the crust but soft n the inside. Definitely a keeper.
Lindsay @ The Café Sucre Farine says
Wonderful! Thanks for letting us know, Melody!
Karen says
This recipe is fantastic!!! It was the by far the best at home pizza I have ever made. I gently pulled the dough back a bit from the side after it had risen and added some grated parmesan all the way around the pan before stuffing to insure a crusty cheesy exterior. I love the cast iron method. I used a large 12" skillet and it worked perfectly. The dough is very forgiving and easy to work into most skillets so don't worry if you don't the have an exact size skillet. This pizza was so easy and so delicious. This recipe will be a regular at my house. Your instructions are very clear and easy to follow. Thank you for sharing.
Lindsay @ The Café Sucre Farine says
Thanks so much, Karen! So glad you enjoyed this!
Tami says
OH MY YUMMMMMMM!!! This was so easy, a little more time consuming than my regular pizza crust, BUT OH SO WORTH IT!!! Trust her process, it turned out so well. Thank you!!!
Lindsay @ The Café Sucre Farine says
Awesome! Thanks for letting us know, Tami!
Angie says
Hi I only have self rising flour- can I use that instead of all purpose ? If so any tricks or changes I need to incorporate? Thanks!
Chris Scheuer says
Hi Angie, I'm sorry to say, I would not use self-rising flour for this recipe. To ensure success, it's best to use all-purpose or plain flour.
Deana says
Just to let you know, your ingredients state that there is 4 total cups of flour for the Instant yeast and 2 cups for dry active.
Chris Scheuer says
Thanks, Deana! I hadn't noticed that!
Ann says
I'm not a f of yeast but this recipe may just convert me. I think what did it was the temp for the instant yeast being around 124F. I also placed the bowl in the microwave using the towel to keep the light on. Overall, this was the quickest, easiest and best recipe I've ever
made. Can I double it and bake in a 9 x 13 dish? Thank you for a great recipe.
Chris Scheuer says
That's great, Ann! Thanks for letting us know. You could double it and cook it in a pan. We also have a sheet pan pizza recipe here- https://thecafesucrefarine.com/ridiculously-easy-roasted-veggie-pizza/
Briana says
My family loves this recipe!
Chris Scheuer says
Thanks, Briana!
Heather says
I loved this recipe but we definitely need more in my house! Has anyone doubled this recipe?
Chris Scheuer says
That should be fine, Heather. Enjoy!
Jennifer says
This is my new go-to pizza dough! I make it exactly as directed & divide it in half. Then I preheat a 10 inch cast iron skillet at 500 for 30 min, oil it, put the shaped pizza dough in, add my toppings of choice, & bake for approximately 13-15 minutes until the cheese is slightly golden brown. I refrigerate the leftover half for up to 3 days & that one is even better! So flavorful & crispy. Thank you!!
Chris Scheuer says
Awesome! Thanks for letting us know, Jennifer!
Amy says
fab-o recipebhands down! works like a charm every time. Never fails. I’ve used this recipe for making grilled pizza. I’ve substituted AP flour for 00 flour and goodness, pure heaven! That being said, have you tried baking this in an air fryer? If so, what have your results been?
Chris Scheuer says
That's awesome, Amy! Thanks for letting us know :). I have not tried this in an air fryer.
Jo Murphy says
I'm a yeast phobic.!! I've never been successful in making pizza dough. I actually feel confident now and will be making this dough in my cast iron. Thanks for your great tips.
Also I just love that you honor Christ on your blog here, it really warmed my heart when I saw your thought for the day! To him be all the glory and many blessings to you!
Chris Scheuer says
Thank you for the kind comment, Jo! I'm so glad you're enjoying the site 🙂
William Fay Niver says
Hello from Southern California, and thanks for giving out this recipe. Unlike Jo Murphy, I am not a Christian - in fact, I have recently come to identify quite comfortably as an atheist - so the quotation from Romans is unimportant to me. I wonder nonetheless if you accept followers here who share your taste in food, but not your religious beliefs. Can a secular humanist like me continue to access your site and enjoy your thoughts and recipes, or should I find a more secular food site? With only the greatest respect and civility, I am Bill Niver.
Chris Scheuer says
Hi Bill - from one coast to another! Thanks so much for taking the time to write. I'm so happy you have enjoyed this recipe and I appreciate your sincerity and thoughtfulness.
Regarding your question, this site is open to everyone and we understand that there are others do not share our faith and that okay. However, when something (for us, Jesus Christ) profoundly changes your life, you want to share it with others. Please continue to enjoy our recipes as, honestly, that is the main purpose of our website. Good food is a wonderful way to unite families, friends, co-workers, neighbors, etc. and a perfect way to celebrate life.
Kathy says
How will this work wirh freshly ground whole wheat flour? My husband doesnt eat white flour.
Chris Scheuer says
Hi Kathy,
You could certainly try it. I haven't tested this recipe with WW flour but my fear would be that it would be heavy.
Angie G. says
Kathy, I think using freshly ground whole wheat flour will work fine, except you might need to add a tad more water, like a teaspoon at a time. Ww flour gets thirstier.
Chris Scheuer says
Thanks, Angie!
Dayna Hemmelgarn says
Could you tell me what brand, kind of yeast you buy?
Chris Scheuer says
Hi Dayna,
I buy usually purchase Red Star Active Yeast in bulk on Amazon - https://amzn.to/3zXpVRb
For instant yeast, I like SAF Instant Yeast - https://amzn.to/3JuuzsS
I find that the yeast sold in bulk really works well. It comes in a large package but it freezes well. I keep a small jar in the refrigerator (which is good for months) and the rest in the freezer where it will keep well for over a year.
Terry says
Need your help, please. How do you measure your cast iron pan? The one I use is almost 70 years old. I tried researching online, but got conflicting answers. Some say measure the base diameter, others say across the top, so I'm never sure whether my pan is the correct size for the recipe. Thanks in advance!
Chris Scheuer says
Hi Terry, a cast iron or any other skillet should be measured across the top. Sometimes there might be a half inch difference, larger or smaller but a 10-inch cast iron pan should measure close to 10 inches in diameter.
Terry says
Thanks so much. Now it's time to get the ruler out! 🙏
Kahwana says
I have to say cast iron pan measurements are not consistent. One would think logically that the size would be determined by measuring in bottom where the pizza lays. I'm not refeferring to how you measure, but in general the bottom of a cast iron pan is smaller in diameter than the top edges. So confusing to people, as cast iron pans are not all the same. Please help. 🙏
Chris Scheuer says
Hi Kahwana, I measure across the top, which is the industry standard. Hope that helps!
Jacqui says
Can’t wait to try this recipe! I have one question though, when I see recipes/pictures of food that has fresh basil on top like your pizza, when do you put it on? Before, during or after it’s baked? It looks beautiful and delicious!
I too have made your focaccia bread and it’s amazing! Everyone always loves it!
Thank you so much for all your recipes!
Jacqui
Chris Scheuer says
Hi Jacqui, hope you enjoy the pizza as much as we have!
Regarding your question, you can actually do both. Add some basil before baking and then add a few fresh leaves right before serving for a pretty presentation.
Diane DiPrete says
what size cast iron pan are you using?
Chris Scheuer says
Hi Diane, I use a 10-inch cast iron pan
Phyllis D says
I love your focaccia bread recipe. It is really awesome and a big hit at my Italian dinners.
Only problem with website is when watching a video an ad comes on and the video changes recipes.
Chris Scheuer says
Thank you, Phylis!
Regarding your video frustration, I'm sorry for that. But if you watch on the right hand side of the screen, there will be two little buttons that come up. One will say "STAY" and the other will say "NEXT". If you click on "STAY", you'll be able to watch the entire video. That's there so people who don't want to watch the whole thing can move on.
Hope that helps!
Jannetta says
Thanks so much for this dough recipe. I tried another recipe that was a big fail.
Chris Scheuer says
Glad this one worked for you, Jannetta!
Patti Webb says
This is my husband's favorite deep dish pizza dough. It's my favorite, too, and not just because it's the EASIEST one yet! I tried recipes that must be made days ahead, 24 hours ahead, 6 hours ahead, but this one just takes an hour. It has wonderful taste and texture and takes ONE HOUR. How great is that?? And it's great every time, made in a a cast-iron skillet.
We used this for a basil pesto and 4-cheese white pizza, and it is fabulous. THANK you, author Chris Scheuer, wherever you are!
Chris Scheuer says
Thanks so much for letting us know, Patti! I'm so happy you are enjoying this recipe!