This post may contain affiliate links. For more information, see our privacy policy.

If you've been around The Café for a while, you probably know that we have "a thing" about focaccia. We have more than 10 unique focaccia recipes on the website, and they remain some of our most-loved bread recipes year after year.
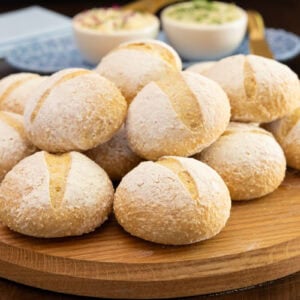
But recently I thought it would be fun to have another homemade bread option to serve alongside Italian-inspired meals. Something that would work well for mopping up a delicious pasta sauce, dunking into olive oil, or splitting and filling with layers of meats, cheeses, and fresh vegetables for fabulous sandwiches. These No-Knead Italian-Style Dinner Rolls are exactly that bread!
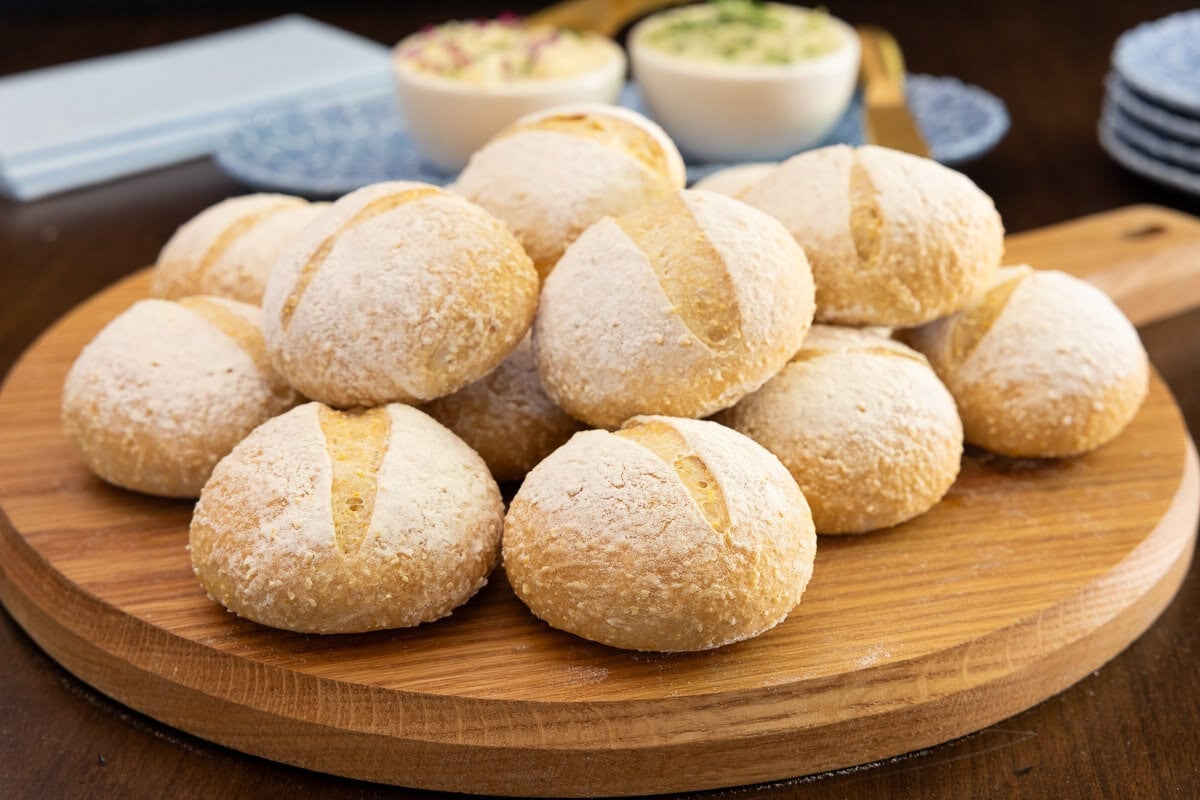
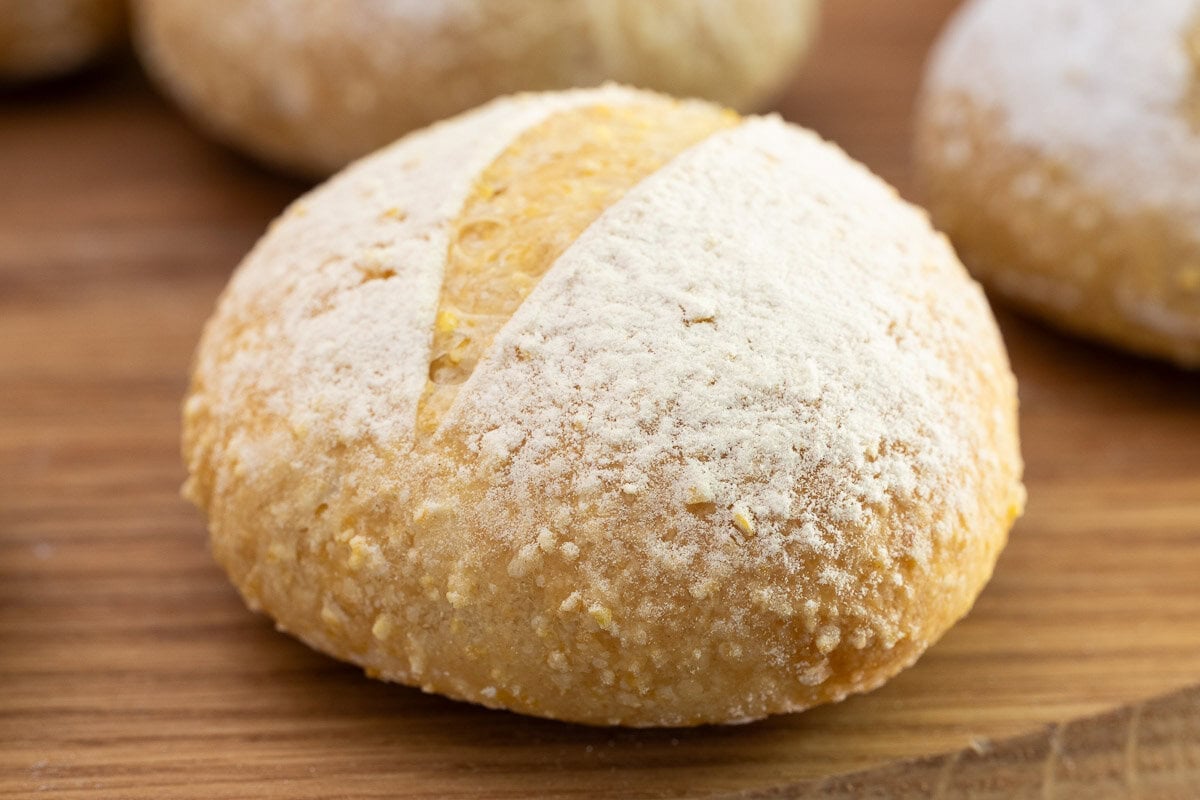
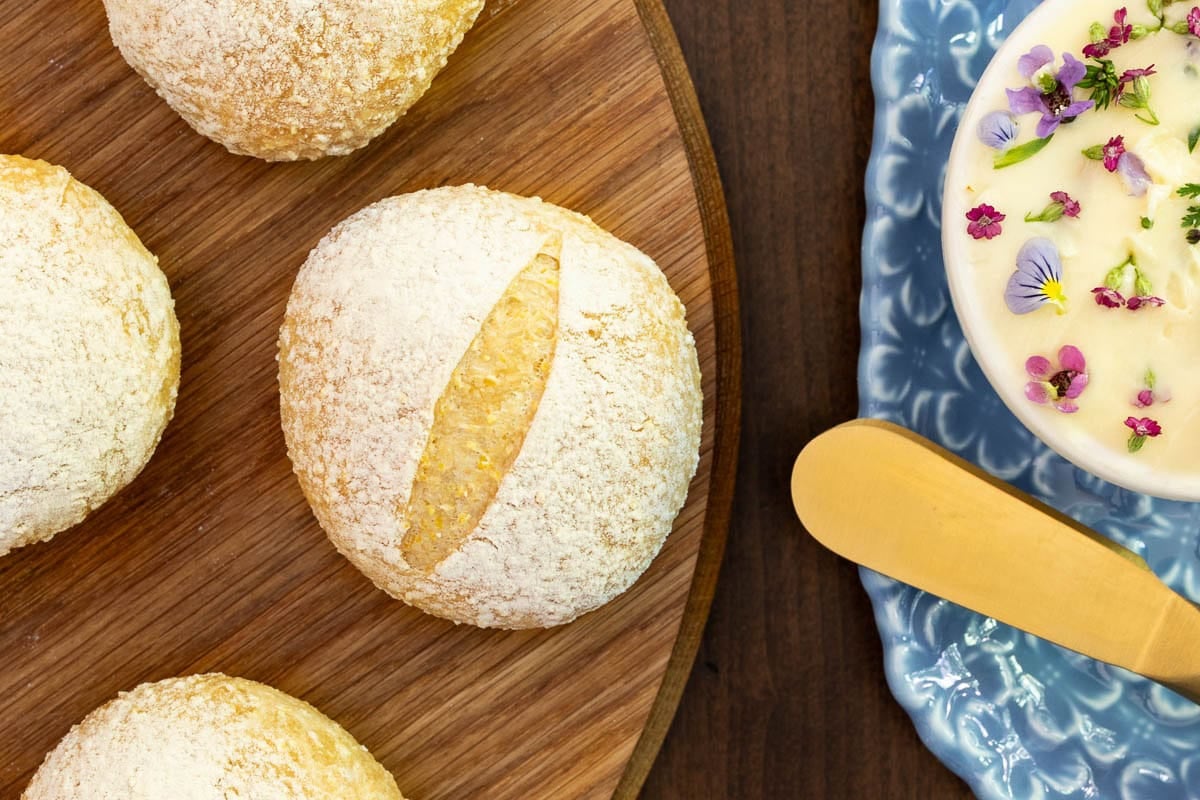
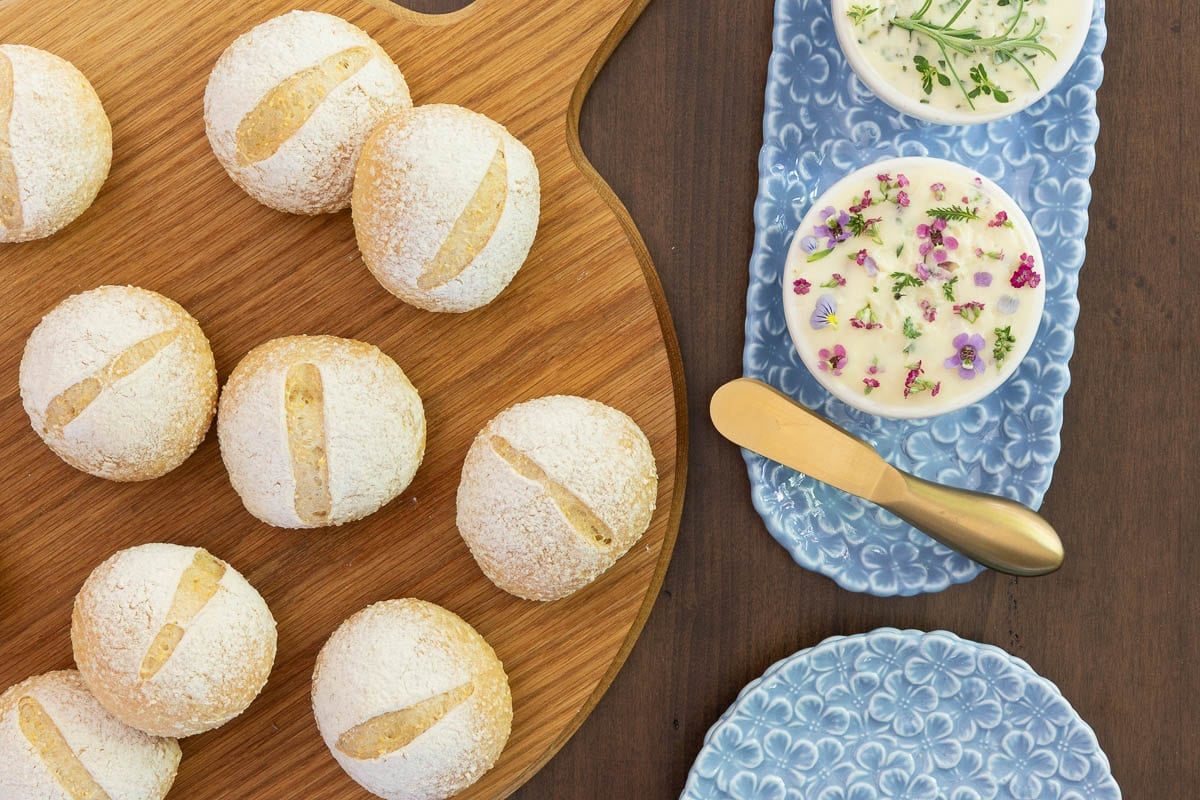
These rolls are reminiscent of a great rustic Italian loaf with a crisp, golden crust and a tender, chewy interior. The dough comes together with minimal effort, requires no kneading, and bakes up into beautiful artisan-style rolls that look like they came from your little local Italian bakery.
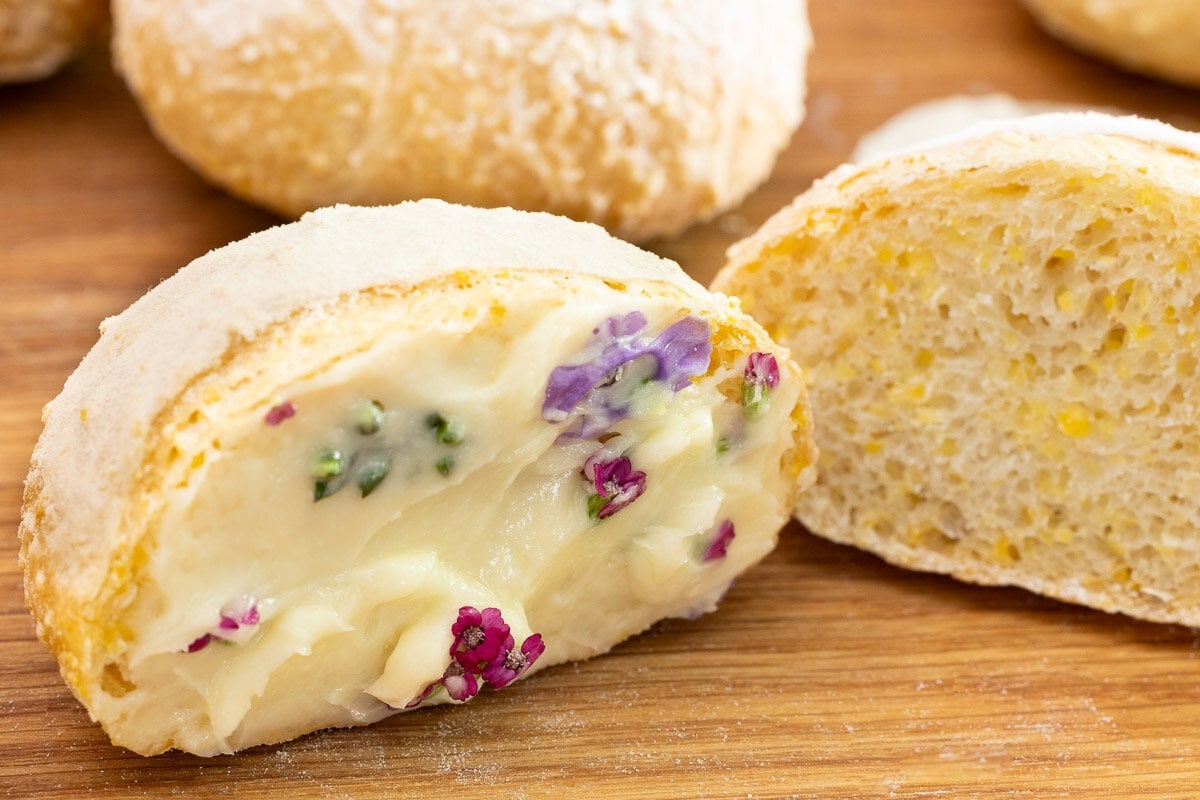
A small portion of polenta (or cornmeal) adds subtle flavor and a rustic, Northern Italian texture. Whether you're serving them alongside lasagna, soup, salad, or your favorite Italian-inspired dinner, they're guaranteed to disappear quickly!
Why we love these rolls
- No kneading required. Simple stretch-and-folds do the work of developing structure and creating that wonderful chewy texture.
- Panetteria-style (Italian bread shop) results. These rolls bake up with a crisp golden crust and a tender, chewy interior that rivals artisan bakery breads.
- Simple pantry ingredients. No specialty ingredients required, just a handful of everyday staples.
- Perfect for Italian-inspired meals. Serve them alongside pasta, soup, salad, or your favorite Italian dishes.
- Great for sandwiches. Slice them in half and fill them with your favorite Italian meats, cheeses, and veggies for fabulous sandwiches. We love them with a smear of pesto and thinly-sliced turkey breast, salami, prosciutto, red onion, and provolone cheese, but you do you!
- Freezer-friendly. Make a batch now and enjoy homemade rolls whenever the craving strikes.
Gather These Ingredients...
One of my favorite things about these no-knead Italian-style dinner rolls is how short and simple the ingredient list is. You'll need just a handful of pantry staples!
Flour
Regular all-purpose flour works beautifully in this recipe. I use King Arthur unbleached all-purpose flour, which gives the rolls wonderful structure while still keeping the interior tender and chewy. Bread flour will also work!
Polenta or Medium-Coarse Cornmeal
This ingredient is what gives the rolls a more rustic character. The polenta adds subtle flavor and a bit of texture that reminds me of some of the wonderful breads we've enjoyed throughout Europe. If you don't have polenta, medium-coarse cornmeal will also work.
Instant Yeast
I love using instant yeast because there's no need to proof it before mixing the dough. Just add it right in with the dry ingredients, and you're ready to go!
One little tip: You can always substitute instant yeast for active dry yeast, but not the other way around. If active dry yeast is all you have on hand, you'll need to dissolve it in warm water and let it sit for a few minutes until foamy before adding it to the recipe.
Kosher Salt
Salt not only adds flavor, but it also helps strengthen the dough structure. I use Morton Kosher Salt, as that's what's available at my local grocery stores. If you're using Diamond Crystal Kosher Salt (the other popular brand), you'll want to use a bit more since its flakes are lighter and less dense than Morton's. For this recipe, use 2½ teaspoons Diamond Crystal Kosher Salt in place of the 2 teaspoons Morton Kosher Salt.
Sugar
These rolls aren't sweet, but a pinch of sugar helps feed the yeast and encourages beautiful browning during baking.
Warm water
Warm water activates the yeast and hydrates the flour. I think this is where a lot of people develop what I call "yeast phobia." Many recipes call for "lukewarm water," which can be confusing. Instant yeast actually likes fairly warm water, about 105-115˚F which is actually pretty hot. If you're not using a thermometer, here's an easy way to think about it: the water should feel comfortably hot, not lukewarm. It should feel warmer than bath water but not so hot that you want to pull your finger out right away. If the water feels pleasantly hot, you're probably right in the sweet spot.
Olive Oil
A splash of olive oil adds flavor and helps create the tender, chewy texture that makes these rolls so irresistible!
How to Make These Italian-Style Dinner Rolls
Don't let the beautiful appearance of these dinner rolls fool you; they're surprisingly easy to make!
Start by stirring together the dry ingredients, then add the warm water to create a thick, shaggy dough. Drizzle with olive oil, then stir again to coat.
Let the dough rise for 30 minutes, and then comes the magic: a technique called stretch and fold. Instead of kneading the dough, you'll simply grab a section of dough, gently stretch it upward, then fold it over the dough in the bowl. Rotate the bowl and repeat until you've completed 8 stretch and folds. This easy process takes minimal time but it strengthens the gluten structure, traps air and helps create that wonderful chewy texture we love in artisan breads.
After another 30-minute rise, you'll repeat the stretch-and-fold process one more time. It's easy, takes just a minute or two and transforms the dough from rough and shaggy to smooth, silky and full of structure.
If you've never done stretch and folds before, don't worry! Lindsay put together a short video below that walks you through the entire process, including exactly how to perform the stretch and folds.
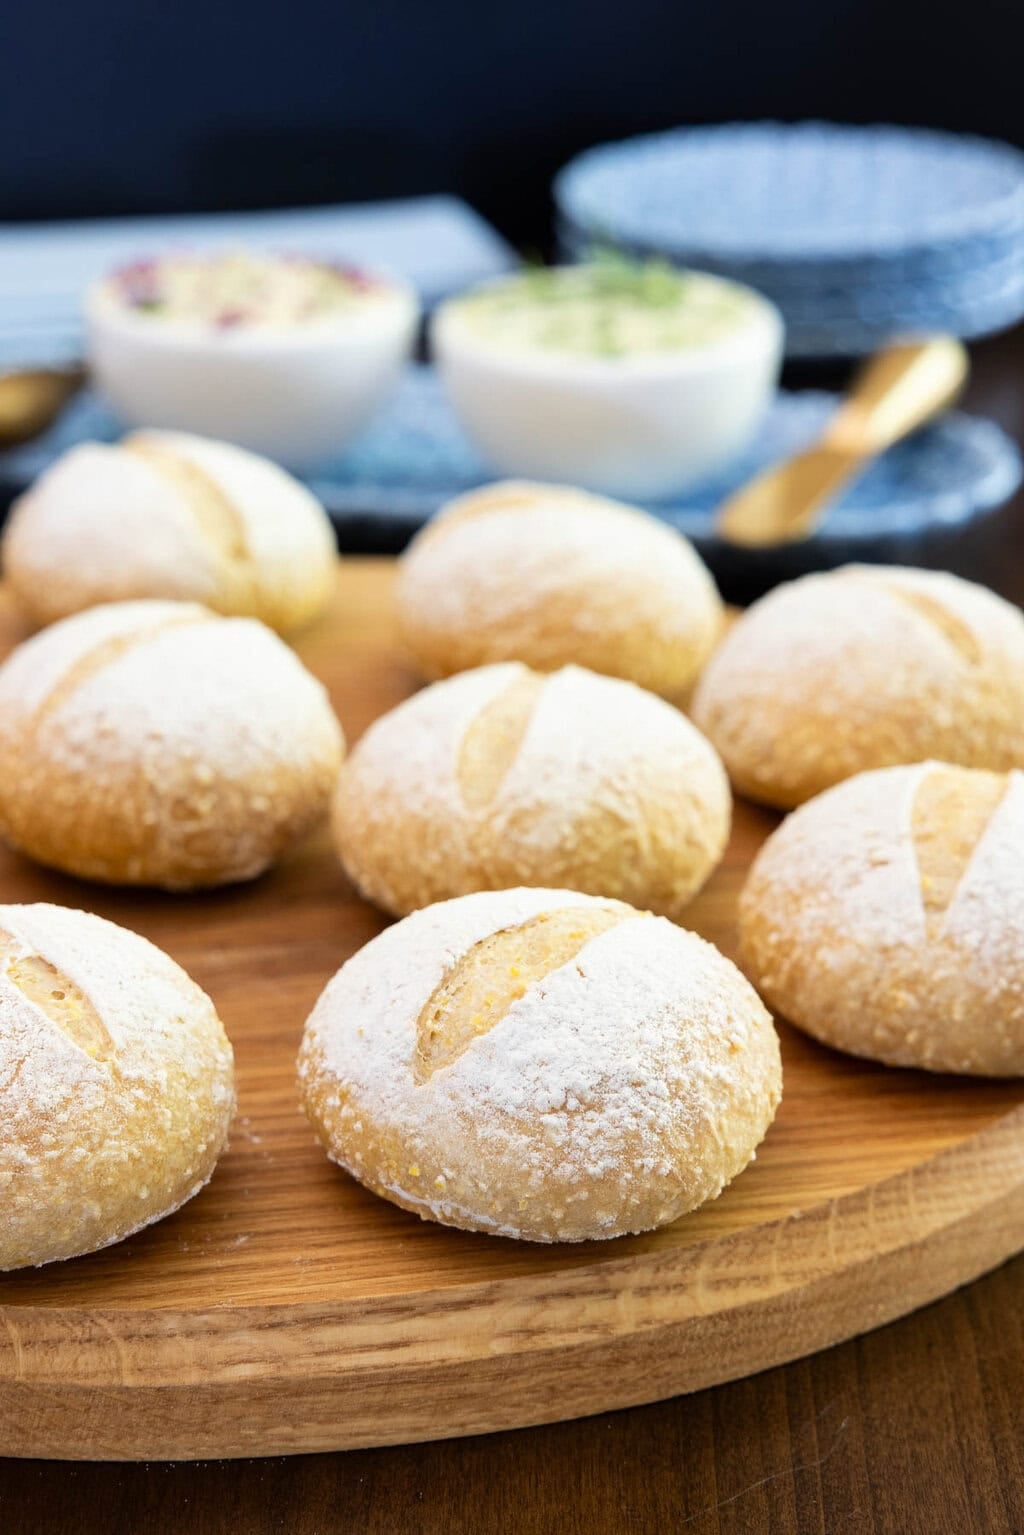
Next, divide the dough into portions and shape each one into a round roll. After a final rise, dust the tops with flour and score each roll with a sharp blade or knife.
The rolls bake in a steamy oven until beautifully golden brown with a crisp crust and a tender, chewy interior. They're delicious served warm with butter, alongside pasta dishes, soups and salads, or split and filled for fabulous sandwiches.
Oh, and if you suffer from what I call "yeast phobia," don't worry! We'll walk you through every step and share lots of tips along the way. Yeast is actually much more forgiving than many people think, and before long, you'll be baking beautiful homemade rolls with confidence!
Here's Lindsay's video that demonstrates the process from start to finish:
Easy enough for everyday, special enough for company!
There's something especially satisfying about pulling a pan of homemade bread from the oven, and these No-Knead Italian-Style Dinner Rolls make that experience wonderfully easy. With their crisp golden crust, tender chewy interior, and rustic bakery-style appearance, they're equally perfect for a casual family dinner or a special gathering with friends.
Serve these rolls warm with butter, alongside your favorite Italian-inspired meals, or filled with sandwich fixings for a delicious lunch.
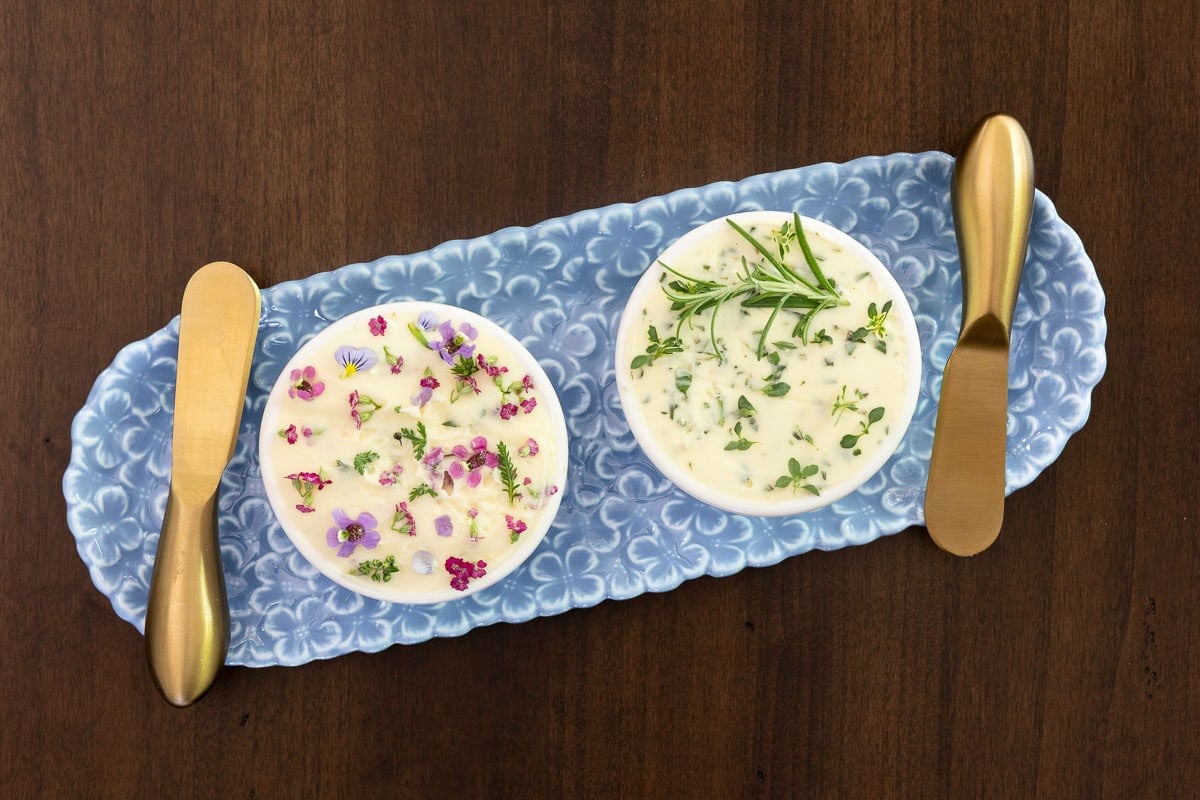
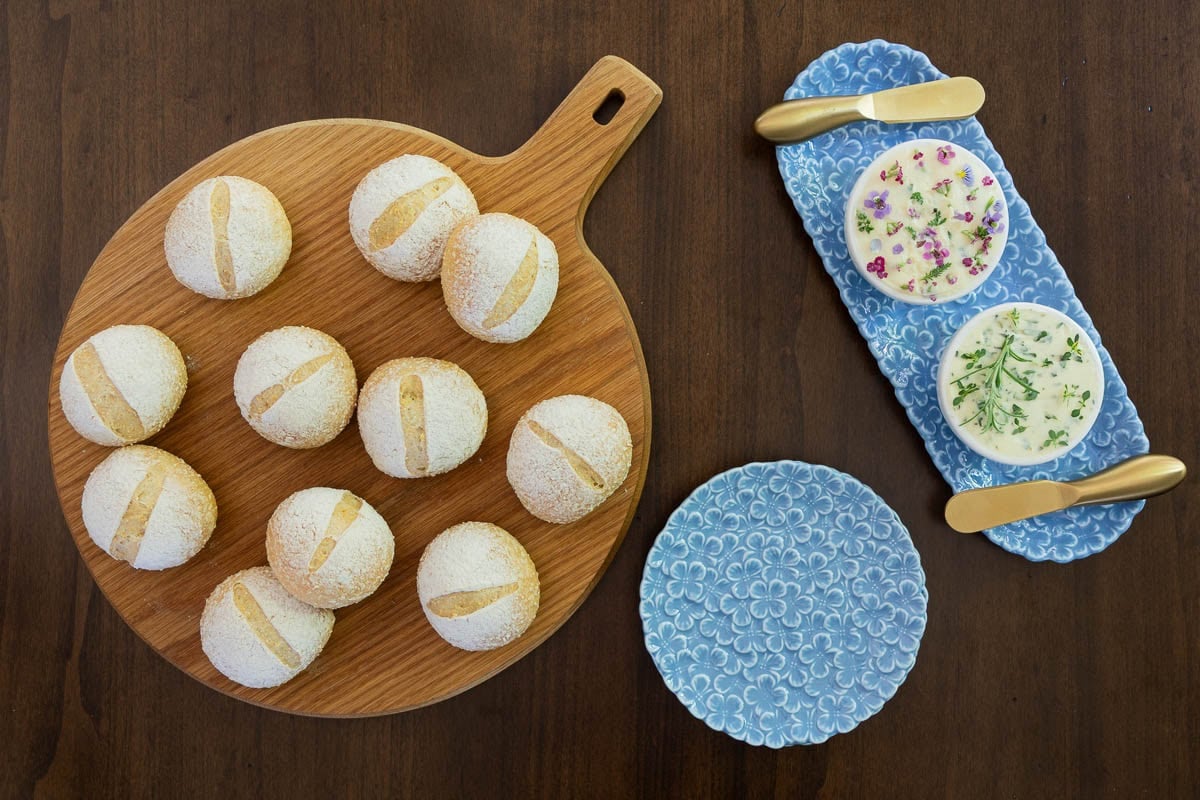
If we're entertaining, I love taking a few extra minutes to make a special butter for serving. This time, I whipped up a simple herb butter and another with a squeeze of honey and a scattering of edible flower petals. I call the second one Beautiful Butter because, well... just look at it! I've included the easy directions for both below in the recipe card.
However you decide to enjoy them, I have a feeling these rolls will earn a regular spot in your baking rotation!
- Why is my dough sticky? It's supposed to be sticky, at least at first! This is a fairly high-hydration dough, which is what helps create the rolls' tender, chewy interior. Be generous with the flour when dividing and shaping the dough. The extra flour makes the dough much easier to handle and contributes to the rustic artisan-style appearance.
- Can I use active dry yeast instead of instant yeast? Yes! However, if active dry yeast is all you have on hand, dissolve it in the warm water and let it sit for 5-10 minutes, or until foamy, before adding it to the dry ingredients. Once it's activated, proceed with the recipe as directed.
- Can I use bread flour? Absolutely. Bread flour will yield slightly chewier rolls with a bit more structure. Either all-purpose flour or bread flour works well in this recipe.
- Why do you put a pan of water in the oven? The water creates steam as the rolls bake. Steam helps keep the surface of the dough flexible during the first part of baking, allowing the rolls to expand fully while developing a beautifully crisp, golden crust.
- Will these work as sandwich rolls? Yes! These rolls make wonderful sandwich buns. Slice them in half and fill them with your favorite meats, cheeses, and vegetables. They're especially delicious for Italian-inspired sandwiches.
- Can I freeze these rolls? These rolls freeze beautifully. Allow them to cool completely, then place them in a freezer-safe bag or container for up to 3 months. Thaw at room temperature and warm in a 300˚F oven for 5-8 minutes before serving.
- How do I know when the dough has risen enough? Rather than watching the clock, watch the dough. The dough should look noticeably puffed and approximately doubled in size after the first rise. For the shaped rolls, look for rolls that are light, airy and nearly doubled in size. Rise times can vary depending on the temperature of your kitchen.
- What if I don't have polenta? Medium-coarse cornmeal is a perfect substitute. The flavor difference is minimal, and you'll still get the wonderful rustic texture that makes these rolls special.
- Can I make the dough ahead of time? Yes! After the second set of stretch-and-folds, cover the bowl tightly and refrigerate the dough for up to 24 hours. When you're ready to bake, let the dough sit at room temperature until it has warmed slightly and become puffy before shaping and proceeding with the recipe.
Scroll Down for the Recipe - or Save It to Your Inbox
We'll email you the recipe so it's easy to save, print, or share.
No-Knead Italian-Style Dinner Rolls
Ingredients
- 3¼ cups all-purpose flour, I like King Arthur unbleached flour
- ½ cup polenta or medium-coarse cornmeal, I like Bob's Red Mill polenta
- 2¼ teaspoons instant yeast
- 2 teaspoons kosher salt, I use Morton's
- 2 teaspoons granulated sugar
- 1½ cups warm water, 105-115˚F - maybe a bit more
- 1 tablespoon olive oil
Instructions
Prep:
- Line two 12x18-inch sheet pans with parchment paper. Set aside.
Make the dough:
- Combine the flour, polenta, sugar, salt, and yeast in a large bowl. Stir well to combine.
- Make a well in the center of the dry ingredients and add 1½ cups of the warm water. Stir until thoroughly combined, making sure there is no dry flour remaining at the bottom of the bowl. Add additional water, 1 tablespoon at a time, as needed. The dough should be thick and shaggy, but you want enough water to fully incorporate all of the ingredients.
- Drizzle the olive oil over the dough and stir until most of it is incorporated, leaving a light coating on the surface.
Rising and stretch and folds:
- Cover the bowl tightly with plastic wrap and let the dough rise for 30 minutes.
- Perform 8 stretch-and-folds (wet your hand, then lift the dough, stretch it upward, and fold it over the dough in the bowl, repeating in a circular motion around the bowl, turning the bowl about 45 degrees with each fold - see the video in the post). Flip the dough over and cover again. Repeat the 30-minute rise followed by another set of 8 stretch-and-folds.
- Cover the bowl and let the dough rise for an additional 30-45 minutes, or until doubled in size. (This is dependent on the temperature of your kitchen.)
Divide and shape the rolls:
- Turn the dough onto a generously floured work surface. Using a dough scraper or spatula, gently turn the dough several times so it's completely coated with flour.
- Divide the dough into 16 equal portions. Turn each portion in flour to lightly coat all sides.
- Shape each portion into a smooth round ball. I like to roll the dough piece in flour first, then hold it in the palm of my right hand (I'm right-handed) while using the fingers of my left hand to tuck the dough underneath and toward the center. Once it's roughly shaped, I set it on the floured counter and gently cup my hands around it, rotating it a few times to create a nice smooth ball.
- Arrange 8 rolls on each prepared sheet pan.
- Cover the pans with clean kitchen towels and allow the rolls to rise for 30-45 minutes, or until puffy and nearly doubled in size.
- When the rolls are shaped and just starting the final rise, place an 8 or 9-inch baking pan filled with hot water on the lowest oven rack. Preheat the oven to 450˚F.
- Lightly dust the tops of the rolls with flour. Use a baker's lame, razor blade or sharp knife to make a slash down the center of each roll about ¼ inch deep.
Bake:
- Bake the first pan for 14-20 minutes, or until golden brown. Begin checking at 14 minutes, then every minute or two until done.
- Repeat with the second pan, making sure the pan still contains water.
- Transfer the rolls to a wire rack and cool slightly before serving.
Notes
Nutrition
Shop Our Café Loves
We’ve gathered our favorite kitchen tools, tableware, and entertaining treasures in one place, the Café Loves store. It’s a wonderful spot to find something special for yourself or the cooks and hosts you love!


Another winner by the Cafe! So easy and delicious. They look professional. These will be my go to rolls. Thanks, as always, for another great recipe.
Hi Liz, Thank you for the wonderful review! It's so encouraging to hear how pleased you were with these rolls, and we love to hear when our readers call Café recipes their "go-to's". Thanks so much for taking the time to let us know!
I made these Italian rolls today. Perfection and so good. Followed the recipe and no issues! Thank you Chris for sharing!!! Definitely a recipe I will make over and over as most of your recipes!!!
Warm blessings,
Gayle
Thank you for the excellent review, Gayle! It's lovely to hear how well these rolls turned out for you. We so appreciate you taking the time to let us know how much you enjoyed this recipe and for sharing such encouraging comments!
The dough didn’t turn out shaggy at all. When it came time to divide & shape the rolls, I had to knead in more flour until it was no longer tacky. Also, I don’t care for the pale color. Maybe they could be brushed with something for more color?
Hi Vicky, I'm so sorry you had trouble with this recipe. It's difficult to say what went wrong without having been right there in the kitchen with you. I probably made these rolls 5-6 times last week, and the dough was always shaggy before the first rise, stretch & fold.
Regarding the color, you can bake them a little longer to achieve a nice golden color. Every oven is a little different, so always use the time as a suggestion, but your oven may need more or less time.
No problem Chris. I’ll try the recipe one more time.
So far as baking them longer for more color, that didn’t work. The first pan baked for 14/15 minutes. The second pan baked for 20 minutes and they felt much harder than the first batch and there was no color difference.
Also this is my 2nd attempt at the reply as the website just “glitches” and starts over. It maybe b/c I’m using my phone and not a computer.
Thank you for your reply.
Sincerely,
Vickie
Thanks, Vickie - I'm wondering if you might prefer these rolls - https://thecafesucrefarine.com/no-knead-crusty-dinner-rolls/
Thanks for the recipe recommendation Chris.
I will try this one instead!
We hope the Crusty Dinner Rolls turn out beautifully for you, Vickie!
These look delicious; any idea if the recipe would work with a gluten free flour blend like King Arthur ?thanks, I’d love to try them!
Hi Meredith, Thanks for the kind comment! Though we haven't tested this recipe with gluten free flour, many of our readers have reported success substituting King Arthur's Measure for Measure GF flour in our bread recipes. If you end up trying it, we'd love to hear how it turns out for you!
I also had trouble with the "Jump to" but saw an odd Page 1 and Page 2 indication so I went to Page 2 and then it was there. That being said, however, I have noticed, in the last several weeks to a month that your site is being pretty glitchy for me. I can't use it on my phone to successfully navigate to recipes and have to come to my laptop. Just an FYI....don't know if it's just one too many pop-ups or what it is.
Hi Benna, there was a technical glitch when this recipe was first published but it's been corrected. Thanks for taking the time to let us know. Regarding the site being glitchy, I'm so sorry you've had trouble with this. I will check with our developer to see what can be corrected.
These rolls look great. Is there a way to leave out the polenta/corn meal & just use extra flour? We have a corn protein allergy and can’t use these products
Thanks!
Hi Alicia, yes, the recipes will work well just subbing 3/4 cup AP flour for the polenta.
The Jump to Recipe is not working.
Hi Judy, thanks - it's working now. Just refresh your page!