This post may contain affiliate links. For more information, see our privacy policy.
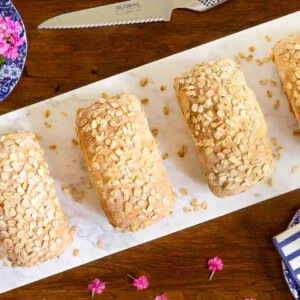
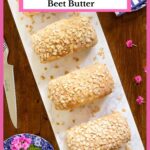
This charming, old-fashion porridge bread has a buttery crisp crust, a soft tender interior and lots of fabulous flavor. The no-knead dough comes together with minimal effort! It's wonderful for toast, sandwiches and in your bread basket!
A few weeks ago, Scott and I spent a day and overnight in Charlotte, about 2 hours south of where we live in the mountains of western North Carolina. We had dinner at a highly recommended restaurant, not far from our hotel. As we perused the menu, we were particularly intrigued by one of the appetizers; Porridge Bread with Beet Butter.

Porridge Bread? Beet Butter? Neither one was familiar but they both sounded fascinating so we put in our order. It didn't take long before a beautiful loaf of warm rustic bread was delivered to our table with a stunning side of brilliant pink butter. It was such a fun combination and it didn't take long to discover that it was as delicious as it was charming and beautiful.
I returned home with Porridge Bread and Beet Butter on my brain and knew that I would have to re-create both the fabulous bread and the fancy, beautiful butter.

What is porridge bread?
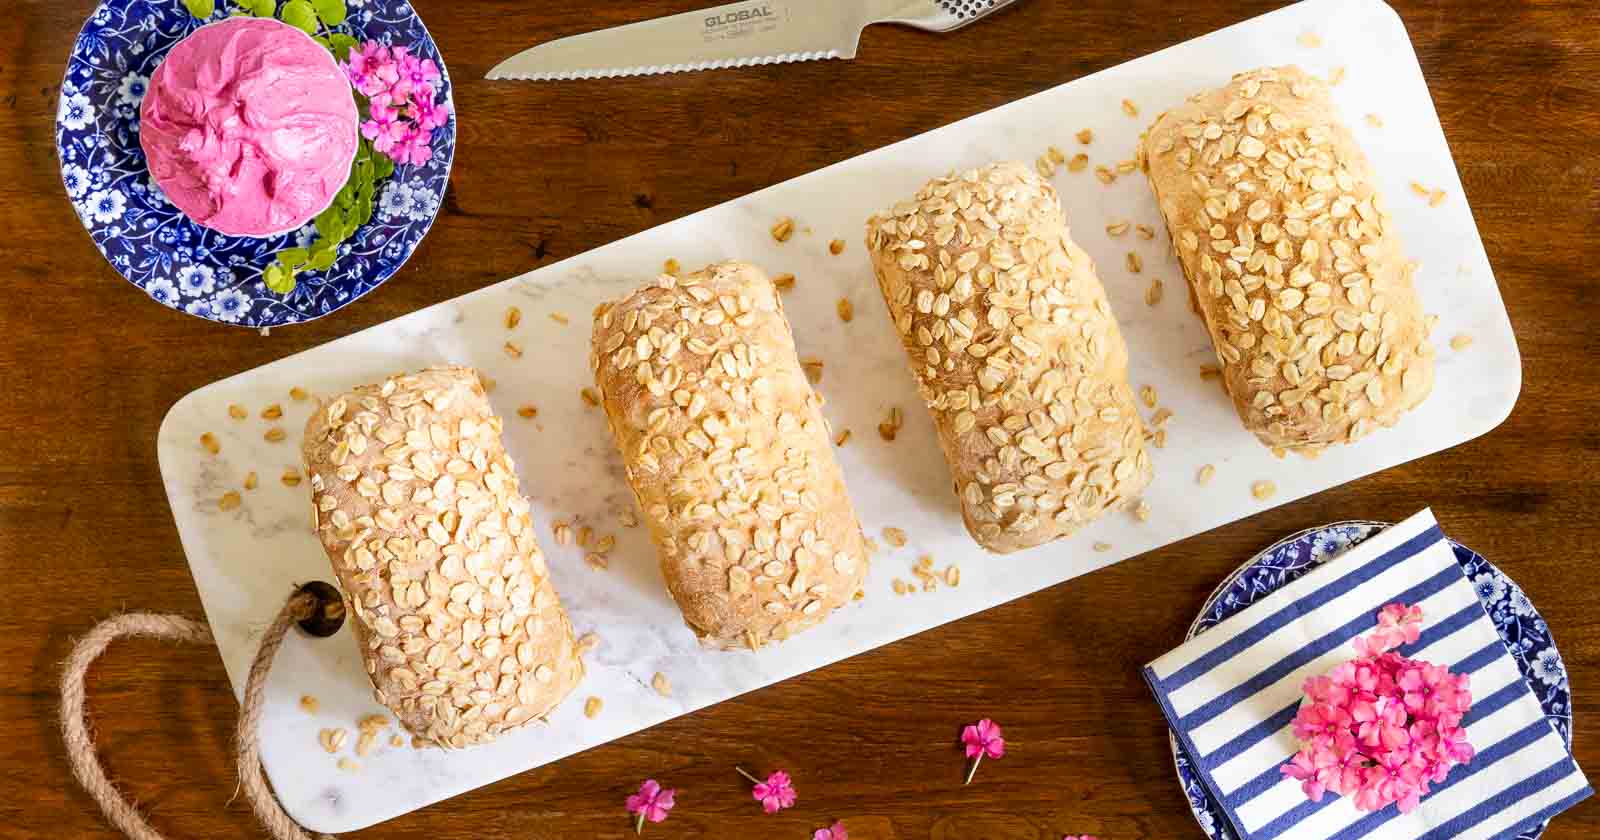
So what is porridge bread? It's exactly what it sounds like; bread that's made from porridge. And what is porridge? It's a hot cereal that can be made with oats or a combination of grains. I did a bit of research, then came up with an easy recipe that starts with a simple microwave porridge that consists of rolled oats and water.

Beet butter
My next challenge was the beet butter. While we were dining in Charlotte, I asked our waitress a few questions about the beet butter. She wasn't sure but she thought that the beautiful color was achieved with beet juice. I tried that but it definitely didn't work. The resulting butter had an ugly pinkish-brown hue... not at all what I was looking for.
For my next test, I picked up a package of pre-roasted beets at Trader Joe's, attempting to make the process easy. I combined softened butter with a chunk of the packaged beets. That didn't work either - the result was also a dull, unappetizing color. Hmmm, I felt a little stumped but wasn't ready to give up yet.
Scott was running some errands so I requested that he pick up a few raw beets from our local grocery store. When he returned, I scrubbed one of the beets, wrapped it with foil and popped it in the oven while I was roasting something else. Once the beet was tender, I let it cool down then cut off a small slice. I pulled out my mini food processor (I love this little kitchen workhorse!) and tried again; soft butter, a drizzle of honey and the slice of roasted beet.
I held my breath, gave the mixture a whirl and... WHOA! It was absolutely gorgeous! Check it out for yourself:

What does beet butter taste like?
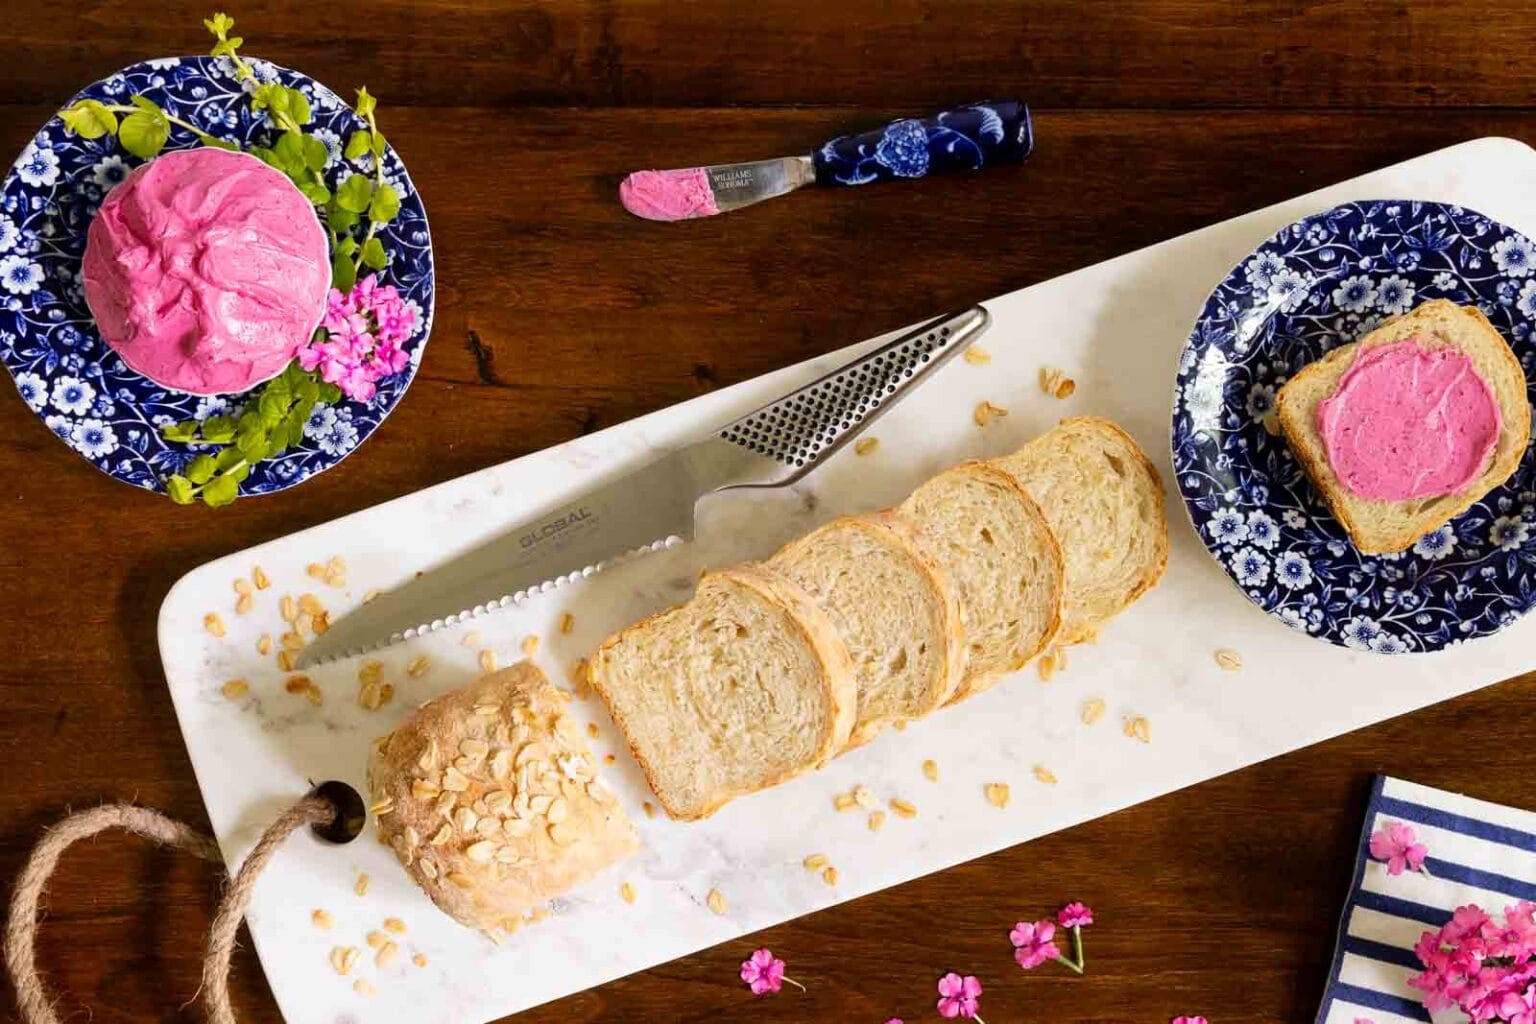
I've served this beet butter several times for dinner parties with a basket of warm, sliced porridge bread. It always brings gasps of delight and even the non-beet lovers have enjoyed it. The beet flavor is minuscule, with most of our guests describing it as a delicious, slightly sweet butter.

No need to knead
Although kneading isn't tricky, it can be messy and the extra step that makes people hesitate to make homemade bread. I love that for this porridge bread, all you do is stir everything together in the bowl, let it rise then shape it into loaves.
How to serve Porridge Bread
What to do with this delicious bread? Well, besides just slicing into it right out of the oven and slathering it with butter (or beet butter), it makes fabulous toast, is wonderful for dinner in the bread basket and it's perfect for a sandwich to take to work or a grilled cheese.
It's fabulous lightly toasted (as pictured below) with a spoonful of Nectarine Jam or any of our other homemade jams or jellies.

You probably have everything you need to make this porridge bread so put this recipe on your must-make-soon list. Oh and next time you're at the grocery store or farmer's market, pick up a fresh beet and whip up a batch of beet butter. Then just wait for the gasps of delight when you pull out a loaf of warm, delicious bread and a bowl of butter so pretty, it could win a beauty contest!
Cafe Tips for making this No-Knead Porridge Bread
- This recipe calls for rolled oats, also called old-fashioned oats. Don't use quick oats for this recipe which are oats that have been ground up to facilitate faster cooking.
- I use four of these mini loaf pans to make my porridge bread. They're the perfect size for the bread basket and morning toast. You could also use two medium-size (8x4-inch) bread pans.
- This recipe calls for spraying the pans with non-stick baking spray and also coating them with butter. Don't skip either one! The spray helps the loaves to slip out of the pan easily. The butter adds flavor and helps the oats to adhere to the exterior of the bread.
- You'll need instant yeast (also called quick-rising yeast) for this recipe. Instant yeast does not need to be activated in warm water. I like to buy my instant yeast in bulk as it's infinitely cheaper than the little packets. I keep a small jar in the refrigerator and freeze the rest. It keeps well for several months in the refrigerator and for up to a year in the freezer.
- This bread freezes well. To rewarm, just let the bread thaw, then pop it in the oven at 300˚F (150˚C) for 10 minutes.
- For sandwiches and toast, I like to slice this porridge bread before freezing. Then it's super easy to pull out one or two slices when needed.
- I mentioned using my mini food processor to make the beet butter. I love this handy little kitchen tool and use it for so many tasks. Its small size makes it super easy to store and convenient to pull out.
- You might be good at eye-balling dough like this and dividing it equally. I am miserable at this, no matter how hard I try. So I use my handy little kitchen scale to weigh the dough in grams, then divide the total by 4. Then I divide my dough, weigh each piece and adjust as needed. Voila! Perfectly equal size loaves!
- To make the beet butter, scrub one small or medium size beet then wrap it with foil. Place the foil-wrapped beet in a small baking pan and bake at 400˚F (200˚C) for 50-60 minutes until tender. Allow the beet to cool then unwrap and use a paper towel to rub the skin off. Combine 4 ounces (113g or 1 stick) of soft butter, 2 teaspoons of honey (more to taste) and a slice of beet in the bowl of a food processor. Process until smooth and creamy. Add more beet and process again for more intense color if desired.
- As mentioned above in the post, beet juice and/or the pre-roasted beets you find in the produce section of some grocery stores will not work for this recipe. The color will be muted and dull.
Thought for the day:
How excellent is Your name in all the earth,
Who have set Your glory above the heavens!
Psalm:8:1
What we're listening to for inspiration:

If you enjoy this recipe, please come back and leave a star rating and review! It's so helpful to other readers to hear your results, adaptations and ideas for variations.
Scroll Down for the Recipe - or Save It to Your Inbox
We’ll email you the recipe so it’s easy to save, print, or share.
No-Knead Porridge Bread
Ingredients
For the porridge:
- 1 cup rolled oats, plus more to coat the bread pans
- 1 cup tap water
For the dough:
- porridge, from above
- 3 tablespoons cold butter
- ⅓ cup honey
- 2 teaspoons kosher salt
- 1 cup room temperature tap water
- 2 ¼ teaspoons instant dry yeast
- 3 ½ cups bread flour, or all-purpose flour
Instructions
For the porridge:
- Combine the oats and water in a large, microwave-safe bowl. Cook on high power for 5 minutes.
For the dough:
- Remove the bowl from the microwave and add the butter. Stir until the butter is melted. Allow the mixture to cool for 5 minutes.
- Add the room temperature water, honey and salt. Stir to combine.
- Sprinkle the instant yeast over the surface and stir well. Lastly, add the flour and stir with a sturdy silicone spatula until well combined, from the bottom up and scraping the sides of the bowl. The dough will be sticky, thick and shaggy. (If it seems difficult to get all of the flour incorporated, add an extra tablespoon or two of water to loosen the dough a bit.)
- Drizzle the dough in the bowl with a bit of oil and pat it with your spatula to coat the top. Cover the bowl with a plate or plastic wrap and set it aside in a warm spot until the dough has doubled in size, 45-90 minutes.
- Spray the interior of 4 mini loaf pans (3x6 inches) with non-stick cooking spray then rub with a paper towel to coat. Add ½ teaspoon of soft butter to each pan and rub with the paper towel to coat.
- Add ¼ cup of rolled oats to one of the pans. Tilt the pan in all directions to coat it with the oats. Tip the pan and discard excess oats into the next pan. Repeat until the interior of all of the pans is coated with oats, adding more oats as needed.
- Lightly dust a work surface with flour. Turn the dough out onto the floured work surface. Using a bench scraper or spatula, divide the dough into four equal pieces. Turn each piece in the flour to coat all of the surfaces. Add more flour to the work surface if needed.
- Take one piece of the dough and flatten it out with your hands into a rectangle shape with the short side slightly longer than one of your bread pans. Turn to coat both sides with flour if any of the surfaces are sticky. Starting from a short end, roll the dough up tightly, then tuck the ends under and shape with your hands into a loaf. Repeat with the remaining portions of dough. Rub the top and sides of each loaf with a bit of soft butter then place them into the prepared pans. Sprinkle the top with more oats.
- Cover the pans with a clean kitchen towel and let the bread rise again until the loaves look like they’ve doubled in size, 45-60 minutes (if your house is chilly, it may take a little longer).
To finish:
- Towards the end of the rising time, preheat the oven to 350˚F (177˚C).
- When the loaves are finished rising, place them on a sheet pan and bake for 30-40 minutes, or until the top is nicely browned.
- Remove the sheet pan from the oven and let the loaves cool in the pans for 5 minutes. Using a pot holder, turn each pan to the side and slide the loaves out. Place upright on a cooling rack. Cool for at least 30 minutes before slicing.
For the beet butter:
- See The Café Tips above in the post for instructions on how to make the beet butter, if desired.
Notes
Nutrition
Shop Our Café Loves
We’ve gathered our favorite kitchen tools, tableware, and entertaining treasures in one place, the Café Loves store. It’s a wonderful spot to find something special for yourself or the cooks and hosts you love!


Hi if you are using 2 larger pans instead of 4 small ones, how long should I bake the bread?
Hi Tammy, it will take 45-50 minutes, depending on your oven. I would look for a pretty golden brown color. If you want to be precise, you can check the internal temperature (in the center of the loaf) with an instant thermometer. It should read, 190-210kF.
These little breads and the brioche breads were a big hit for Thanksgiving. I started making no knead breads during the pandemic, and I'm gradually expanding my recipes. I made these ahead ( good thing, because I got flour all over when I shaped the loaves), and they froze and reheated beautifully. The little loaves are much more festive than standard loaves, but much less time consuming to make than rolls.
Thanks for your review, Mimi!
I'm not keen on coating the pans with extra oatmeal. May I skip without detriment to the recipe? Just subscribed. Live the thought of the day; needed to read that today!
Hi Mary, you can definitely skip the extra oatmeal. It will still be delicious!
Yes, God's Word is always timely! 💕
I made the beet butter OMG, it is so good. Since I use unsalted butter I added a pinch of salt. I also added 1/4 teaspoon of cinnamon. I love it and will be making it to have on hand whenever I want it.
Awesome! Thanks for letting us know, Markey!
I just saw this recipe and I knew I had to make it. Well, I did, and I love it. I had one disposable minipan so I decided to use it and when I divided my dough, I put three loaves in a regular size bread pan. It turned out really good. My question is do you have an internal temperature for the bread when it is done? I had a hard time trying to decide when the bread is done. I cooked the one loaf by itself a shorter time than the ones in the bread pan. I baked it to 190 degrees, but I am not sure if I should have cooked it longer. The center looks slightly moist. I didn't have a fresh beet but I will be buying one and want to make the beet butter. Thanks for you excellent recipes.
Hi Markey, thanks for your kind words.
Regarding your question, the internal temperature for bread should be 195˚F to 205.
Received the email with this recipe this morning. Sounded so good I got up from my desk, went into the kitchen and made. I am not disappointed. It is delicious. Thanks so much.
That's awesome, DoLee! Thank you for your review!
great recipes: we're having the bread and beet butter today with our BBQ! thanx
You are speedy! Hope you enjoy it, Despina!