
This post may contain affiliate links. For more information, see our privacy policy.
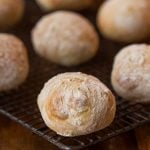
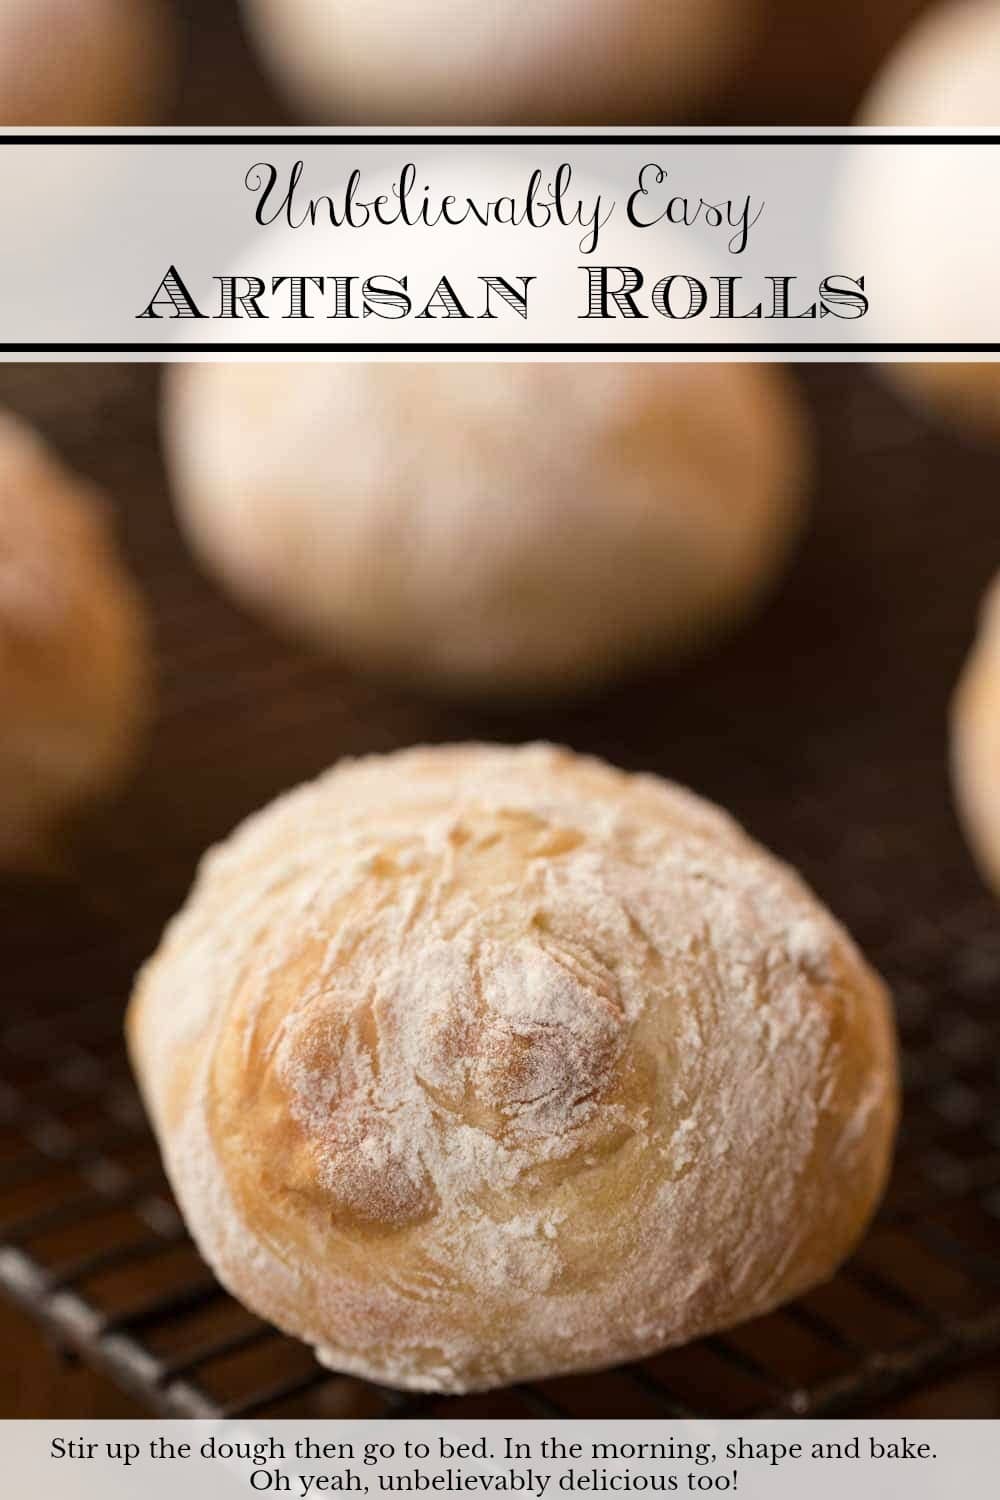
These Easy Artisan Rolls truly are ridiculously easy. Stir up the dough then go to bed. In the morning, shape and bake. Unbelievably delicious too!
When I first published this recipe 5 years ago, I called the rolls Unbelievably Easy Artisan Rolls. And it was true, they are unbelievably easy. But that was before the days of our Ridiculously Easy Recipes. Recently, when making a batch of this delicious bread, I realized that it truly deserve a place in our Ridiculously Easy collection. So, without further ado, let me re-introduce you to these fabulous, Ridiculously Easy Artisan Rolls.

What is Ridiculously Easy?
If you're new to The Café, you might not be familiar with our Ridiculously Easy recipes. They are super popular with our readers and I love them just as much! You can read more about these recipes in this post along with the specific criteria that these recipes have to follow but my nutshell definitely is "recipes that make you look like a kitchen rock star with minimal effort on your part". Like that? I sure do!
Can yeast rolls really be easy?
Let me explain how easy they are and you can decide for yourself. Ready? Combine flour, salt and yeast in a bowl. Grab a sturdy spatula. Add tap water (even cold tap water works!), and stir till combined. Cover, go to bed and have sweet dreams! When you wake in the morning, the yeast will have done its magic.
Sprinkle a work surface with flour and turn the dough a few times, to give it a nice white coat. Divide your dough into 12 pieces and shape the pieces into balls. Place the dough balls on a parchment-lined sheet pan and bake for 20 minutes. That's it! See what I mean? Easy, ridiculously easy!
Oh, one more thing; wipe that drool off your mouth, and please, try to wait till they've cooled just a bit before you start sampling.
I saw these beautiful rolls a few months ago on Pinterest. They originated on a beautiful blog called Alexandra's Kitchen. I did adapt the recipe slightly, but she's the genius who came up with the technique.

It's hard to find really good artisan bread unless you live in a big city where there are lots of bakers. Here in Asheville, NC, there are several high-quality bread shops, but they're few and far between. So what do you do if you're craving delicious, European-style bread? You know, the crusty exterior and chewy, richly-flavored-interior type of bread with those big irregular holes?
In the past all I could personally do was dream about it but now the answer is super simple, I just whip up a batch of these Ridiculously Easy Artisan Rolls.

I started to call them dinner rolls but changed my mind when I thought about how versatile they are. While they do make wonderful dinner rolls, I also love these rolls for sandwiches and as an accompaniment to soups and salads.
Four Ingredients
And, while my recipe today has just four ingredients; flour, yeast, salt and water, you can get really creative with herbs and spices. My favorites are rosemary and sea salt, but I was at Whole Foods for lunch recently and had a crusty dinner roll with Parmesan and fresh ground pepper. That just might be my next version!

Make ahead!
Do you know what might be even better than the simplicity of this Ridiculously Easy Artisan Rolls recipe? The fact that you can make a batch in advance and freeze them for several weeks. Just under-bake the rolls slightly, then pop them in the freezer after cooling. Pull the rolls out of the freezer a few hours in advance and warm them for 8-10 minutes before serving. They'll taste just like freshly baked!
Imagine a basketful of these fragrant rolls being passed around the table at your next dinner party. You'd be sure to see smiles of delight, as each guest peeks under the napkin. Be prepared for lots of compliments, as the warm rolls are savored by one and all. Only you will know that the total hands-on time for these rolls is less than 20 minutes!

Café Tips for Making these Ridiculously Easy Artisan Rolls
- Use plenty of flour on your work surface. This is what will keep the dough from sticking. You will need at least a ¼ cup, maybe more, depending on how wet your dough is. I also like to keep my hands well-floured while shaping the rolls.
- A metal bench scraper (aka a dough scraper) is a wonderful tool to have when making bread, rolls, etc. It will keep your hands from getting sticky as you can use it to move the dough and coat it with flour. Also turning the dough a couple of times on a well-floured surface with a bench scraper, will also keep the dough from sticking to the counter. And lastly, a bench scraper makes cleaning the counter a breeze as you can just scrape up any excess dough and flour.
- Do you have to let the dough rise for 10-12 hours? Nope! I've been in a pinch a number of times and have sped up the rising time by using warm water instead of room temperature water. The rolls still turn out and are delicious BUT the beautiful craggy interiors of these rolls are definitely improved with a long slow rise. There is also more depth of flavor - so if you have the time, by all means, go for the overnight l-o-n-g, s-l-o-w rise.
- This Ridiculously Easy Artisan Rolls recipe is a bit unusual in that you form the rolls by pulling the edges under, then pinch them together to form a smooth ball and place them on the baking pan with the pinched side UP. All other roll recipes that I've ever used direct you to place the rolls on a baking pan, smooth side up. Being a bit of a rebel, I decided to try baking them with the pinched side up and LOVED the beautiful artisan whimsical presentation when the rolls "rolled" out of the oven.
- I love these pre-cut sheets of parchment paper. They save a lot of time in the kitchen, as they're the perfect size for a half sheet pan.
- For regular parchment paper, I really like the Kirkland brand that Costco sells. The problem is, that they only carry it seasonally. I was happy to discover you can purchase it online with free shipping. A roll like this will last a long time and is way more economical than the typical size rolls that you often find.
P.S. If you love delicious, EASY bread recipes, be sure sure to check out our Ridiculously Easy Rosemary Bread. SO good and you won't believe the amazing aroma that will fill your house; AND how easy it is!
These Unbelievably Easy Artisan Rolls are super easy! Stir up the dough, then go enjoy a good sleep. In the morning, shape and bake. Unbelievably delicious too!
- 4 cups bread flour plus extra for shaping
- 2 teaspoons kosher salt
- 1 teaspoon active dry yeast (traditional)
- 2 cups room-temperature tap water
-
In a medium-large bowl, whisk together the bread flour, salt, and yeast. Make a well in the center and add the water. Mix with a sturdy rubber spatula until all flour is incorporated. Don’t worry, the dough will be wet and sticky, that’s how it should be. Cover the bowl with plastic wrap and leave to rise at room temperature for 10 to 12 hours.
-
The following morning (or after 10-12 hours), the dough will have risen, but it may still look shaggy and its surface will be covered with bubbles.
-
Line a sheet pan with parchment paper. Preheat the oven to 425ºF.
-
Spread a generous ¼ cup of flour on a work surface. Dump the dough out onto the floured surface and turn it several times to coat with flour. I like to use a bench scraper for this.
-
Divide the dough into 12-16 equal portions, turning each piece in the flour to coat. (The bench scraper is also great for cutting the dough). Shape each piece into a ball, pulling edges under and pinching together to make a smooth top. Invert balls and place on prepared pan, pinched side up. This will give you craggy, rustic textured rolls. If the dough is sticky as you’re shaping, just roll the piece in more of the flour. Let shaped rolls rise for 20 minutes.
-
The rolls may look a little deflated as they're rising and they won't rise a ton during the 20 minutes but a little magic happens when they hit the hot oven and you'll be shocked at how beautiful they look when baked.
-
Transfer the pan to the oven. Bake 15 minutes. Rotate pan. Bake 5 minutes more or until nicely golden. Transfer rolls to a cooling rack to cool completely.
-
If making in advance, remove from oven when pale golden brown (about 3-4 minutes less). Cool completely, then freeze on a baking sheet. Once frozen, transfer rolls to a large zip lock bag and store in the freezer. To serve, allow rolls to thaw, then heat for 10-12 minutes at 325˚F.
See Café Tips above in the post for more detailed instructions and tips to ensure success.
Sharon says
Gloria, you might try using instant yeast. You don't have to proof it and can just throw it in with everything else at the beginning. I made these rolls today and they turned out beautifully. Added 1 Tbsp canola oil (I have found that adding oil makes keeps finished bread moister longer and does not impede proofing) and 1 Tbsp sugar, no salt. I let the bread raise for about 4-6 hours at room temperature and then, fearing (with the added sugar) that it might overproof, I put it in my refrigerator overnight. It came out very bubbly, light, airy dough that did not raise much during the 20 min 2nd raise but raised nicely in the oven. I used, probably around 1/2 cup of flour for the brief kneading required.
Outside nicely brown, crisp, inside moist as can be. Cooking time, temperature as provided in recipe, perfect.
Chris Scheuer says
Thanks Sharon!
Joy Gunter says
I made these for our dinner last night. We loved them! I used 1/2 whole wheat flour (hard white spring wheat) and 1/2 all purpose white flour. After letting the dough sit for 8 hours, it had raised in the bowl and had many bubbles on the surface. It had a flat top instead of rounded. I dusted the counter with 1/4 cup of the all purpose flour and rolled all the dough in the flour. Then I cut the dough into 16 pieces. I rolled each piece in additional flour until it was easier to handle, then shaped into rolls and let rise 20 minutes before baking. They turned out delicious. I did bake them about 25 minutes instead of 20 so they would brown a little. We live at a little higher altitude (4300) so baking takes a little longer. They had a crusty exterior and a nice soft interior. We will definitely make these again and again!
Chris Scheuer says
Thanks for such a detailed review Joy! So happy you enjoyed them!
Chris Scheuer says
Oh my goodness Gloria! I'm so sorry you had such a bad experience. I hate wasting good ingredients. I'm honestly not sure what could have gone wrong as so many others have had wonderful results with this recipe. The dough is always pretty wet and you need to use a good amount of flour on your work surface to make it easy to work with. It sounds like, for some reason, the yeast did not activate.
Terry says
We can't get enough of these rolls!! sooo easy and delish! Has anyone tried adding cheese to mix? If so, when to add and how much?
Rita says
Wanted to add that the measurements work fine using metric cups - 600g of flour and 500g of water, for anyone like me in metric areas. Also, in case you don't hold that info in your head and can't be bothered looking it up, 425*F is roughly 220*C, and 350*F (the reheating temperature) is roughly 180*C. Hope that helps somebody. These rolls are my new favourite bread! Making some now using brown (wholemeal) flour to try out.
Rita says
These worked perfectly! I have made slow yeasted bread before that honestly was a bit meh. I mixed the dough for these last night and baked them this morning - the smell pulled the kids away from their Lego which doesn't happen often! Perfectly crunchy on the outside and chewy on the inside. I am going to teach my 9 and 7yo how make them because really, it took very little effort on my part to make these rolls but my cunning plan is to have fresh bread with zero effort on my part! It's easy enough for them to handle. With four young kids it can be hard to find time and energy to cook well - thanks for the inspiration that your blog is!
Peggy says
These rolls are amazing! I made them at Thanksgiving, baking them in the morning, and everyone loved them. For Christmas Eve, I baked them just before dinner and, of course, they were even better hot out of the oven. Either way, you can't beat easy + delicious. Thank you, thank you, thank you.
Chris Scheuer says
That's awesome Peggy, so happy you enjoyed them! Thanks for taking the time to come back and leave a comment! 🙂
Valerie says
This recipe is absolutely amazing, Chris! I first made it for Thanksgiving, then I made it again this week for a Christmas dinner party. So easy and simple, but full of that wonderful yeast flavor! All of my guests loved these rolls, and I've shared the recipe with several of them. Also, my husband has declared that he would forego many servings of inferior breads for these rolls.
It would be helpful for this recipe to have step-by-step photos of how you shape the rolls at the end. I looked at the photos on Alexandra's Kitchen to get some help with the process.
Jennifer says
These are so good! I made a couple batches for my parents while I was home for Thanksgiving. We par baked them and froze them so they can have fresh rolls whenever they want.
Chris Scheuer says
Thanks for letting us know Jennifer, and what a great idea. I know your parents loved it! It's so nice to pull something yummy out of the freezer and warm it up with a bowl of soup or something warm and comfy on a cold winter day!
Luci says
This is the second time, in two days, that I made these. The first time, they did not rise much. So then I checked my expiration date on the yeast, it was December 2016, which is now. So I went out and bought a new yeast product. I also put 1/1/2 tsp of yeast in this batter.. they are in the oven now and I will let you know how these turned out. I also used AP flour. So lets keep our fingers crossed.
Chris Scheuer says
That was a good choice Luci! Sometimes yeast can be a little tricky and fussy.
Luci says
Well, they came out much better, but I can not get them to brown, like your pictures, so I thought next time, I would raise the temp in my oven and put on a higher rake, do you have any suggestions? However that tast great.
Nicole says
These are great! A friend brought them to T-giving dinner then shared the recipe with me. I made the dough first thing this AM and left it to rise while I was at work. I had fresh rolls ready for dinner tonight in a short amount of time. Delicious and easy!
Chris Scheuer says
Thanks so much Nicole for taking the time to leave a comment. So happy you enjoyed the rolls. What a wonderful thing to come home to!
Krista P says
Thank you so much for this recipe. I was skeptical however it was unbelievably easy and the rolls came out perfect! This recipe is a keeper according to my husband and family! Absolutely awesome!!! I already have requests to make these and to bring them to Christmas dinner...
Chris Scheuer says
Thanks for your encouraging comment Krista! We had them with a warm, cozy bowl of soup yesterday - so good!
Sue K says
This is the easiest recipe to follow and make. I made a batch the other day, and they will be reheated today for Thanksgiving dinner. Delicious rolls!! A keeper recipe.
Chris Scheuer says
Thanks so much Sue. So happy you took the time to leave a comment. Have a lovely Thanksgiving!
P.S. If there are any left, they'll make wonderful turkey sandwiches tomorrow! 🙂
Donna Cifuentes says
My son is my fancy bread maker in the family and usually takes around 3 days to make his loaves. We are making this for Thanksgiving and I can't wait to taste them. In the oven as we speak!
Chris Scheuer says
That sounds wonderful Donna, and that he's become the bread maker, so cool! There's nothing more fragrant than bread or rolls baking in the oven, yum!
Margaret Freeman says
Funny story....You know those cute chalk labels that you can put on mason jars? Well, they rub off. I accidentally used potato starch instead of flour!! It was basically a science experiment! Usually have some sort of goof up like this leading up to Thanksgiving but I thought it would make you laugh like I did 🙂
Chris Scheuer says
Haha! That is so funny! My mom once used part powdered sugar instead of flour to make her homemade bread. She didn't realize it and wondered why the bread looked a little off. It tasted terrible and then she knew what she'd done. I hope you get to try these rolls with the correct label on the jars 🙂 Thanks for sharing, I know lots of us have done something similar!
Ruth Myers says
These rolls are absolutely fabulous, and soooo easy! They'll be on our Thanksgiving table this year!
Chris Scheuer says
That's awesome Ruth, so happy they turned out well for you. Have a wonderful Thanksgiving!
Brenda says
Chris, i am an avid bread lover so had to make these. Fabulous, just Fabulous. Thank you for sharing
Sandra Garth says
Dare I try these for Thanksgiving? Not having to have the water at the perfect temperature is wonderful. I think I can, I think I can!
Gayann says
Made em yesterday....ate and gave away all but one! Theyare crazy easy! Next time I am adding parm cheese in the dough,and a little sea salt on the top...I made 14 large rolls....they are PERFECT as small sandwich rolls...a lot like chabatta bread! My normal yeast roll recipe takes 5 hours,and is very tempramental.....these are rediculously easy! No fuss!
Adina says
Absolutely perfect! I have already wrote down the recipe in my recipe notebook, this is something I will make for sure.
Chris Scheuer says
Oh, you'll love them Adina! And they'll go so well with all the good food you're always making 🙂
Laura | Tutti Dolci says
These rolls look incredible, Chris! I know I'd never be able to stop at just one 🙂
Chris Scheuer says
Thanks Laura! I have to admit, I didn't stop at one!
Judi says
HOME RUN you guys! I struggle with bread most of the time. I can be pretty good or a hit and a miss. So when I decided to try these and wanted them for a friend who is going through a difficult time, I figured I'd better hedge my bets, so made a batch of regular buns yesterday and started these last night. WELL, they are baking as we speak and I can tell they are perfect!!! We will have a couple for breakfast and share the rest. And EASY? Could not be more so! I LOVE your recipes and am always trying new things from you, . I've only had one flop and that was my error. I feel the happiness you guys share and this is my favourite cooking site. Thanks so much. Okay, now to get one of those beauties with my coffee. Have a great day!!
Chris Scheuer says
That is just awesome Judi! I hope they cheered up your friend! Thanks for letting us know!
Marjorie Holste says
I made the rolls today, very easy, and taste great. Thank you for sharing recipe. I will be making them often I'm sure????
Chris Scheuer says
Thanks Marjorie for taking the time to let us know. So... happy you enjoyed them!
Ann says
Looks great! Any suggestions for a gluten-free version?
Chris Scheuer says
Hi Ann, I haven't tried a gluten free version and have to admit, I'm not super smart when it comes to GF. If you try them with GF flour, please let us know your results. Sorry I can't be more helpful 🙁
cheri says
Hi Chris, these rolls look perfect for the holidays. I can tell they are wonderful just by the way they look.:)
John/Kitchen Riffs says
Wow, that IS easy! And awfully good looking. Love a good roll/bread recipe. And love the way these look when you tear them open -- that's the way bread SHOULD look! Really good -- thanks.