
This post may contain affiliate links. For more information, see our privacy policy.
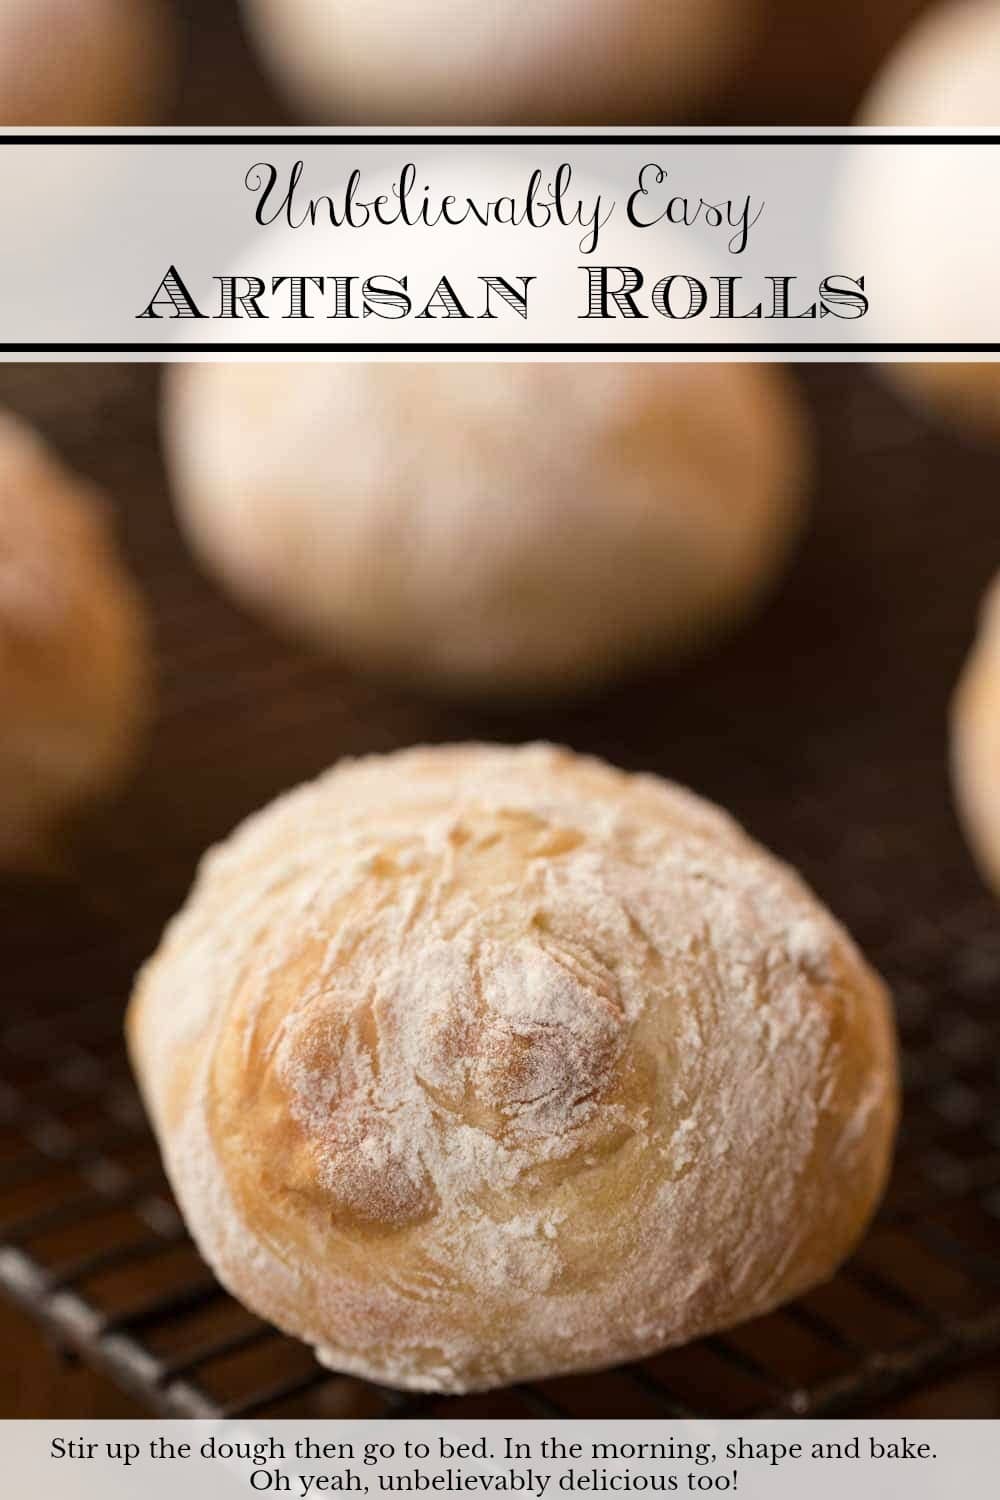
These Easy Artisan Rolls truly are ridiculously easy. Stir up the dough then go to bed. In the morning, shape and bake. Unbelievably delicious too!
When I first published this recipe 5 years ago, I called the rolls Unbelievably Easy Artisan Rolls. And it was true, they are unbelievably easy. But that was before the days of our Ridiculously Easy Recipes. Recently, when making a batch of this delicious bread, I realized that it truly deserve a place in our Ridiculously Easy collection. So, without further ado, let me re-introduce you to these fabulous, Ridiculously Easy Artisan Rolls.

What is Ridiculously Easy?
If you're new to The Café, you might not be familiar with our Ridiculously Easy recipes. They are super popular with our readers and I love them just as much! You can read more about these recipes in this post along with the specific criteria that these recipes have to follow but my nutshell definitely is "recipes that make you look like a kitchen rock star with minimal effort on your part". Like that? I sure do!
Can yeast rolls really be easy?
Let me explain how easy they are and you can decide for yourself. Ready? Combine flour, salt and yeast in a bowl. Grab a sturdy spatula. Add tap water (even cold tap water works!), and stir till combined. Cover, go to bed and have sweet dreams! When you wake in the morning, the yeast will have done its magic.
Sprinkle a work surface with flour and turn the dough a few times, to give it a nice white coat. Divide your dough into 12 pieces and shape the pieces into balls. Place the dough balls on a parchment-lined sheet pan and bake for 20 minutes. That's it! See what I mean? Easy, ridiculously easy!
Oh, one more thing; wipe that drool off your mouth, and please, try to wait till they've cooled just a bit before you start sampling.
I saw these beautiful rolls a few months ago on Pinterest. They originated on a beautiful blog called Alexandra's Kitchen. I did adapt the recipe slightly, but she's the genius who came up with the technique.

It's hard to find really good artisan bread unless you live in a big city where there are lots of bakers. Here in Asheville, NC, there are several high-quality bread shops, but they're few and far between. So what do you do if you're craving delicious, European-style bread? You know, the crusty exterior and chewy, richly-flavored-interior type of bread with those big irregular holes?
In the past all I could personally do was dream about it but now the answer is super simple, I just whip up a batch of these Ridiculously Easy Artisan Rolls.

I started to call them dinner rolls but changed my mind when I thought about how versatile they are. While they do make wonderful dinner rolls, I also love these rolls for sandwiches and as an accompaniment to soups and salads.
Four Ingredients
And, while my recipe today has just four ingredients; flour, yeast, salt and water, you can get really creative with herbs and spices. My favorites are rosemary and sea salt, but I was at Whole Foods for lunch recently and had a crusty dinner roll with Parmesan and fresh ground pepper. That just might be my next version!

Make ahead!
Do you know what might be even better than the simplicity of this Ridiculously Easy Artisan Rolls recipe? The fact that you can make a batch in advance and freeze them for several weeks. Just under-bake the rolls slightly, then pop them in the freezer after cooling. Pull the rolls out of the freezer a few hours in advance and warm them for 8-10 minutes before serving. They'll taste just like freshly baked!
Imagine a basketful of these fragrant rolls being passed around the table at your next dinner party. You'd be sure to see smiles of delight, as each guest peeks under the napkin. Be prepared for lots of compliments, as the warm rolls are savored by one and all. Only you will know that the total hands-on time for these rolls is less than 20 minutes!

Café Tips for Making these Ridiculously Easy Artisan Rolls
- Use plenty of flour on your work surface. This is what will keep the dough from sticking. You will need at least a ¼ cup, maybe more, depending on how wet your dough is. I also like to keep my hands well-floured while shaping the rolls.
- A metal bench scraper (aka a dough scraper) is a wonderful tool to have when making bread, rolls, etc. It will keep your hands from getting sticky as you can use it to move the dough and coat it with flour. Also turning the dough a couple of times on a well-floured surface with a bench scraper, will also keep the dough from sticking to the counter. And lastly, a bench scraper makes cleaning the counter a breeze as you can just scrape up any excess dough and flour.
- Do you have to let the dough rise for 10-12 hours? Nope! I've been in a pinch a number of times and have sped up the rising time by using warm water instead of room temperature water. The rolls still turn out and are delicious BUT the beautiful craggy interiors of these rolls are definitely improved with a long slow rise. There is also more depth of flavor - so if you have the time, by all means, go for the overnight l-o-n-g, s-l-o-w rise.
- This Ridiculously Easy Artisan Rolls recipe is a bit unusual in that you form the rolls by pulling the edges under, then pinch them together to form a smooth ball and place them on the baking pan with the pinched side UP. All other roll recipes that I've ever used direct you to place the rolls on a baking pan, smooth side up. Being a bit of a rebel, I decided to try baking them with the pinched side up and LOVED the beautiful artisan whimsical presentation when the rolls "rolled" out of the oven.
- I love these pre-cut sheets of parchment paper. They save a lot of time in the kitchen, as they're the perfect size for a half sheet pan.
- For regular parchment paper, I really like the Kirkland brand that Costco sells. The problem is, that they only carry it seasonally. I was happy to discover you can purchase it online with free shipping. A roll like this will last a long time and is way more economical than the typical size rolls that you often find.
P.S. If you love delicious, EASY bread recipes, be sure sure to check out our Ridiculously Easy Rosemary Bread. SO good and you won't believe the amazing aroma that will fill your house; AND how easy it is!
These Unbelievably Easy Artisan Rolls are super easy! Stir up the dough, then go enjoy a good sleep. In the morning, shape and bake. Unbelievably delicious too!
- 4 cups bread flour plus extra for shaping
- 2 teaspoons kosher salt
- 1 teaspoon active dry yeast (traditional)
- 2 cups room-temperature tap water
-
In a medium-large bowl, whisk together the bread flour, salt, and yeast. Make a well in the center and add the water. Mix with a sturdy rubber spatula until all flour is incorporated. Don’t worry, the dough will be wet and sticky, that’s how it should be. Cover the bowl with plastic wrap and leave to rise at room temperature for 10 to 12 hours.
-
The following morning (or after 10-12 hours), the dough will have risen, but it may still look shaggy and its surface will be covered with bubbles.
-
Line a sheet pan with parchment paper. Preheat the oven to 425ºF.
-
Spread a generous ¼ cup of flour on a work surface. Dump the dough out onto the floured surface and turn it several times to coat with flour. I like to use a bench scraper for this.
-
Divide the dough into 12-16 equal portions, turning each piece in the flour to coat. (The bench scraper is also great for cutting the dough). Shape each piece into a ball, pulling edges under and pinching together to make a smooth top. Invert balls and place on prepared pan, pinched side up. This will give you craggy, rustic textured rolls. If the dough is sticky as you’re shaping, just roll the piece in more of the flour. Let shaped rolls rise for 20 minutes.
-
The rolls may look a little deflated as they're rising and they won't rise a ton during the 20 minutes but a little magic happens when they hit the hot oven and you'll be shocked at how beautiful they look when baked.
-
Transfer the pan to the oven. Bake 15 minutes. Rotate pan. Bake 5 minutes more or until nicely golden. Transfer rolls to a cooling rack to cool completely.
-
If making in advance, remove from oven when pale golden brown (about 3-4 minutes less). Cool completely, then freeze on a baking sheet. Once frozen, transfer rolls to a large zip lock bag and store in the freezer. To serve, allow rolls to thaw, then heat for 10-12 minutes at 325˚F.
See Café Tips above in the post for more detailed instructions and tips to ensure success.
Ellie says
Made these for the first time tonight. Mixed the dough this morning (weighed the bread flour) and then finished them to go with a homemade soup for dinner. I definitely needed my bench scraper and used better than 1/4 C. of flour on my counter when I dumped out the "gloopy" dough. I portioned into 15 rolls and kept using more flour in order to roll them into a soft ball. Baked as directed for the first 15 minutes and then removed 7 rolls (for freezing) and finished baking the others for another 6-7 minutes until golden. They were delicious!
We frequently host a soup/salad/dessert game night. I am going to try making these the day before and then partially bake but without freezing. Will finish baking right before dinner. Hope it works, the gang will love them!
Chris Scheuer says
Thanks so much, Ellie! I find that at times I need a bit more flour than at others. I think the flour and humidity level can be the variable in this recipe. I'm so happy you enjoyed them. I think you'll be pleased with the results after freezing too!
verdi says
I just made these and they were delicious!! I followed exactly.
Many thanks for a great recipe and Happy Holidays!
Chris Scheuer says
Thanks, Verdi 🙂
Heather M. Whipple says
i do not know about this recipe.
there is not any warm water at least 110 degrees and sugar to help the yeast bloom for 5 to 10 minutes
there is no sugar amount listed. this may look unbelievably easy but i do not think it will taste good.
without sugar to go with the yeast it just is probably not going to taste right. oh well they looked good
good anyway. now i am going to scrap this recipe by first whiting out what little i have written and delete the pin
from my pinterest board completely and look somewhere else for a normal homemade artisan roll recipe.
Chris Scheuer says
Hello Heather!
Thanks for your thoughtful comment. I know you'll never read this since you've whited out and deleted your pin but I felt compelled to respond. It's too bad because you are missing out on something wonderful. I understand your response however as I've been baking for more years than I care to admit and a while back, I would have had the same response as you. However, I've discovered that sometimes rules can be broken with astonishing results and these Unbelievably Easy Artisan Rolls are the poster child for that! If you read any of the preceding comments you'll see that many readers have the same opinion. Hope you find those wonderful rolls you are looking for!
Danielle Schultz says
Chris these rolls were a wonderful accompaniment and were a delight to everyone at our Thanksgiving table this year. The recipe was easy and the kitchen smelled heavenly as they baked. I had to work Thanksgiving so My better half made a lovely dinner and he could not believe the simplicity of the recipe. When I arrived home from work we made them together and our bread basket was empty by the end of our delicious meal family was thoroughly impressed. Thanks for a very easy yet elegant roll recipe it’s now going to be a regular on our holiday table
Lisa says
How long do the frozen rolls need to be thawed before baking the last 5-10 minutes?
Norma says
Just took these rolls out of the oven. They are fantastic! I fully cooked a few for us and we couldn't even wait for them to cool before digging in. I par-baked the rest and will be serving them on Thanksgiving.
Chris Scheuer says
Yay!! Thanks so much for sharing your results, Norma!
Sara says
My dough is rising as we speak. I did knead the dough and formed a ball. Hope it still works
Chris Scheuer says
Hope you enjoy it, Sara!
Lisa says
When doing the freeze and rebake method, does it taste exactly as fresh as if you just baked them? Or is the texture/flavor compromised at all?
Thanks!
Chris Scheuer says
I don't think you can tell at all, Lisa. I usually thaw them and then warm them in the oven at 325 for 5-10 minutes or until they're nice and crisp.
Lisa says
Thanks! How long do you thaw before baking the 5-10? This makes thanksgiving-day baking so much easier!
vicki says
when do you mix the olives in? I make these rolls often and love them but want to try the olives
Rita says
I have made these a few times now and they are always amazing. My favourite variation is to add chopped kalamata olives. The result is restaurant worthy. I made some last year for a family get together and they were gone by the end - adults and kids alike wolfed them down. I made some again tonight with olives and they were as good as the olive bread I buy in the shop - but fresher and made the house smell amazing! A very big hit in our house!
Heather says
These look delicious . I am thinking to put olives and rosemary in the dough.
Couldn’t I just eat a couple
of these rolls with butter after
they have cooled
Some and still are warm enough to melt the butter.
I probably would not want to freeze them
all of the time.
Ann says
I wonder if adding some grated cheese inside the roll would work? Thanks!
Chris Scheuer says
I bet that would be wonderful!
Doris Bond says
could you use half whole wheat flour with this recipe?
Chris Scheuer says
Hi Doris, I think that would work fine. The rolls will be just a bit heavier though.
Charlene McCurdy says
I made them 6 months ago with half whole wheat - they were alright (my guests ate quite a few), but I wasn't crazy about the fact that they were a little too heavy. So happy I tried them again, with original recipe above using bread flour, they were a huge hit for Thanksgiving dinner and were SO easy (other than my shaping them - they were uneven sizes). I can now hardly wait to try them with chives, parmesan and cracked black pepper, maybe some Himalayan salt on the top? And, I saw the recipe for bread too - so will try it as well.
Chris Scheuer says
Thanks, Charlene, so happy you tried them again!
Charlene says
I was SO happy with these rolls that I am making them for Christmas dinner. The last time I made them I thought there were ample for leftovers - NOPE... the guests ate them all and asked for the recipe.
Thank you for this absolutely delicious, easy winner!
Chris Scheuer says
Thanks so much, Maureen, I love that your guests gobbled them up 🙂
Lane says
These are excellent! And you can shape them for different purposes. I’ve made hot dog buns and little ciabatta-type rolls. I think I’ve made them 5-6 times now. The best part is you can whip up the dough before you leave for work and when you get home take 10 minutes to shape the rolls and you will have very impressive rolls to go with dinner !
Chris Scheuer says
Thanks for sharing your results, Lane. I love the idea of making the dough in the morning and having them ready for dinner!
Jaime says
My first time making homemade bread. Wow! Just WOW! So easy with no kneading involved. Perfectly crisp on the outside and heavenly chewy on the inside. The rolls were a little hard to shape, since they're a bit sticky, but still managed to pull it off, even as a first-time bread maker. We ate the entire batch soon after they were out of the oven. Decided that we're having lasagna for dinner tomorrow night, so already set to make another batch. Can't wait to share these with family and friends.
Chris Scheuer says
Yay! That's awesome Jaime, congratulations! I'm so happy they worked out so well for you!
Nancy says
When making artisan bread I lightly coat my hands with oluve iil instead of flour. Works great. Also a dough hook is great for muxing this type of dough.
Chris Scheuer says
Thanks, Nancy. You could definitely use a dough hook and mixer for this bread but it's so easy to mix up by hand. That's one of the beauties of this recipe.
Jmerinboston says
I don't think I will have the time to shape these and bake in the morning, but I want to make them for a work event. If I made these as the recipe states, but I let them have their final rise is the fridge, could I shape them at night then bake in the am?
Chris Scheuer says
I think that would work fine. I would give them at least 30 minutes at room temp though before baking.
Ninni Mattoo says
I have tried baking bread rolls earlier with not much success, but this recipe can't be easier, I am so excited to make rolls from this recipe, unbelievably easier.
Thanku thanku thanku ....god bless you both
love
ninni
Chris Scheuer says
Yay! Thanks so much, Ninni, so happy you shared your results 🙂 God bless you too!
Claire Van Allen says
I have bread machine yeast, traditional yeast and quick rise yeast and I was all set to try these and it calls for dry yeast. I am not a bread maker and did not know which one to use. Does it matter?
Chris Scheuer says
Hi Claire, thank you for noting this. Dry yeast is the same as traditional yeast.
Sue Grover says
I can't wait to try this bread.
If I decide to refrigerate for later use, how long should I let it sit before baking?
Chris Scheuer says
Hi Sue, I just bake them after the 12-hour rising time.
Leah says
Can these be made in a bread machine? Just the dough portion?
Chris Scheuer says
I think you could although I haven't done it.
DC says
Made these for Thanksgiving...as easy as advertised and delicious! Rolls don't usually grab a lot of attention at a holiday meal, but people were commenting on these! Thanks for another great recipe!
Chris Scheuer says
Yay! So happy these worked out well for you! Thanks for letting us know DC 🙂
Thatch says
Is there any changes to the recipe if using whole wheat bread flour? Thank you so much!
Chris Scheuer says
Hi Thatch, I haven't made these with whole wheat bread flour so I can't tell you exactly what to do different.
Paula says
I cannot tell you how much I love these rolls - First time I made them I used them as rolls for a ham - let everyone make a sandwich. Then I used them with some Italian food - They go with everything. I have never had a problem - I was amazed at how they poof up in the oven - fun to watch! I want to try them with some chopped fresh rosemary in them....Everyone thinks I spent hours making them! Thanks so much for this recipe!!
Chris Scheuer says
That's awesome Paula, thanks so much for taking the time to leave such a great review!
Donna Coleman says
I have been making in the artesian bread for a year or so now and just came across this recipe for the rolls. I am so excited. I did make them and they were so easy however they did not get Brown in my oven. Anybody have any suggestions as to how to get them to Brown nicely?
Chris Scheuer says
Hi Donna,
I know everyone's oven is different but could you just bake them a little longer? I just leave mine in until they're a nice color.
Donna says
Make the dough and freeze it??
Or can I make the Dough and keep it in the fridge for a few days?? If so do I proof it first then take it out of the fridge and proof it again then bake??
Chris Scheuer says
You probably can Donna but I haven't tried this. You can just proceed with the recipe as directed and slightly undertake the rolls. Then freeze them and when you want to serve, just thaw and finish off the baking. I have done that and it works great!
dianne says
I decided to experiment with this recipe. I made jumbo sandwich buns to use with pulled pork. They came out great! I did have one moment of semi-panic when resting my shaped rolls. They went all bloopy (technical term) and flattened but they puffed back up in the oven. Really happy I found this recipe. Thanks!
Chris Scheuer says
Thanks Dianne, I know what you mean about that moment of panic. They do bloop a bit but then when you open the oven, it's a wonderful sight!
Gayann O'Neal says
Know what tastes great on these rolls....your cherry freezer jam! Not only can I not stop making the jam, now Im making these wonderful rolls to eat with the jam!!,,,,,first made them back in November....WONDERFUL with your jam.There goes the summer diet!
Chris Scheuer says
Haha, you're a girl after my own heart Gayann!!!
Joy Gunter says
I totally agree. I was eating the raspberry jam with these rolls too!